After you have attached to the board the support devices, as specified in the previous article
and built the image
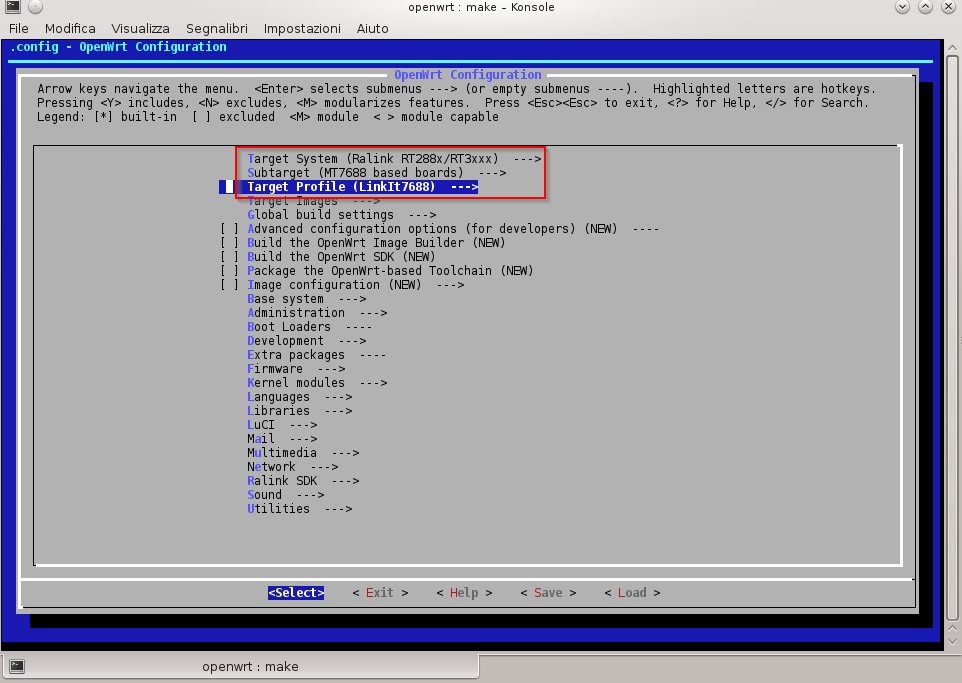
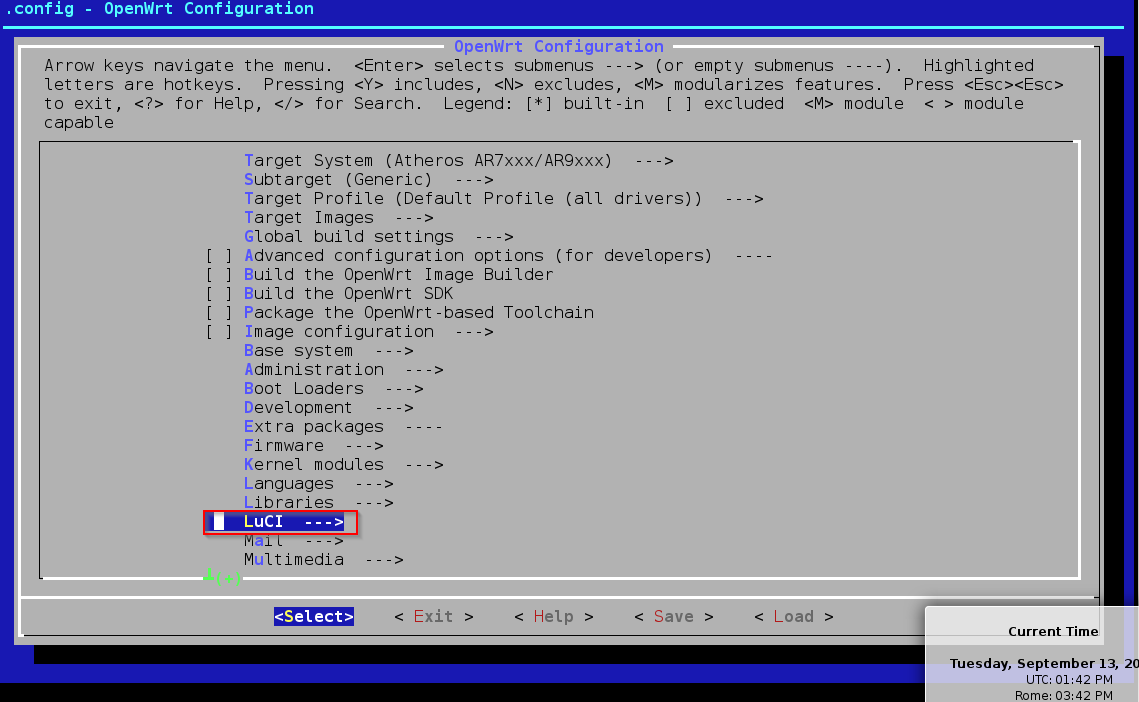
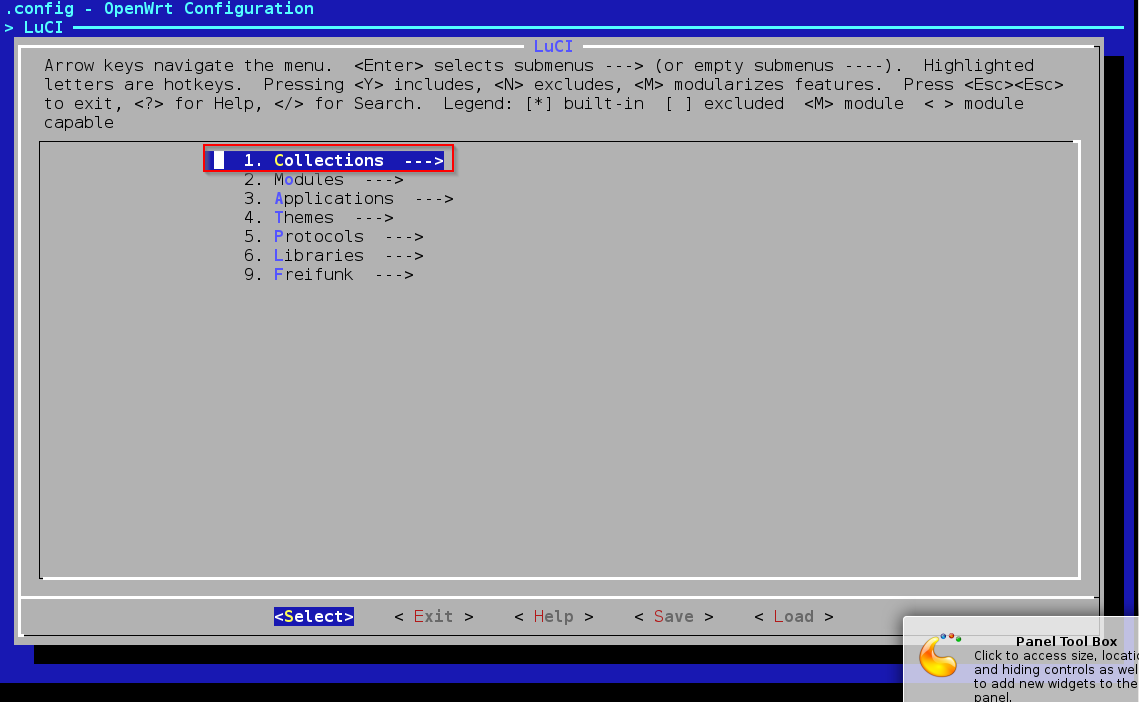
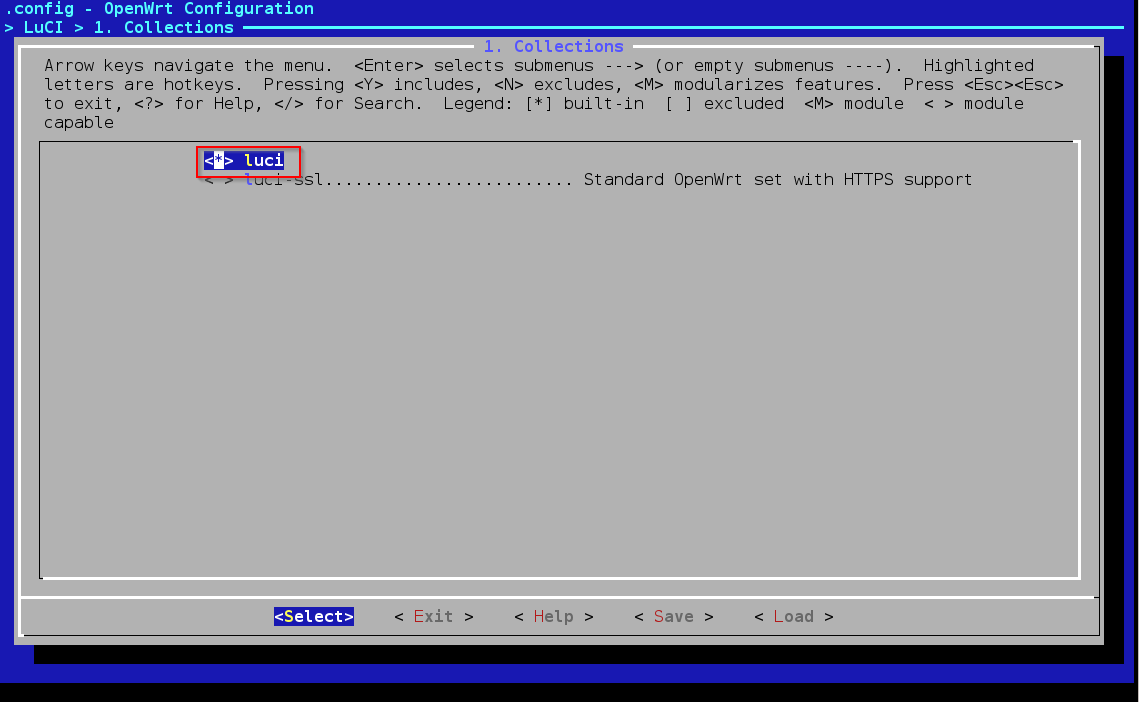
OpenWrt building for Linkit 7688 and 7688 Duo
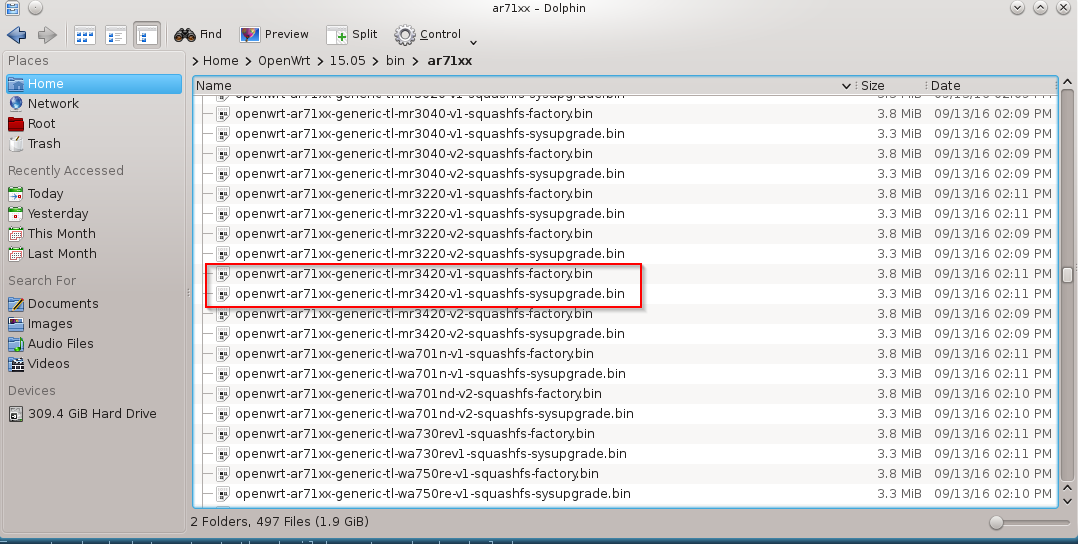
we upload the image to the device.
Following the documentation availble at the link
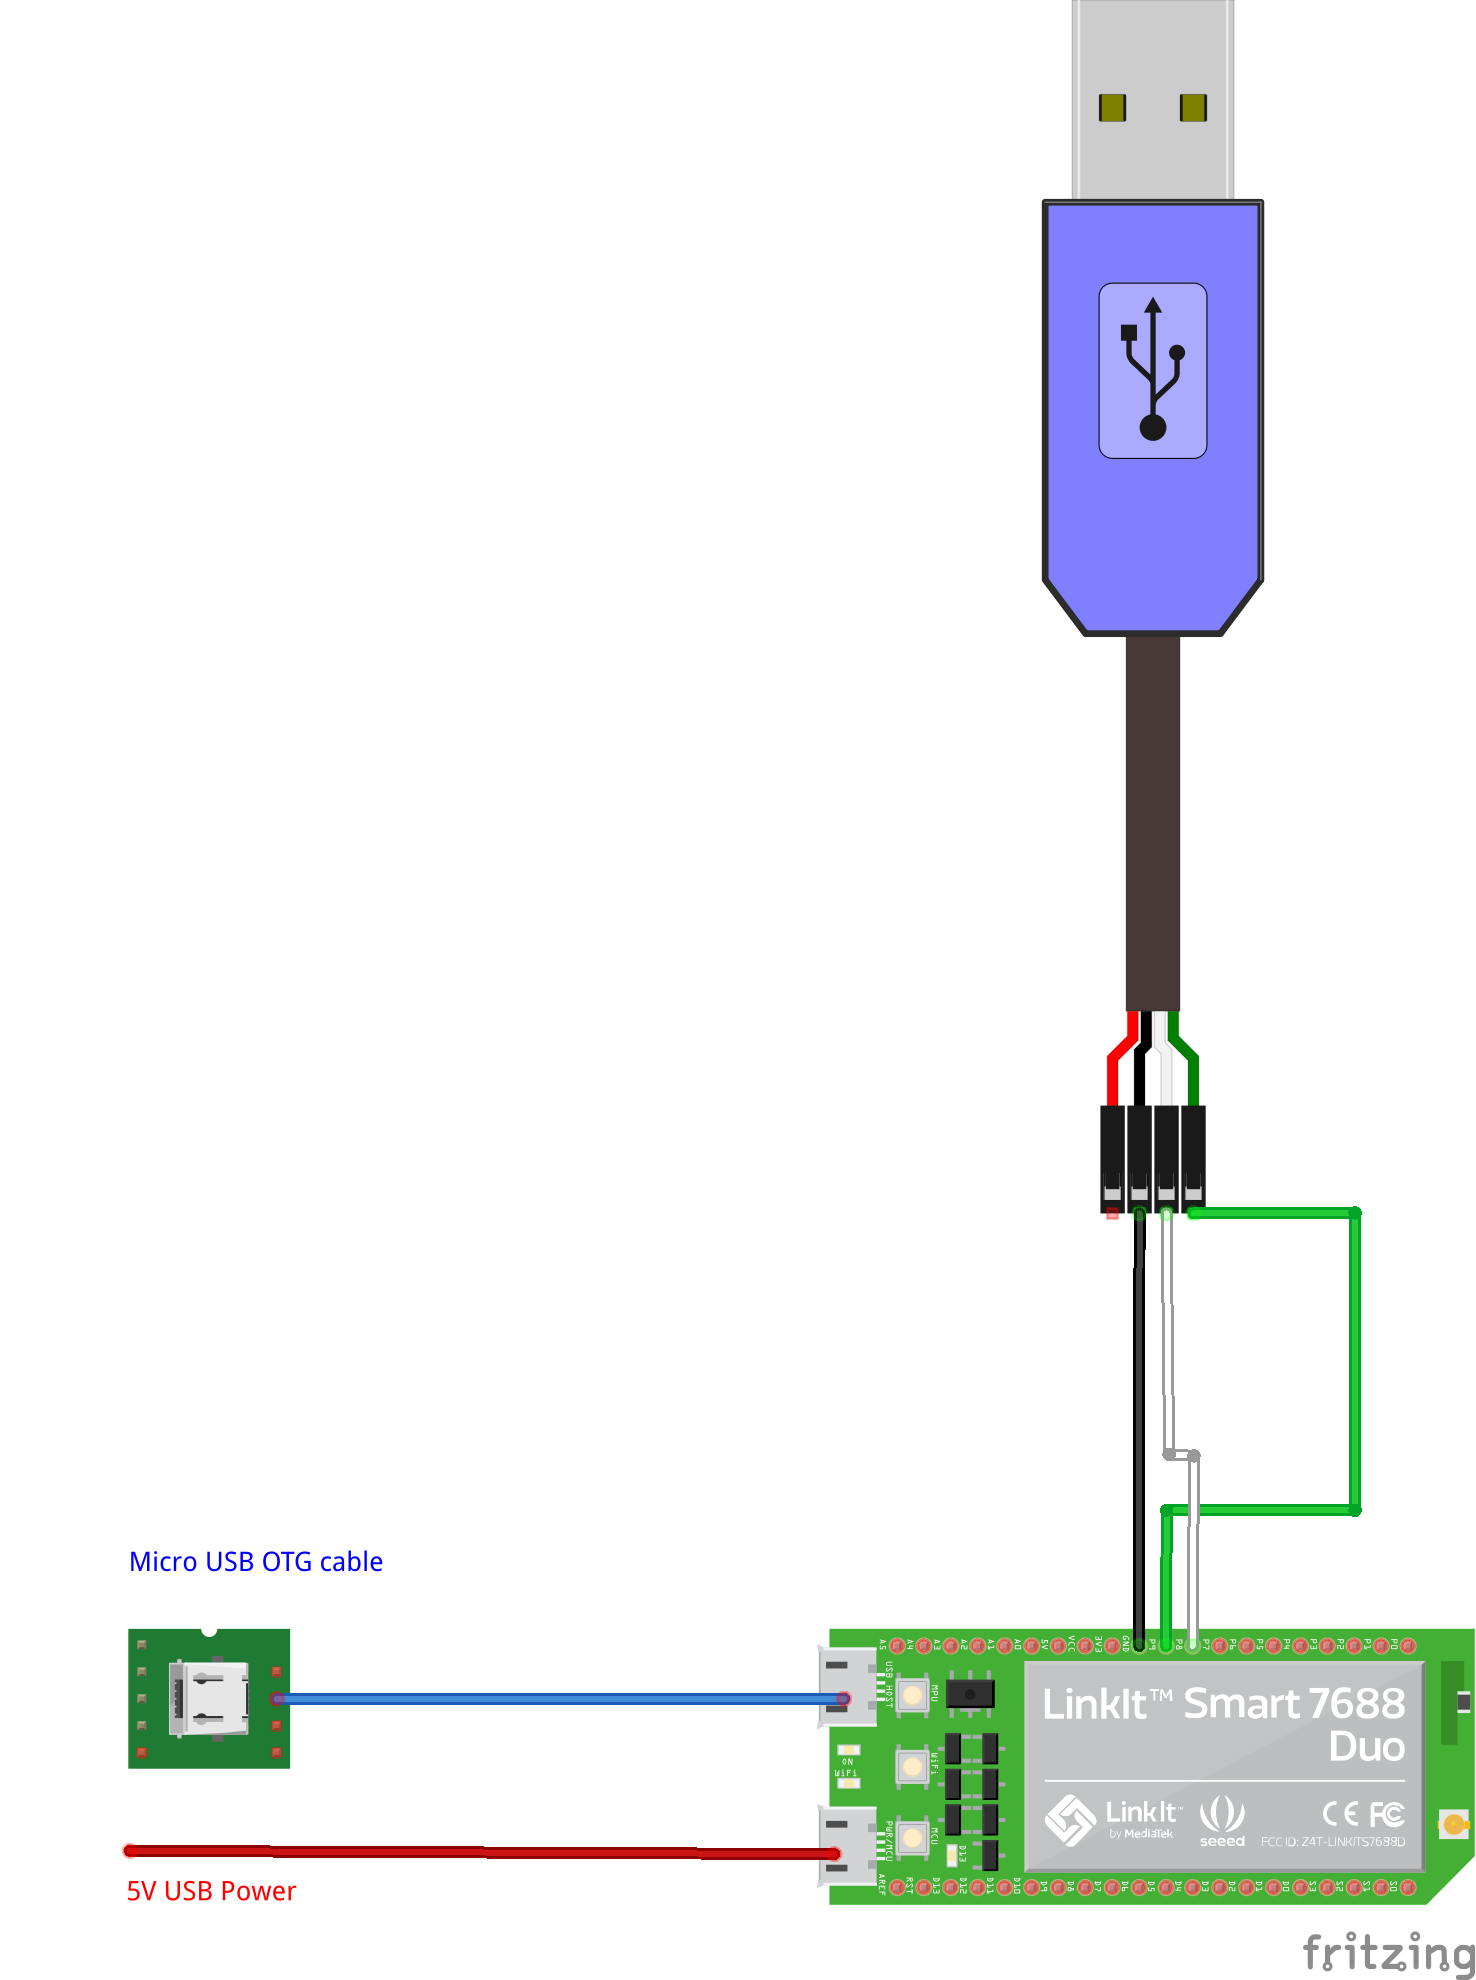
Update the firmware with a USB drive
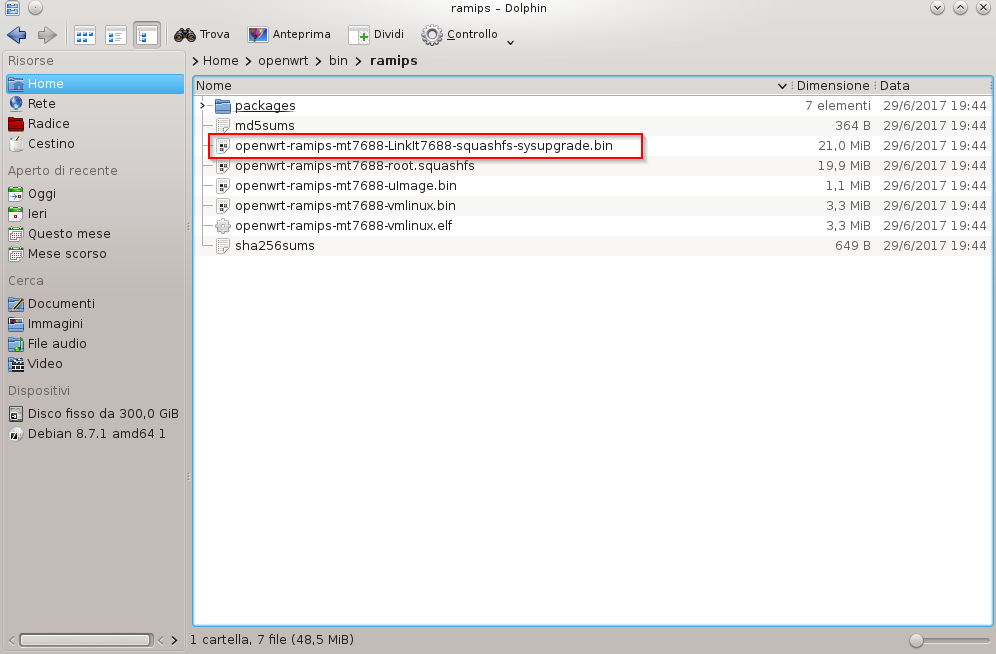
to update the firmware copy the openwrt-ramips-mt7688-LinkIt7688-squashfs-sysupgrade.bin file to the root directory of a FAT32 USB drive and rename it as lks7688.img.
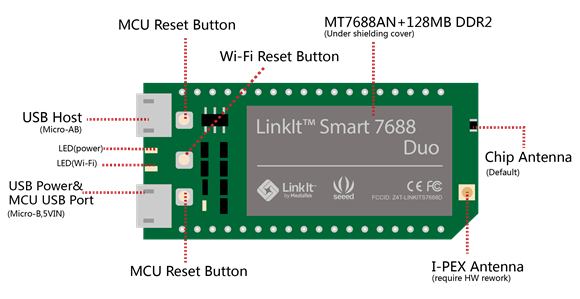
Attach, now, the USB drive to the HOST port of the board with an OTG cable and follow the steps
- Press and hold the on-board WiFi button.
- Press the MPU reset button once, while holding the WiFi button
- Keep holding the WiFi button for about 5 seconds. Do not release until the orange LED for WiFi is off. DO NOT press the WiFi button longer than 20s or it will upgrade the bootloader.
- The device will automatically reboot after firmware update is complete.

You can control the operation via the USB TTL serial connected to the PC and activated on the enabled Com port with the following settings
- Port: Enabled COM
- Speed: 57600
- Data Bits: 8
- Stop Bits: 1
- Parity: None
- Flow Control: XON/XOFF
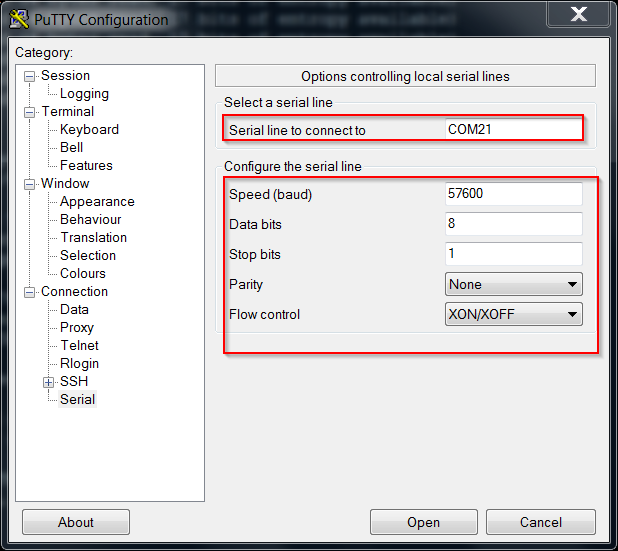 Use, for example, putty to connect, press Enter if the screen is not active, and check the steps the system is runnig when upgrading
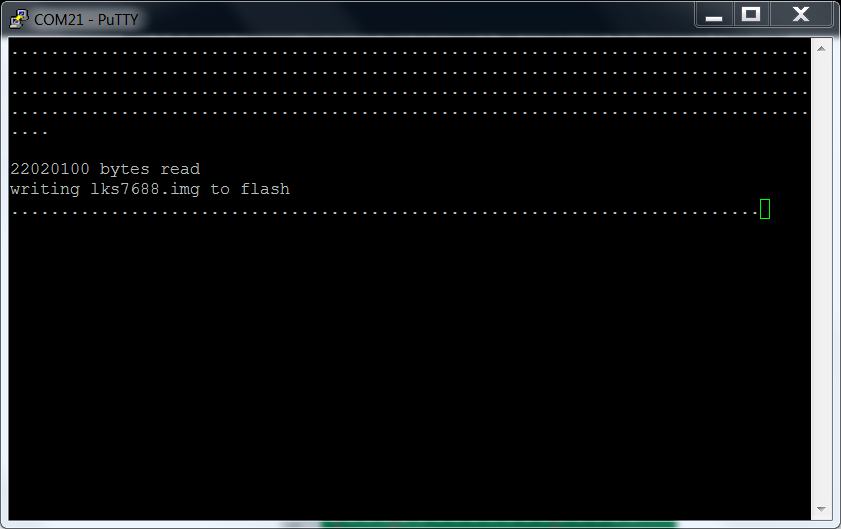
When the orange LED starts blinking at a lower frequency the card is ready to be used.
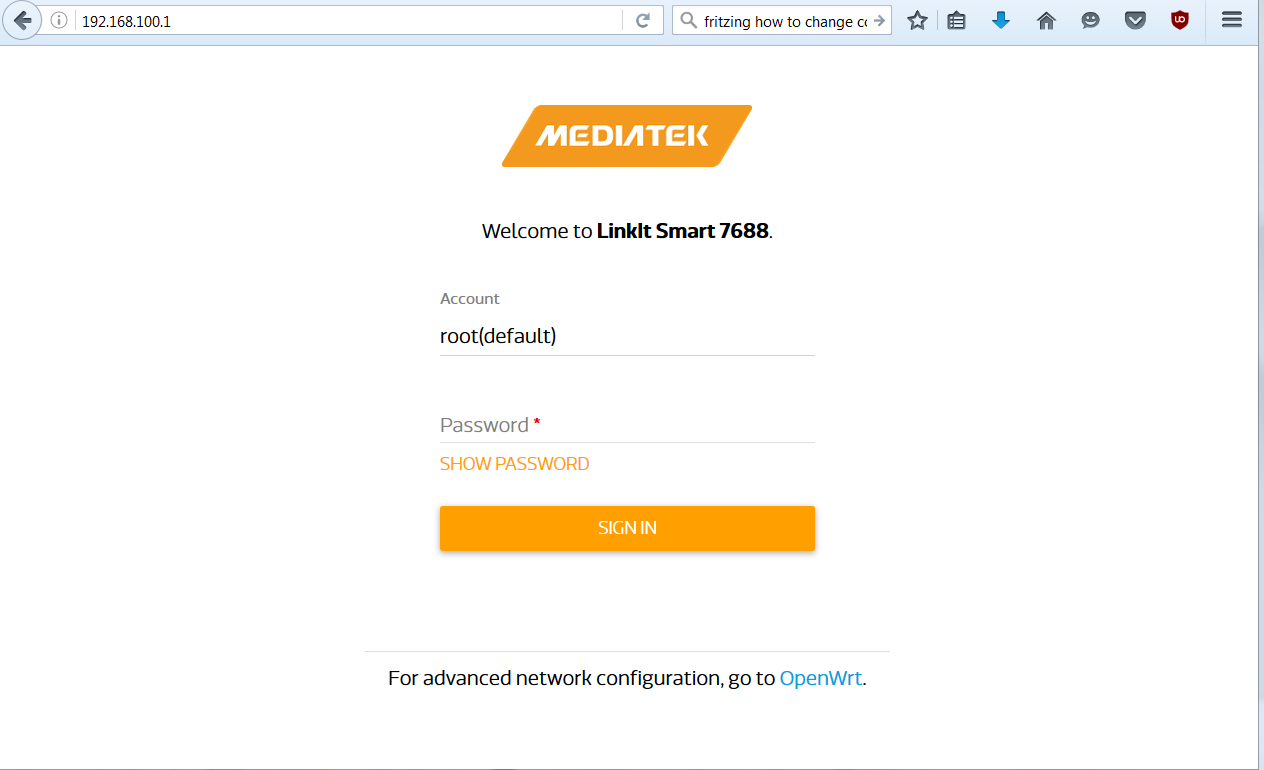
Search for visible access points from your PC and you should find an access point named LinkIT_Smart_7688_xxxxxx, where xxxxxx identifies the specific device.
Connect to this Access Point and access via browser at 192.168.100.1 or at mylinkit.local if you have satisfied the prerequisites
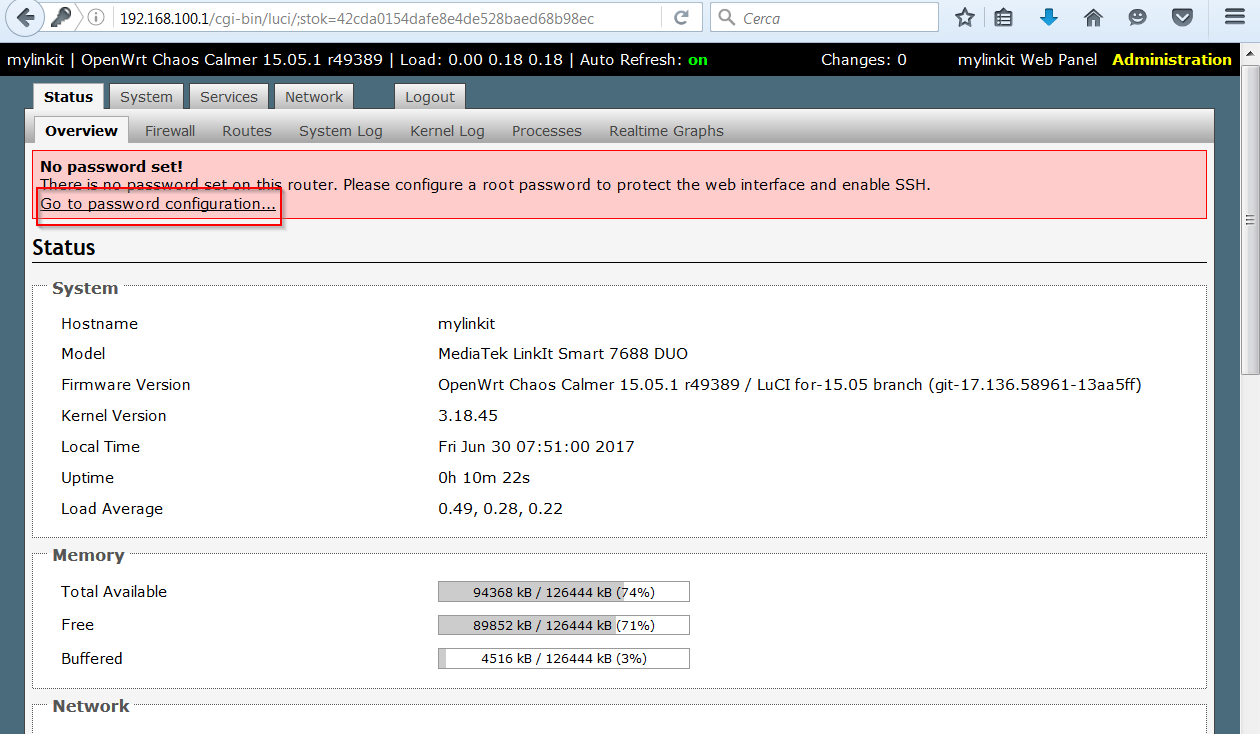
 Enter a password and access the next step
 Select OpenWrt for Advanced Configuration
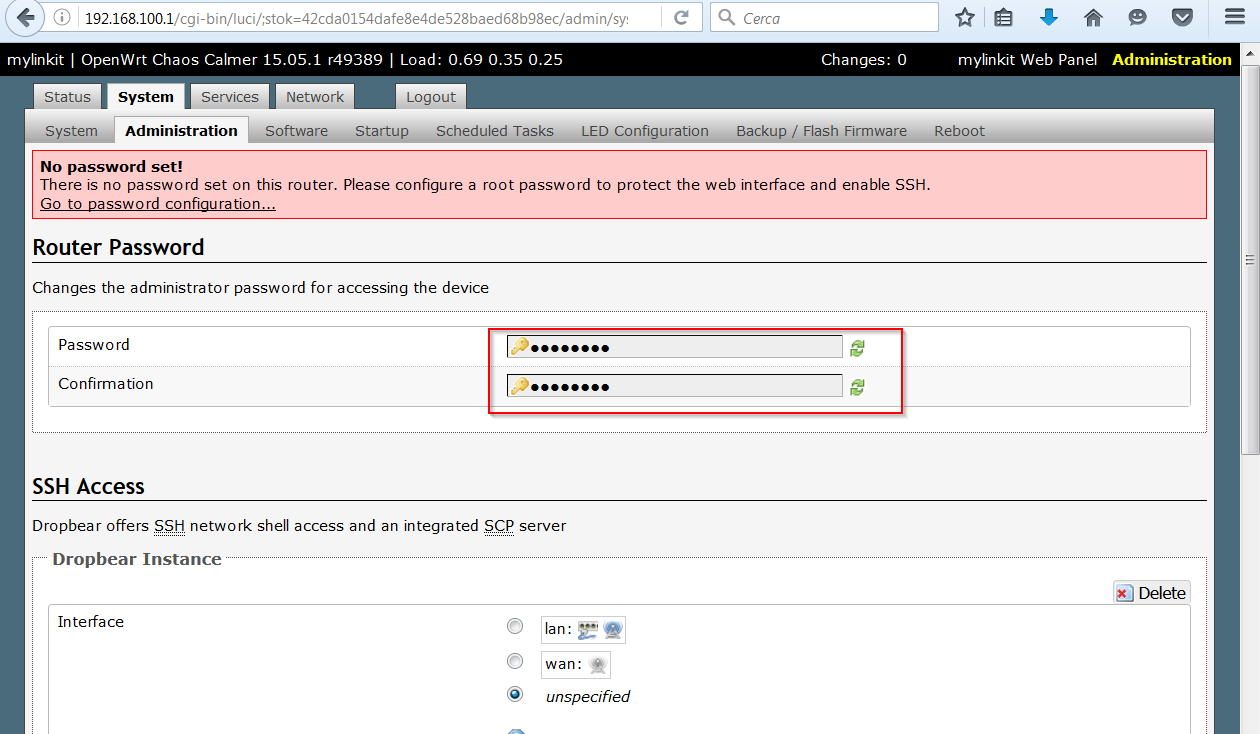
 Set the password on OpenWrt
 entering it twice
 At this point, the system is configured as an Access Point. In our case, we wanted to set the Link 7688 Duo as a client of an Access Point with WPA2 security. To get this setting, if you have a visible network, go to the Network section of the main web console interface
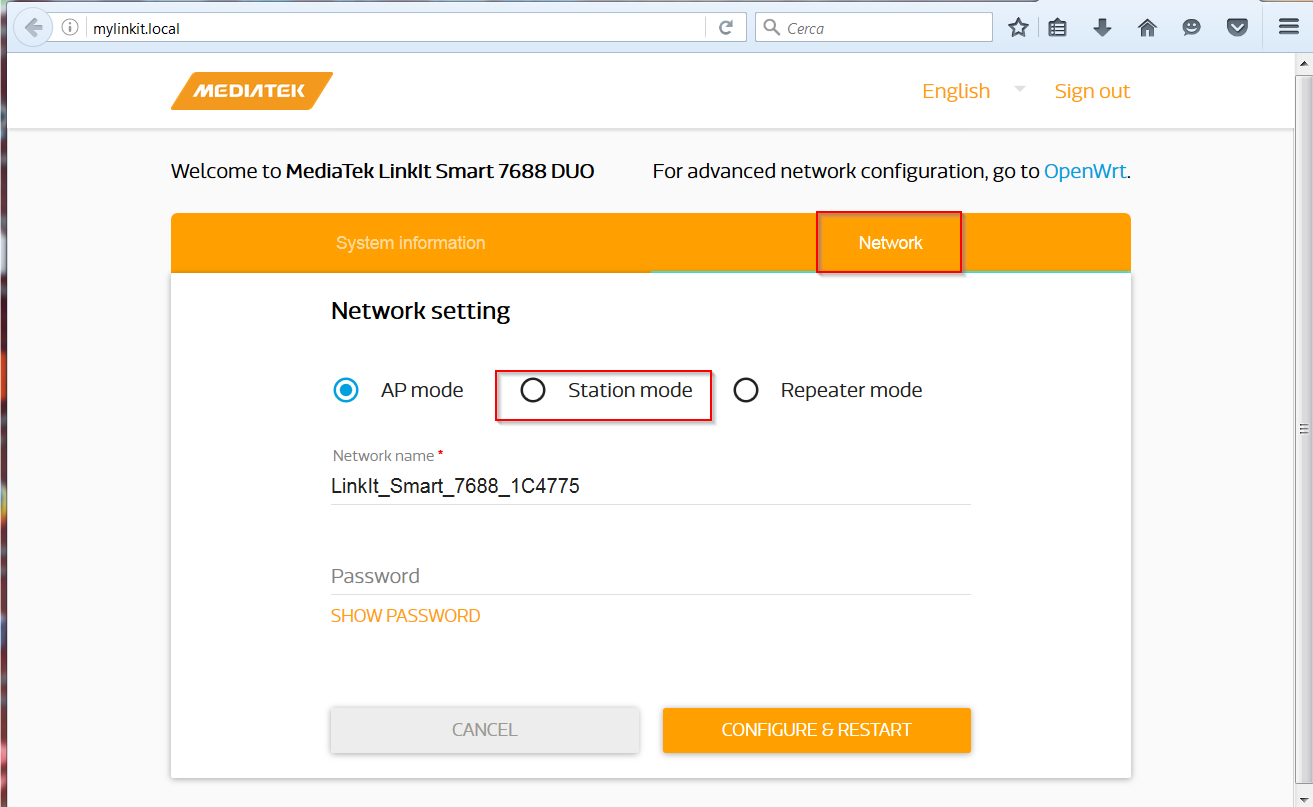 set the values for the Access Point and restart the system

If the Access Point is hidden, you should set the parameters directly in the configuration files in /etc /config.
Connect with putty to the previously connected USB TTL serial and run the commands for Access Points with wpa2 security
|
1 2 3 |
uci set wireless.sta.ssid=ACCESS POINT uci set wireless.sta.key=password access point uci set wireless.sta.encryption=psk2 |
Save the settings
|
1 |
uci commit |
and activate the new configuration
|
1 |
wifi_mode sta |
Check the /etc/config/wireless file; you should see the addition of a new section, config wifi-iface ‘ap’, to connect the board to the access point
|
1 2 3 4 5 6 7 8 9 10 11 12 13 14 15 16 17 18 19 20 21 22 23 24 25 26 27 28 29 30 31 32 |
root@mylinkit:/etc/config# cat wireless config wifi-device 'radio0' option type 'ralink' option variant 'mt7628' option country 'TW' option hwmode '11g' option htmode 'HT40' option channel 'auto' option disabled '0' option linkit_mode 'sta' config wifi-iface 'ap' option device 'radio0' option mode 'ap' option network 'lan' option ifname 'ra0' option encryption 'none' option ssid 'LinkIt_Smart_7688_1C4775' option seq '1' config wifi-iface 'sta' option device 'radio0' option mode 'sta' option network 'wan' option ifname 'apcli0' option led 'mediatek:orange:wifi' option ssid 'AccessPoint' option key 'password' option encryption 'psk2' root@mylinkit:/etc/config# |
Now the card acts as a client and you can access it using the address released by the Access Point or by name as indicated by the documentation
 In the next article, we’ll install and configure the custom Lede firmware
Installation and configuration of Lede image on Linkit 7688 Duo