
After the MQTT server and ESP8266 nodes configurations
MQTT with BeagleBone and ESP8266 – Mosquitto installation on Beaglebone
MQTT with BeagleBone and ESP8266-MQTT ESP8266
MQTT with BeagleBone and ESP8266 – MQTT on ESP8266 with temperature sensor
MQTT with BeagleBone and ESP8266 – MQTT on ESP8266 with Relay
we analize now the webserver configuration on BeagleBone and the Websocket configuration for the broker MQTT mosquitto always on Beaglebone.
First step is to access on the Beaglebone in ssh and disable the following services
|
1 2 3 4 5 6 7 8 9 10 11 |
$sudo systemctl stop cloud9.service $sudo systemctl stop cloud9.socket $sudo systemctl disable cloud9.service $sudo systemctl disable cloud9.socket $sudo systemctl stop bonescript-autorun.service $sudo systemctl stop bonescript.service $sudo systemctl stop bonescript.socket $sudo systemctl disable bonescript-autorun.service $sudo systemctl disable bonescript.service $sudo systemctl disable bonescript.socket $sudo systemctl daemon-reload |
Go into the folder /etc/apache2/sites-enabled and modfy 000-default.conf changing the webserver port from 8080 to 80
|
1 |
<VirtualHost *:80> |
In /etc/apache2/port.conf modify the listening port from 8080 to 80
|
1 2 3 4 5 |
# If you just change the port or add more ports here, you will likely also # have to change the VirtualHost statement in # /etc/apache2/sites-enabled/000-default.conf Listen 80 |
Restart the Http server
|
1 |
sudo systemctl restart apache2 |
Go into folder /etc/mosquitto/conf.d and create a new file websockets.conf with the following contents inside
|
1 2 3 4 5 |
listener 1883 protocol mqtt listener 9001 protocol websockets |
Save the file and restart Mosquitto
|
1 |
sudo systemctl restart mosquitto |
Disable the IPV6 protocol on Beaglebone as described at the following link
In the file /etc/sysctl.conf add
|
1 2 3 4 |
net.ipv6.conf.all.disable_ipv6 = 1 net.ipv6.conf.default.disable_ipv6 = 1 net.ipv6.conf.lo.disable_ipv6 = 1 net.ipv6.conf.eth0.disable_ipv6 = 1 |
Restart the Beaglebone.
We proceed at this point to install on the http server a MQTT Websocket client and the Freeboard dashboard.
As for the MQTT Websocket client hive-MQTT we download the code from github
Log in as root in ssh on Beaglebone and go into /var/www/html folder; clone the Mqtt client into mqtt-web folder and change the owner of this folder
|
1 2 3 |
#cd /var/www/html/ #git clone https://github.com/hivemq/hivemq-mqtt-web-client.git mqtt-web #chown www-data:www-data -R mqtt-web |
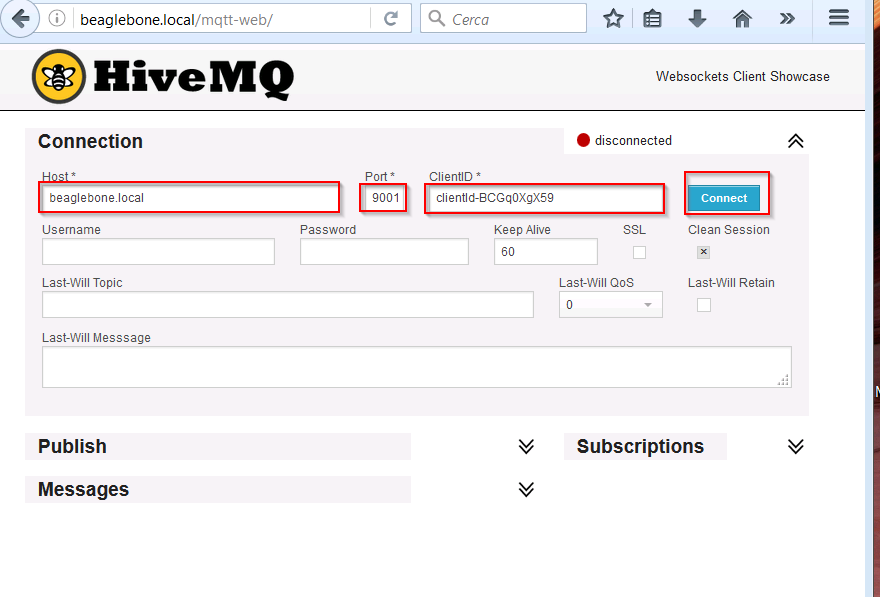
With a web browser navigate on our Http server to the mqtt-web link obtaining the Mqtt Web client; we can now set the parameters for the connection to the Mosquitto Mqtt Broker
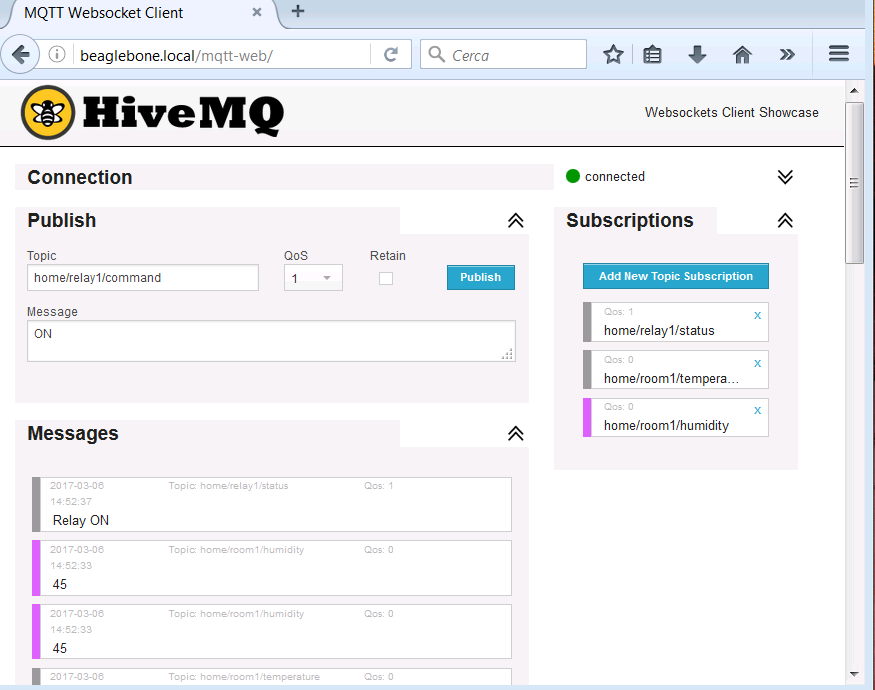
 Populating the values for the subscription and publishing topics we can access to the messages of the topics and the ability to perform a command to the publishing topic
 In the next article we’ll install the Freeboad dashboard on the Beaglebone
Mqtt with Beaglebone and ESP8266 – Freeboard