Category Archives: Compilation

ESP32 – IDF Sdk with Eclipse

After configuring the IDF development environment in the previous article

ESP32 – IDF Sdk

let’s see now how to use Eclipse as IDE for code development. Instructions are available at the link

Eclipse Setup

Download the  C/C++ Eclipse  for Linux

Eclipse Download

Unpack the file and move it to /opt/

Run ecplise

Set the workspace for eclipse

eclipse-workspaceOnce the IDE is open, select File -> Import -> C / C ++ – -> Existing Code as Makefile Project
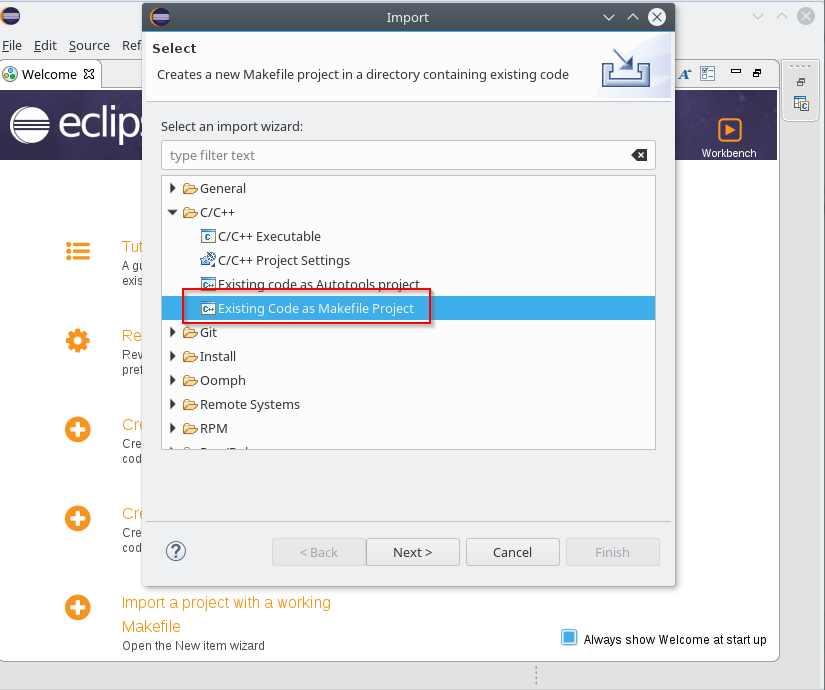
eclipse-importPress Next; on the next screen select the folder containing the Makefile of a sample project in the “Existing Code Location” field and choose CrossGcc as “Toolchain for indexer settings” as shown below
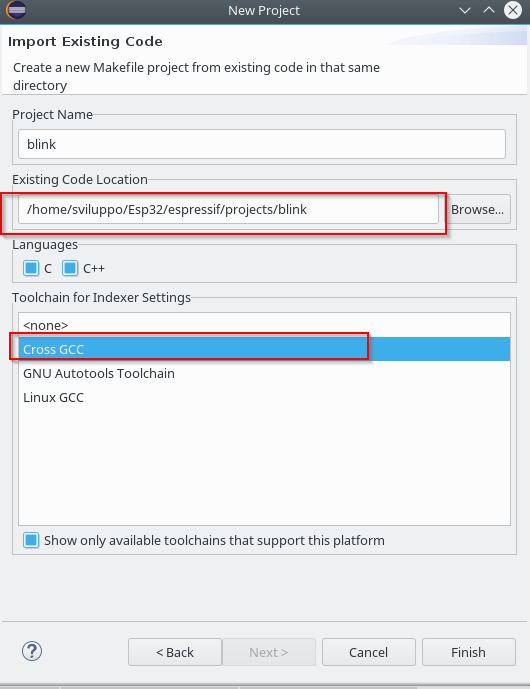
eclipse-import2Once the project is loaded, using the mouse right button on the project name, select the properties option
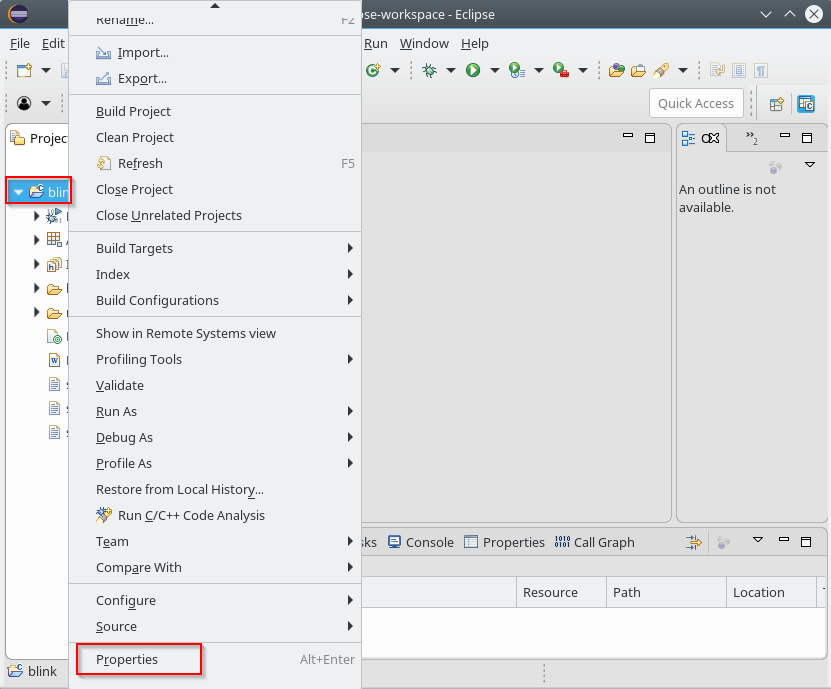
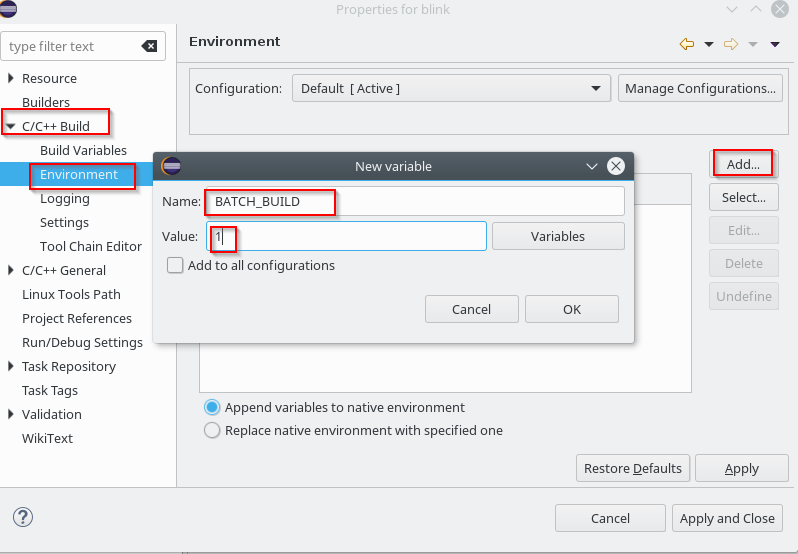
eclipse-project-propertiesUnder C / C ++ Build -> Envinronment add the variable

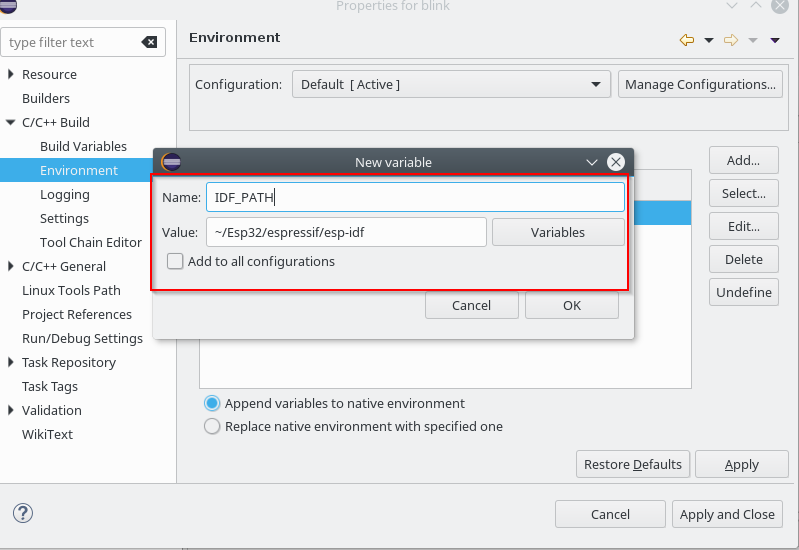
eclipse-batchAdd the IDF_PATH variable pointing to the downloaded IDF SDK in the same section

eclipse-idf-pathEdit the PATH variable and add the path to the bin folder of the cross compiler /home/sviluppo/Esp32/espressif/esp/xtensa-esp32-elf/bin
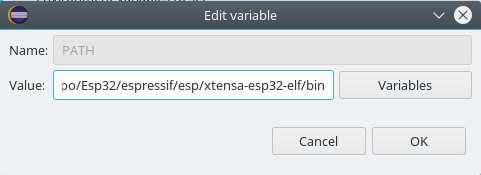
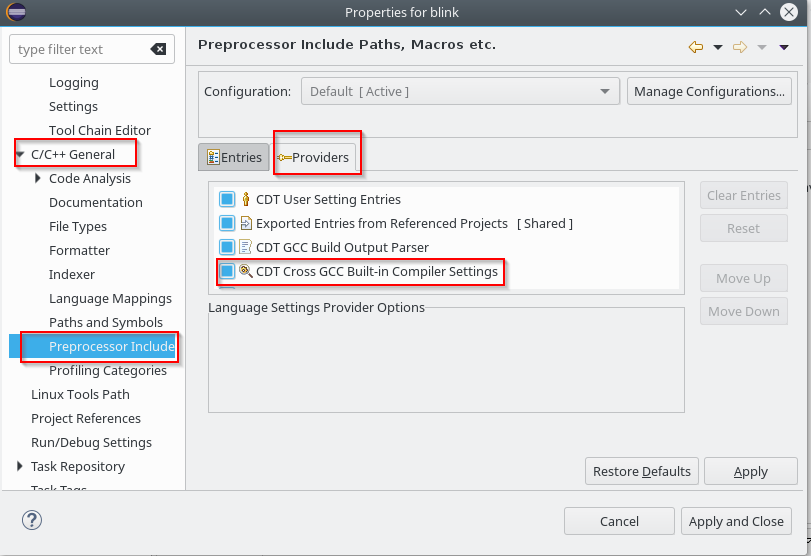
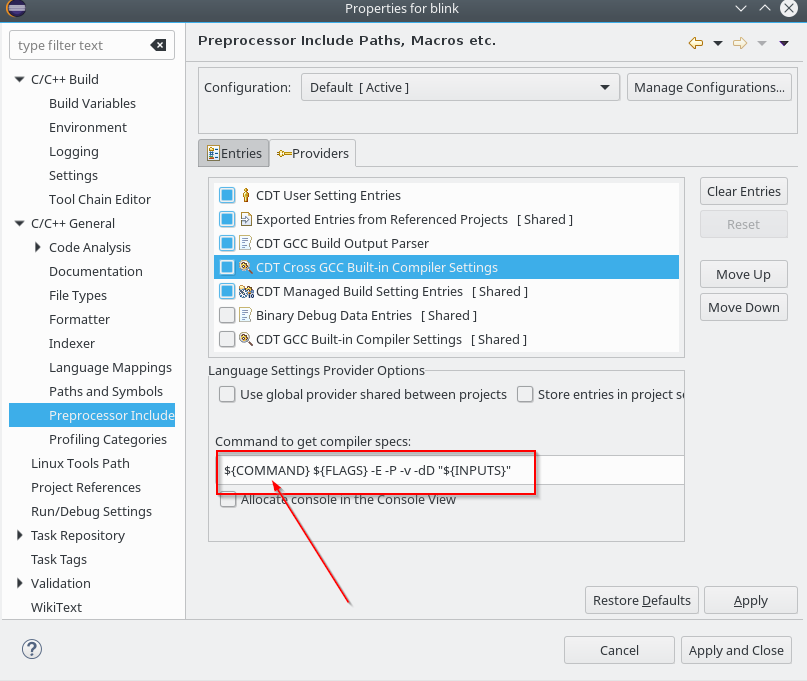
eclipse-pathAccess “C / C ++ General” -> “Preprocessor Include Paths”; choose the Providers tab and click on “CDT Cross GCC Built-in Compiler Settings”
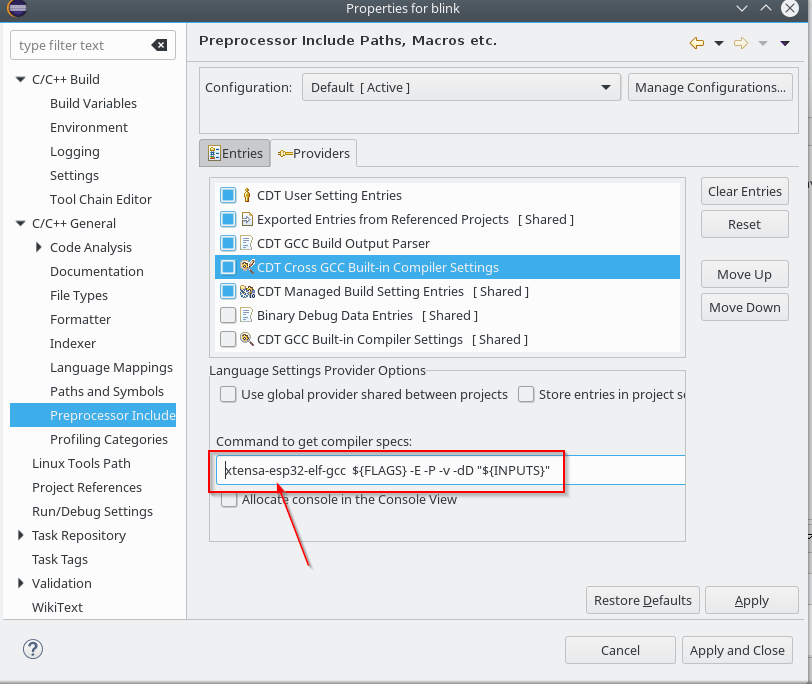
eclipse-cross-cdtReplace $ {COMMAND}

eclipse-cross-cdt1with xtensa-esp32-elf-gcc

eclipse-cross-cdt2Choose now, always in the providers section,  “CDT GCC Build Output Parser”
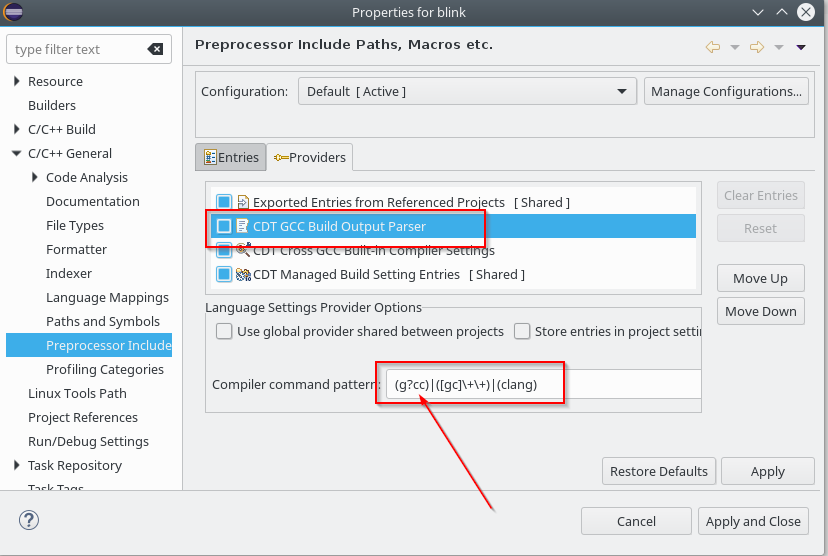
eclipse-cross-cdt3and insert at the beginning of the “Compiler command pattern” xtensa-esp32-elf-

eclipse-cross-cdt4Save the configurations.

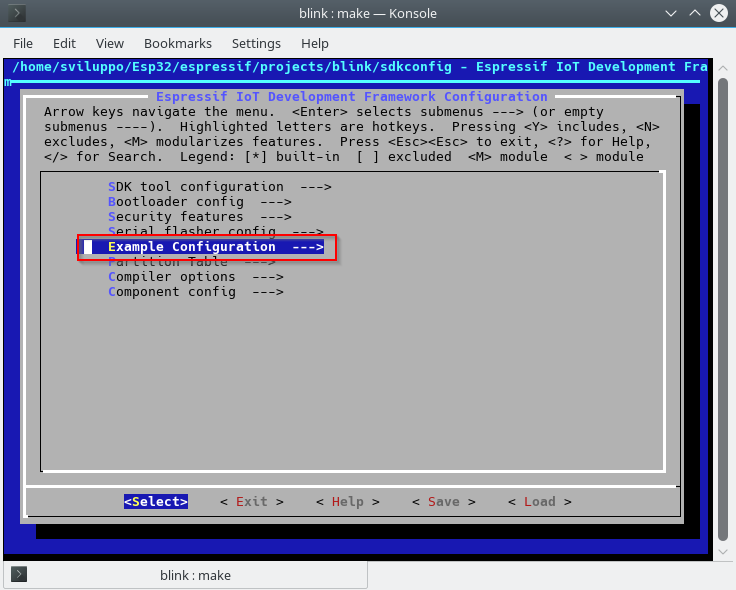
The project settings should always be made by make menuconfig in the unix shell. Access the shell and set the LED to be switched on/off  the value 2 as GPIO; this is because in our case the card is a doit whose design is illustrated in this document


Access to Example configuration

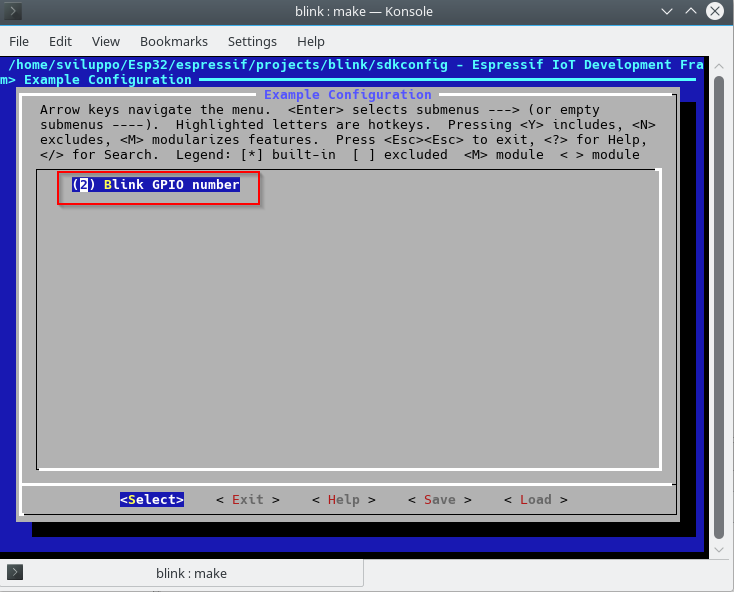
blink-configurationand set the gpio value to 2

blink-gpioSave the configuration. Go back to Eclipse and proceed with cleaning with
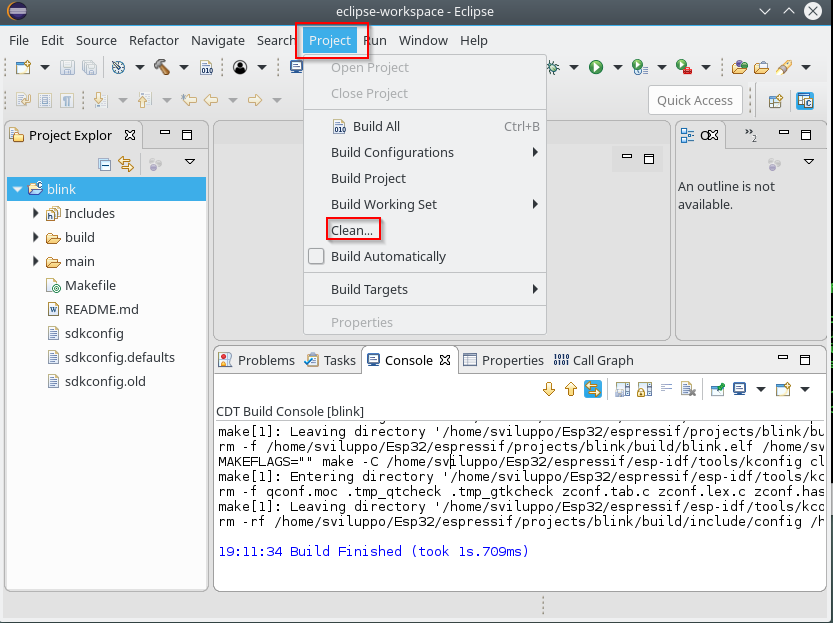
eclipse-clean-blinkand subsequent compilation with Project -> Build
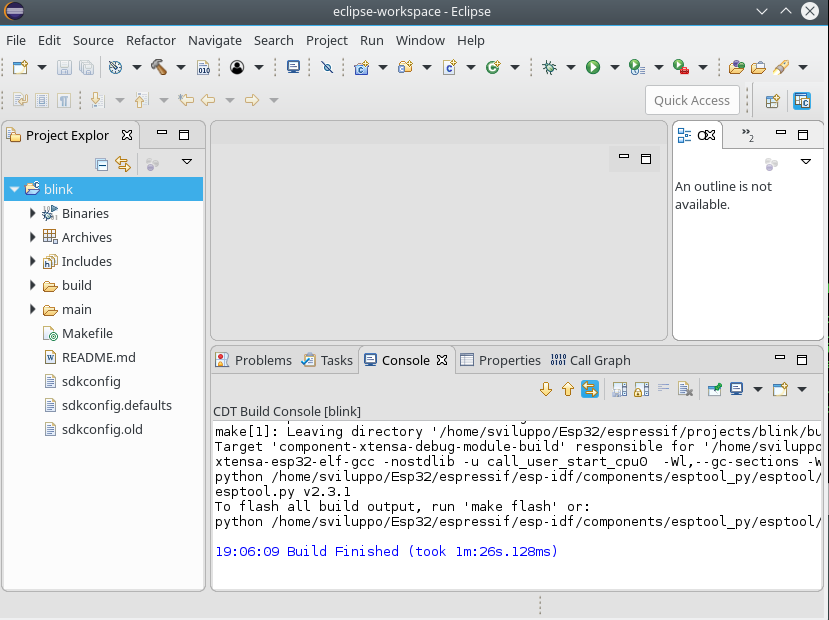
eclipse-build-blinkTo run firmware flash from eclipse;, select the project and with the right button choose Build Targets -> Create …
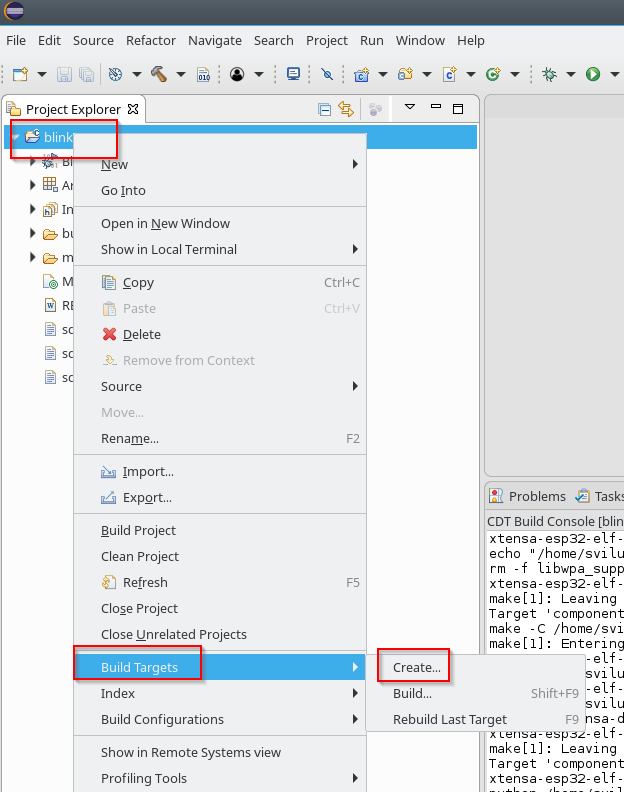
eclipse-create-targetEnter flash as value in the target name field, leaving everything else as default
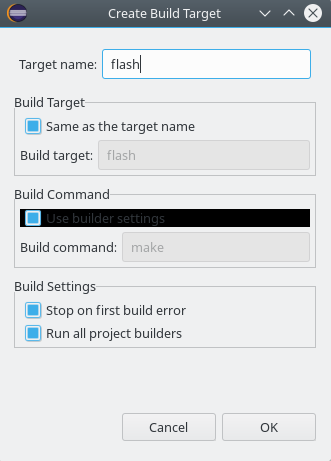
eclipse-create-target-flashAt this point we proceed to upload the image by double-clicking on the new flash item within the project targets
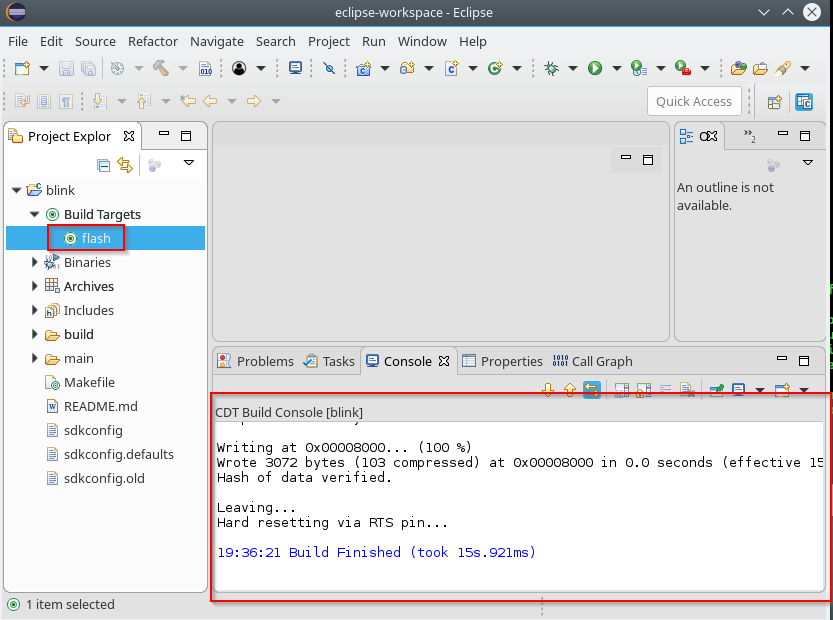
eclipse-run-flashThe settings to run the flash must be set with make menuconfig, as seen in the previous article


ESP32 – IDF Sdk

This article describes how to set the Espressif development environment for the ESP32.

From the link to the resources for the soc

https://www.espressif.com/en/products/hardware/esp32/resources

we access the guide for compiling the firmware on the Windows, OSX and Linux platforms

http://esp-idf.readthedocs.io/en/latest/get-started/index.html

In this article we use Linux Debian 9 as operating system, configured as described previously  here

MicroPython – Python ib embedded devices

We  use the IDF github. On Debian 9, with the user used to connect to the system, we create  the Esp32 folder under the user’s Home and  the espressif folder inside it

Install the prerequisites

Download the cross compiler

Create the esp folder and unpack the toolchain

Add the bin folder of the cross compiler to the PATH

Add the user used for the operations to the dialout group

Clone the IDF repository from  $HOME/Esp32/espressif

Add the IDF_PATH environment variable

Create the project folder under $HOME/Esp32/espressif and copy an example from di IDF examples

Run the configuration

Access Serial flasher config -> and set the connection parameters; in our case we leave the default

idf-serial_flasher-engSave the configuration and build the firmware

To upload the firmware on the device run

To upload only the application run

while to build only the application run

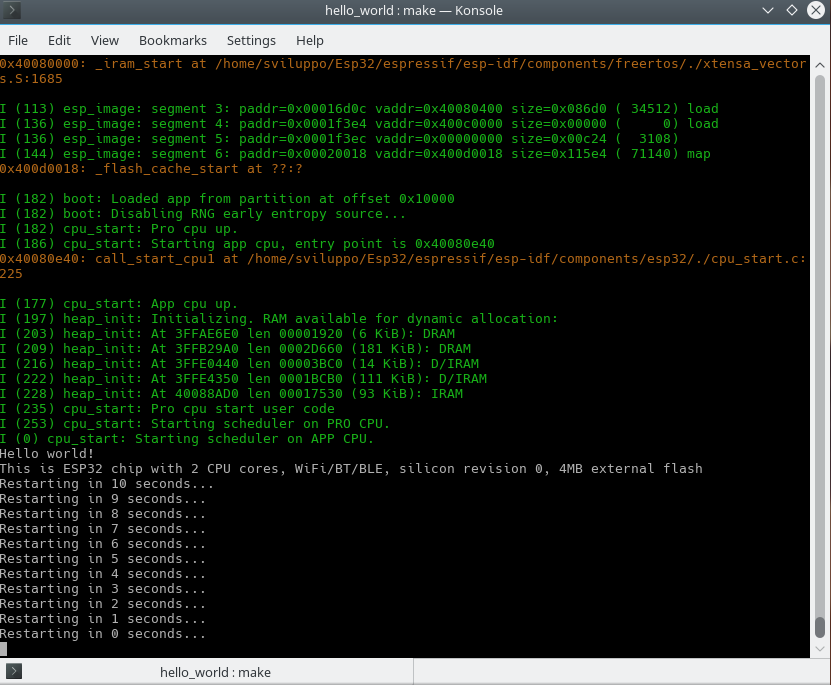
To run the program monitor run

hello_world-engHere are the other examples available with sdk

https://github.com/espressif/esp-idf/tree/f586f5e/examples

The following link contains the references of the IDF API

http://esp-idf.readthedocs.io/en/latest/api-reference/index.html

You can also generate documentation from the github source. Go into  ~/Esp32/espressif/esp-idf/docs/en

Install the prerequisites

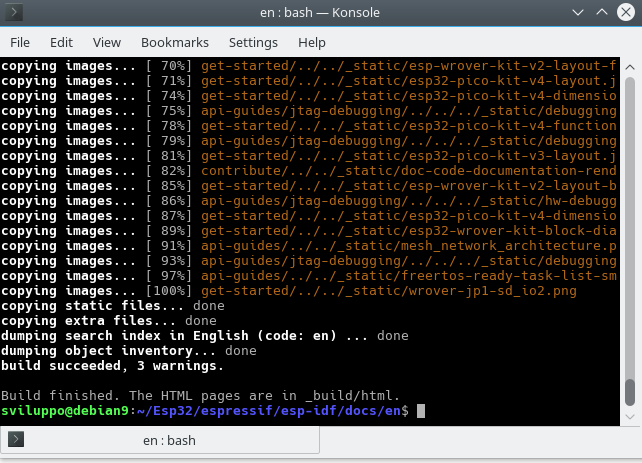
Generate documentantion in html format

make-html-eng

The documentation is available under  _build / html.

In the next article we will configure Eclipse as IDE  to build our applications

ESP32 -IDF Sdk with Eclipse


ESP32 – Nodemcu firmware compiling

After  the compilation of the MicroPython firmware for ESP32

ESP32 – MicroPython compiling for ESP32

this article shows how to generate the Nodemcu firmware for the ESP32 MCU.

The firmware is not yet complete as the one existing for ESP8266.

The instructions can be found on the github at the link

https://github.com/nodemcu/nodemcu-firmware/tree/dev-esp32

The compilation documentation is available at the link

https://nodemcu.readthedocs.io/en/dev-esp32/en/build/

The operating system used is Debian 9 previously encountered for the esptool and Adafruit-ampy utilities

MicroPython – Python on embedded devices

Log on  with the operating system user on Debian 9, sviluppo in our case; under the home folder  create the Esp32 folder and inside this folder the  nodemcu  folder

Clone the repository

To update the cloned repository follow the description on the compilation link, i.e.

Go into  nodemcu-firmware-esp32 folder and run

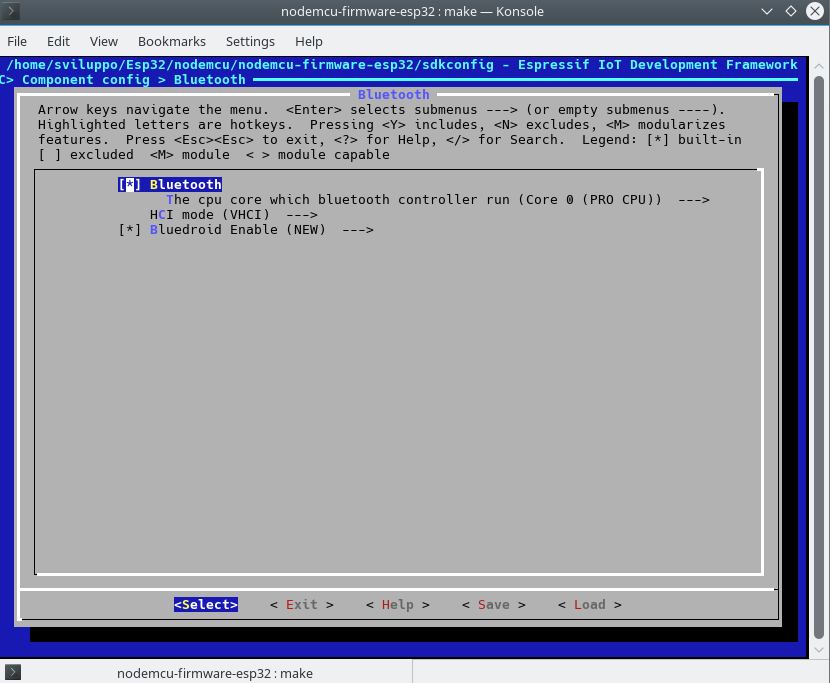
nodemcu-settingsEnable the bluetooth  in Component config–>Bluetooth

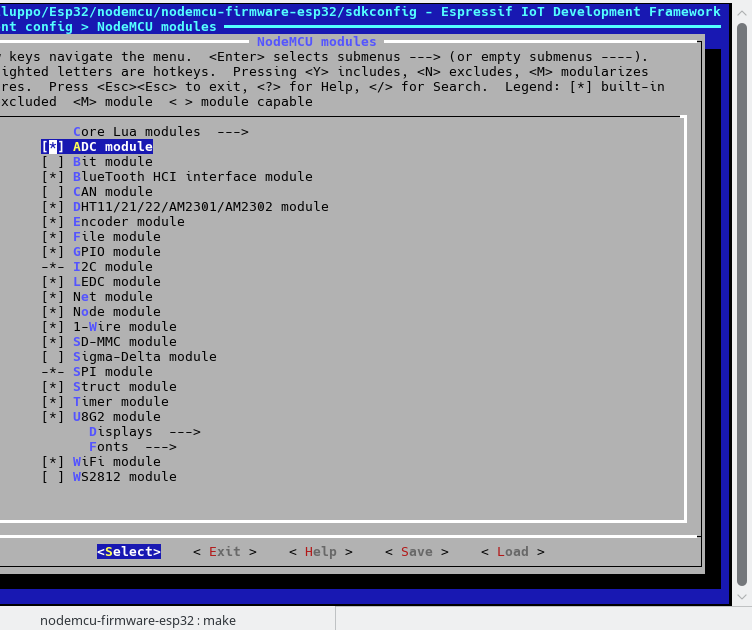
nodemcu-bluetoothEnable various modules in Component config–>Nodemcu modules

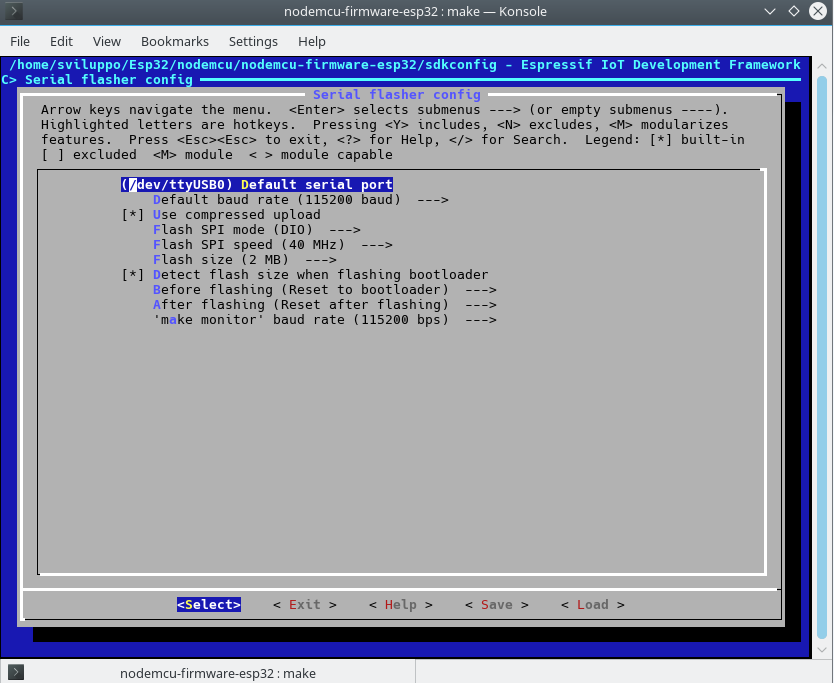
nodemcu-modulesIn the flash settings we set the default values for our ESP32,  Serial flasher config->

nodemcu-flashSave the configuration and exit. To build the firmware run

At the end of the compilation the command to upload the firmware  is shown; the same operation is executed  by simply running

For informations about the partitions of the various ESP32 versions, refer to the documentation

http://api-guides/partition-tables.html

In the next article we’ll  show how to make an application using the Espressif SDK

ESP32 – IDF Sdk

ESP32 – MicroPython compiling for ESP32

We begin now a series of articles about the Espressif ESP32 MCU

ESP32 Wifi-Bluetooth Module

After having analyzed in the previous articles  MicroPython  for ESP8266, in this we start to treat MicroPython on ESP32.

The following shows how to generate the MicroPython image from the source code for the ESP32 board.

The operating system is Debian 9, previously encountered for the esptool and Adafruit-ampy utilities

MicroPython – Python on embedded devices

Log on  with the operating system user on Debian 9, sviluppo in our case; under the home folder  create the Micropython folder and inside this folder the  esp32 folder

The MicroPython source code is available at the following link

Github Micropython

Instructions to build the firmware for the ESP32 are available at the link

MicroPython esp32

Clone the repository

Go into  micropython/ports/esp32 folder

Run

The command releases the git hash for the supported espidf

At the time of our compilation the result is as follows

Go into  /home/sviluppo/Micropython/esp32 folder and clone ESPIDF

Checkout with the hash obtained above

Run

We follow the instructions at the link

Cross compiler

to install the cross compiler; install the prerequisites for building

Download the cross compiler

Create the  esp folder under /home/sviluppo/Micropython/esp32

Unpack the cross compiler in esp

Add the binary folder of the cross compiler to the PATH envinronment variable

Go into the following folder

and create the makefile file with the following code inside

Go into the micropython folder available in /home/sviluppo/Micropython/esp32

Run

to add external dependencies.

Next step is the MicroPython cross compiler build

Finally we can build the ESP32  firmware with the following commands

The firmware is generated under ports/esp32/build with the name firmware.bin.

Proceed to load the firmware with the commands

In our case, the firmware upload was successful with the command

It is also possible to load the firmware.bin image with the commands

where  /dev/ttyXXX is replaced with the actual serial port to which we connect the ESP32 board.

In the next article we’ll compile the nodemcu firmware for ESP32

ESP32 – Nodemcu firmware compiling

MicroPython – MicroPython compiling for ESP8266 with additional modules

After the firmware build of the MicroPython firmware for esp8266 in the previous article
MicroPython – MicroPython compiling for ESP8266

we now show how build a module inside the firmware; this option optimizes the module execution and minimizes the size of the same on the device; the module is frozen into the firmware.

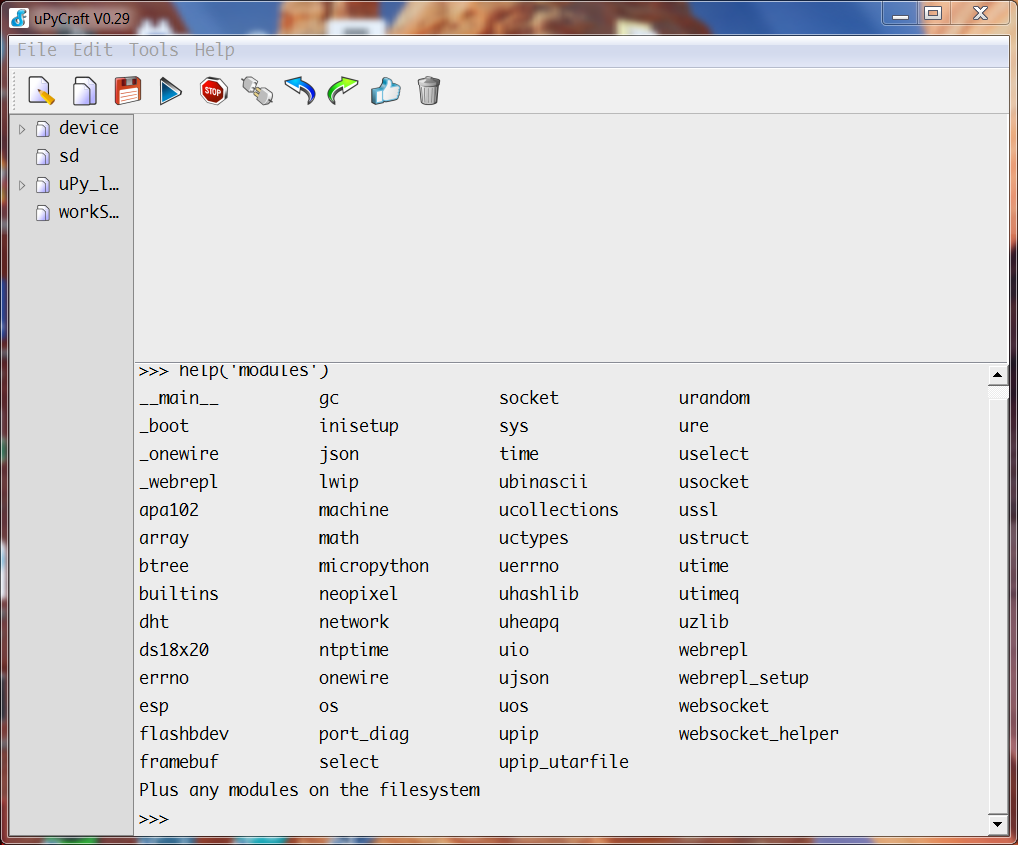
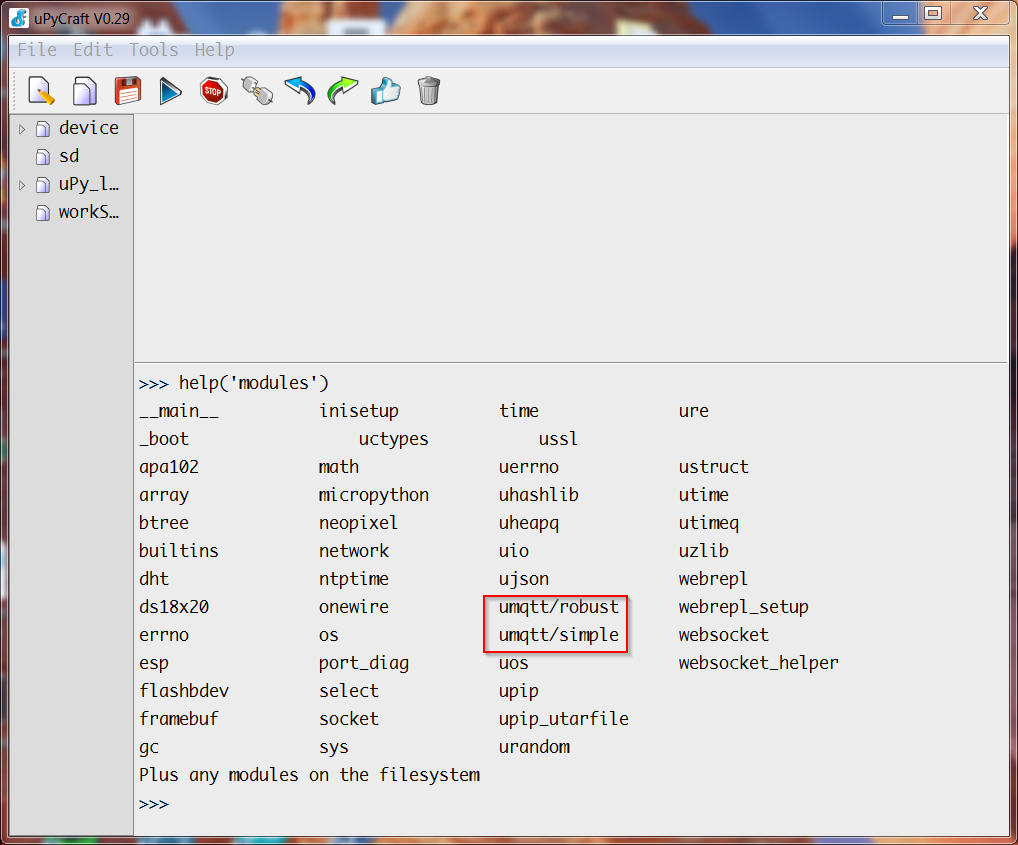
With the firmware compiled with the defaults, the following modules are available, listed in the REPL console with the command

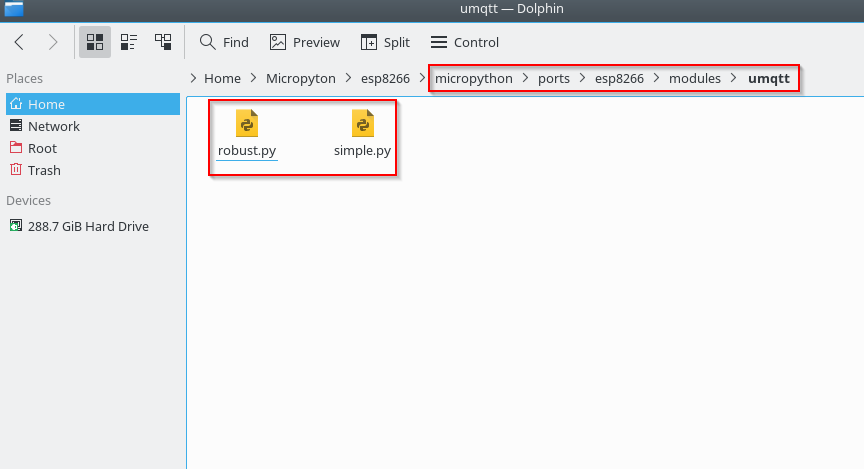
standardmodulesNow let’s try to compile the firmware with the mqtt modules already inside. For this purpose, the module sources are copied to the umqtt folder under modules

umqttfolderWe proceed to recompile the firmware. From micropython/ports/esp8266 we run the following commands

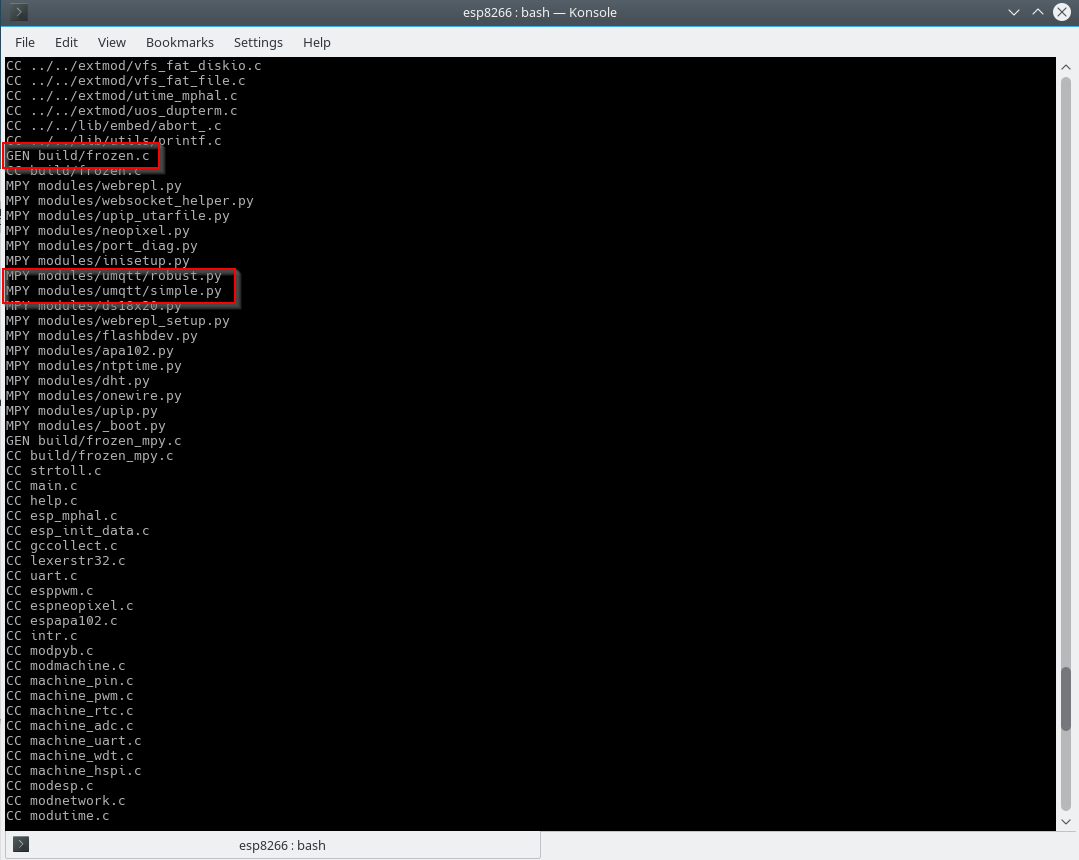
We can see from the compilation log, that these modules are placed in the frozen state

frozenmodulesAfter uploading this firmware we obtain the following list of modules inside the firmware

firmwarewithmodulesIt is also possible to create the firmware with the modules not compiled and optimized, by copying the sources in the scripts folder under esp8266; in the specific case the sources must be placed as shown below

The modules are always visible in the firmware, but not optimized, so if you need some module it is convenient to copy it on the device during the coding  and in the last phase of the project compile the firmware with the frozen modules.


MicroPython – MicroPython compiling for ESP8266

After using in some examples the MicroPython firmware on the ESP8266 board

MicroPython – Nodes examples with DHT11, Relay and MQTT

this article shows how to generate the MicroPython firmware for the ESP8266 board.

The operating system used for this task is Debian 9, already encountered when we analyzed  the esptool utility

MicroPython – Python on embedded devices

Log on  with the operating system user on Debian 9, sviluppo in our case; under the home folder  create the Micropython folder and inside this folder the  esp8266 folder

The MicroPython source code is available at the following link

Github Micropython

Instructions to build the firmware for the ESP8266 are available at the link

MicroPython esp8266

Clone the repository

Download the cross compiler, as described here

Cross compiler

As indicated in the link above, download the source of the cross compiler always from the folder esp8266

Install the prerequisites for building

Proceed to the build of the cross compiler with the following commands

At the end of the build add the binary folder of the cross compiler to the PATH envinronment variable

Go into the micropython folder available under ~/Micropython/esp8266

Run

to add external dependencies.

Next step is the MicroPython cross compiler build

Finally we can build the ESP8266 firmware with the following commands

The firmware is generated under ports/esp8266/build folder with the name firmware_combined.bin.

Proceed to load the firmware with the command

where  /dev/ttyXXX is repalced with the actual serial port to which we connect the ESP8266 board.

In our case, the firmware upload was successful with the command

It is also possible to load the firmware_combined.bin image with the command

In the next article we’ll  analyze how to build the MicroPython firmware adding into the image additional MicroPython modules

MicroPython – MicroPython compiling for ESP8266 with additional modules

OctoPrint installation on Orange PI PC – Python package installation

This article describes how to enable the Orange PI PC board to work as 3d printers network server.

A  software that provides this functionality is OctoPrint

OctoPrint

From the OctoPrint site we can download an image for Raspberry PI with the system already ready; in the case of the Orange PI PC we have  to install and configure OctoPrint on a Linux image.

You can also use a Linux image available for Orange PI PC and run the steps related to OctoPrint package installation, but you have to check the prerequisites for Octoprint python package installation.

We instead built for this article an image using the Armban scripts.

As a first step, prepare the micro sd card with an Armbian image. In the specific case, we’ll use a Debian Jessie image created using the Armbian script, as indicated on the link

Armbian building

and described also in a previous article

Building Armbian image for Orange PI PC

We followed these steps to build the Armbian image on Ubuntu Xenial 16.04; from  a Linux command shell

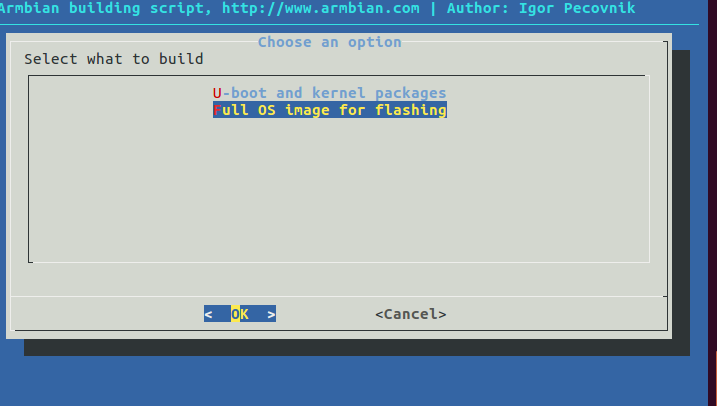
In the building options choose

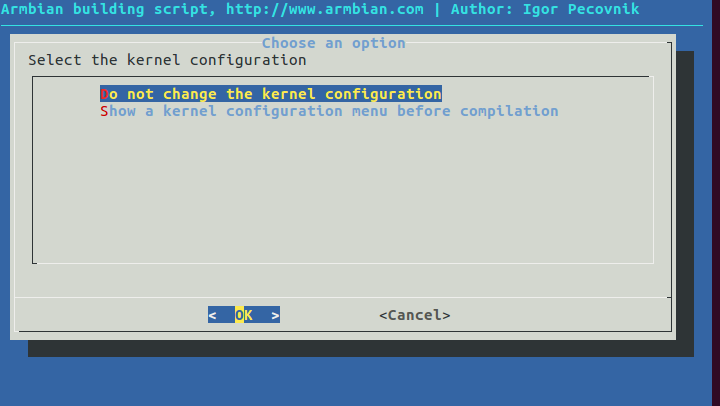
armbianopipcfosWe selected the default kernel configuration

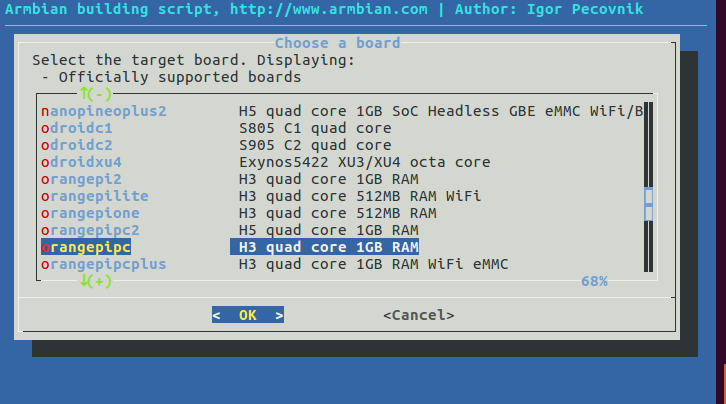
armbianopipckernelChoose an Orange PI PC board

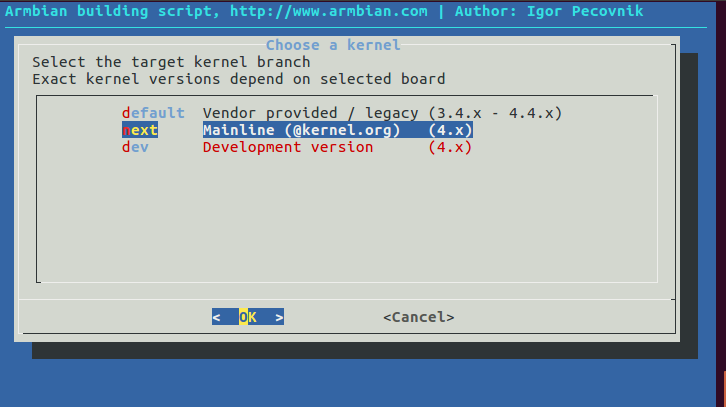
armbianopipcboardWe used the mainline kernel

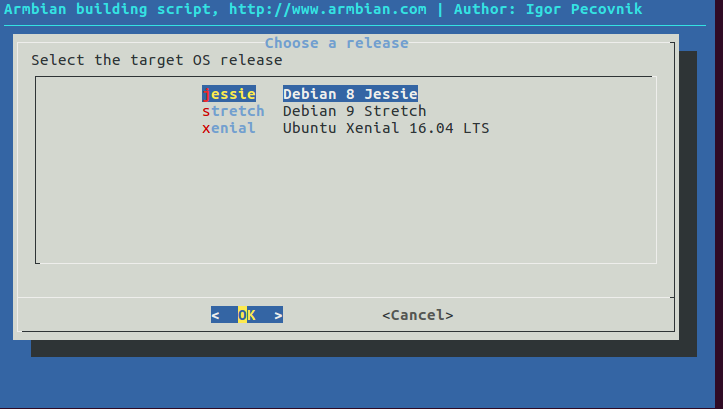
armbianopipcmlkerneland Debian Jessie as distribution

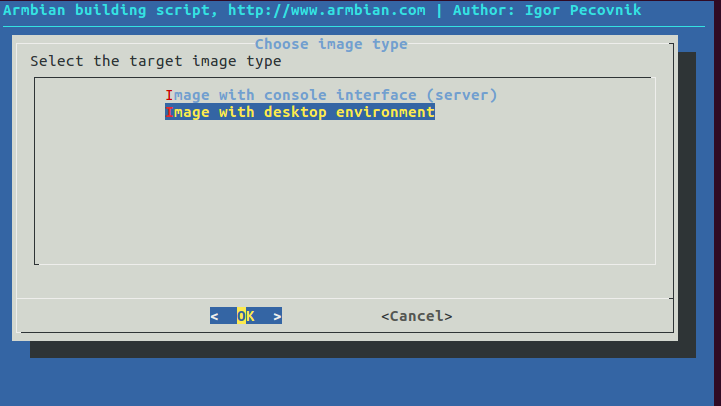
armbianopipcjessieWe built an image with desktop envinronment

armbianopipcjessiedeAfter this option, the script proceeds to the compilation. The generated image is Armbian_5.34_Orangepipc_Debian_jessie_next_4.13.12_desktop.img. This image can be downloaded from the link

Armbian image for Orange Pi PC

Start Armbian and create the user for the Jessie image; in this case we choose octoprint/password as user.

If necessary, reconfigure the keyboard with the command

and proceed to upgrade the system

If the system needs to be configured via a wireless connection, the connection must be active at startup. For this purpose in our case we used the Wicd daemon

Wicd Debian

Remove the network-manager package

This command uninstalls network-manager and network-manager-gnome.

Check that the wireless interface is not present in

/etc/network/interfaces

Proceed to Wicd installation

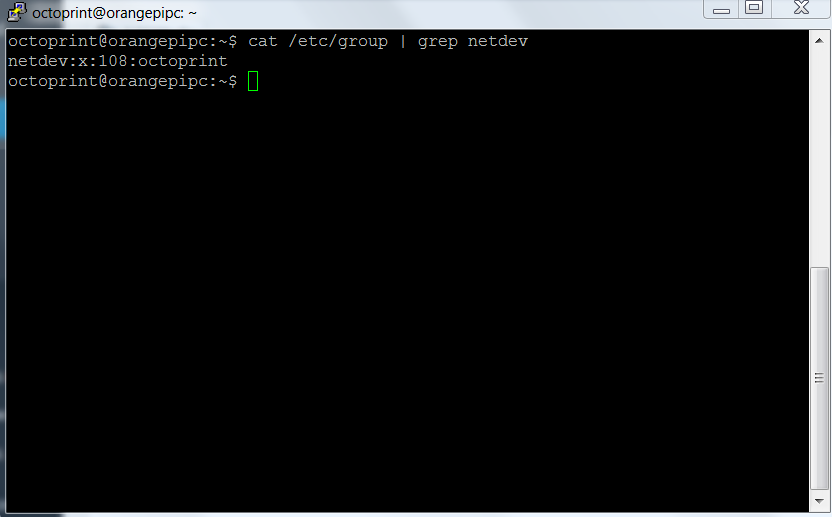
Check that the octoprint user is present in the netdev group

In our case it is already present, giving as a result

netdev-group

If not present, add it with the command

Start  wicd

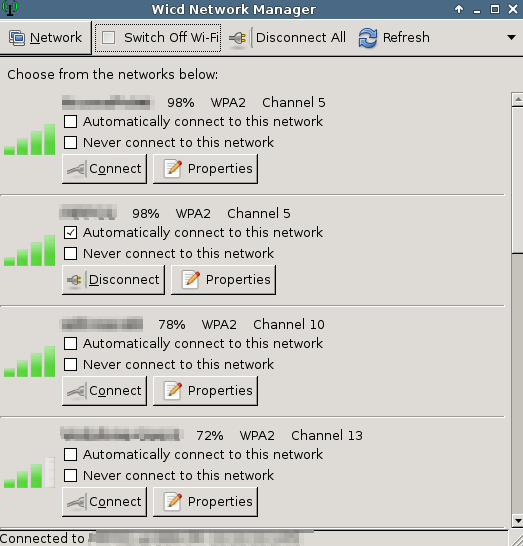
Logon to the armbian graphic desktop and start the wireless configuration with the command

wicd-client

Configure and save the network connection from the graphical interface.

If you want the remote desktop follow the steps listed in the article

Remote desktop setup for Armbian on Orange PI PC

We can now install Octoprint. Follow the steps available at the link

OctoPrint installation on Linux

Install the prerequisites

Create under /opt the octoprint folder and assign the ownership  to octoprint

In a Linux shell command go to /opt/octoprint  folder and download the software

Run

Create the  .octoprint folder

Add  octoprint to the following groups  to manage the 3d printer using the USB port

Check  the correct installation by running the command

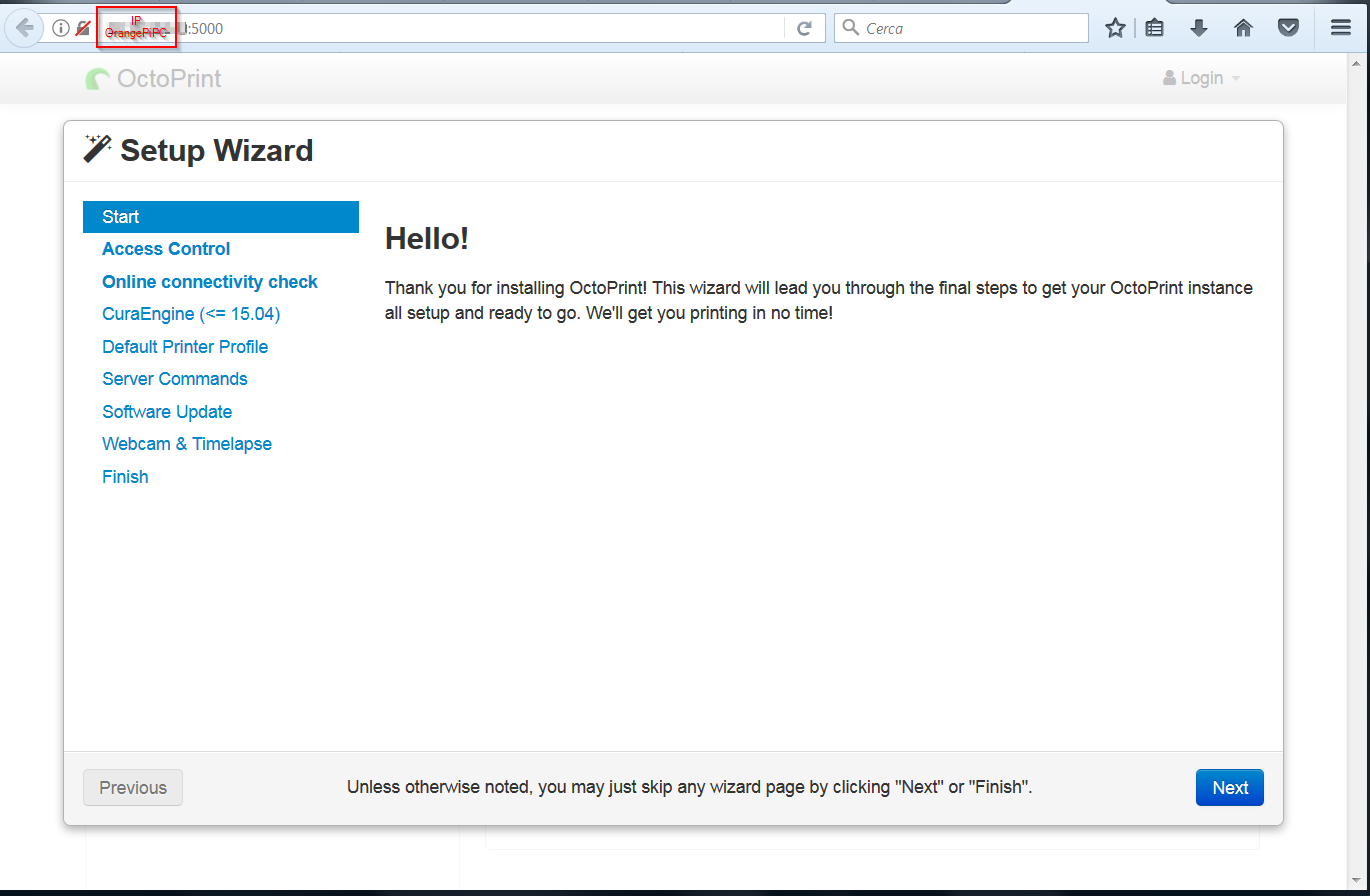
The OctoPrint server can be reached on port 5000 at the IP address of Orange PI PC

http://ipaddress:5000

octoprinttest

Install the Cura Engine at this point; place yourself in the octoprint user’s home and download the source package

Unpack the package

Go into  the unpacked folder

Run  the compilation with the command

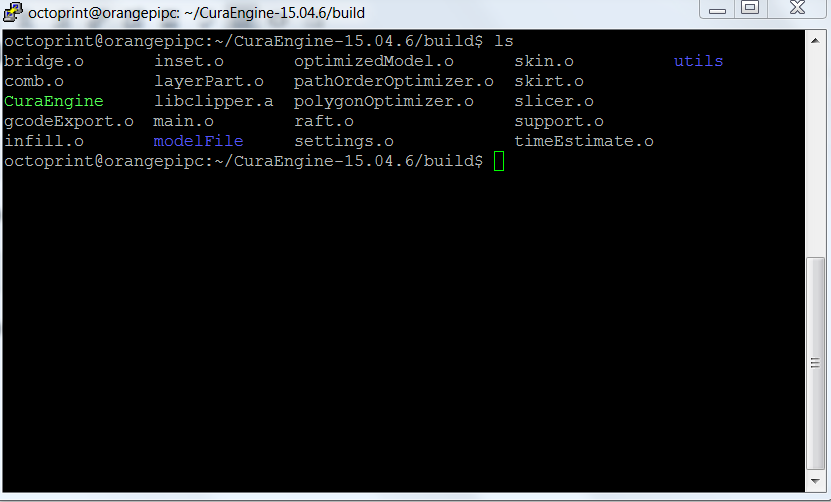
The compiled software is located under the build folder

curaengineCreate the /opt /octoprint/cura folder and copy the CuraEngine file to this folder

The executable is now in the /opt/octoprint/cura folder and will be used later by OctoPrint.

In the next article we’ll treat how to configure OctoPrint’s automatic startup

OctoPrint Autostart

LEDE building for Linkit 7688 Duo

After OpenWrt image building using the Mediatek SDK

OpenWrt building for Linkit 7688 and 7688 Duo

this article describes how to generate a LEDE image for the Linkit 7688 Duo.

The steps on how to compile LEDE are available at the link

LEDE Building

Clone the code from the github in a shell command window,  always from the  Linkit folder

run

Create the src folder under Linkit and extract the compressed file

Feed for Linkit

This feed was created from Mediatek one, eliminating the binary drivers  dependency.

Copy the file to the src folder and uncompress it

Go to the Lede folder and copy the feeds.conf.default file  as feeds.conf

Run

Update the feeds  for the packages

Install the packages

Configure the kernel executing

Use the following settings

  • Target System: Mediatek Ralink MIPS
  • Subtarget: MT7688 based boards
  • Target Profile: Mediatek  LinkIt Smart 7688

menuconfigledeIn the Base system section enable mtk-linkit

mtk-linkitbasesystemSave and exit.

Run the building

where x is the number of cores to use in the building.

At the end of the process the generated image is available in the  bin/targets/ramips/mt7688/  folder as lede-ramips-mt7688-LinkIt7688-squashfs-sysupgrade.bin.

The built firmware is available here

Lede Image for Linkit 7688 Duo

WARNING: The image installation on the device is at your own risk. We accept no responsibility if the installation leads to  malfunction or block of the device.

If you upgrade the board using an usb key, you need to rename the lede-ramips-mt7688-LinkIt7688-squashfs-sysupgrade.bin file in lks7688.img.

This firmware may have malfunctions as it is not thoroughly tested and based on drivers under development.

In the next articles we’ll upload the images to the board and configure them

Installation and configuration of the Openwrt Image on Linkit 7688 and 7688 Duo

OpenWrt building for Linkit 7688 and 7688 Duo

After describing the general specifications of the two boards in the previous article
Linkit 7688 and 7688 Duo Development Boards

now we build the OpenWrt image from the sources. The following link describes the steps

Building the firmware from the source code

First we have to create the folder Linkit under /home/sviluppo in a shell command window in our Debian image, already used to  build OpenWrt in another article

Building OpenWrt Image

Install the prerequisites

Clone the OpenWrt repository

In the shell command window go to the openwrt folder and copy feeds.conf.default file as feeds.conf

Add the Mediatek feed for the boards

Update the feeds  for the packages

Install the packages

Configure the kernel executing

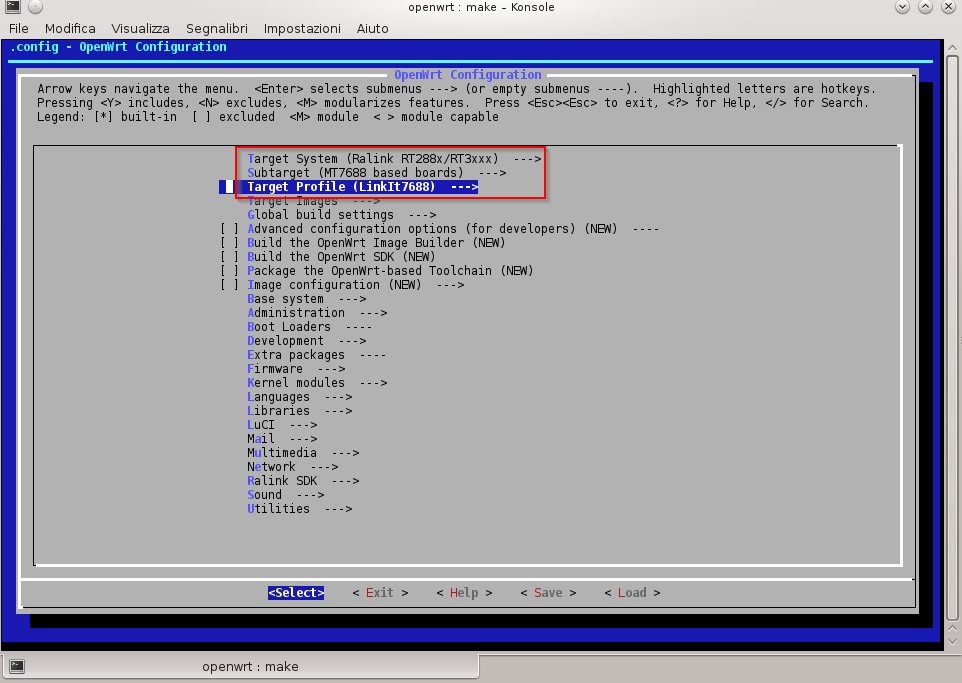
Use the following settings

  • Target System: Ralink RT288x/RT3xxx
  • Subtarget: MT7688 based boards
  • Target Profile: LinkIt7688

menuconfigSave and exit.

Run the building

At a certain point, the building generates an error for the wireless card libraries. Mediatek has not released the wireless card sources, but an sdk with compiled binaries for a kernel version  different from the one we are using in the building; the error reported is

One way to fix the problem is the following.

Go to the  /home/sviluppo/Linkit/openwrt/feeds/linkit/mtk-sdk-wifi/wifi_binary/  folder and copy the files for our kernel version

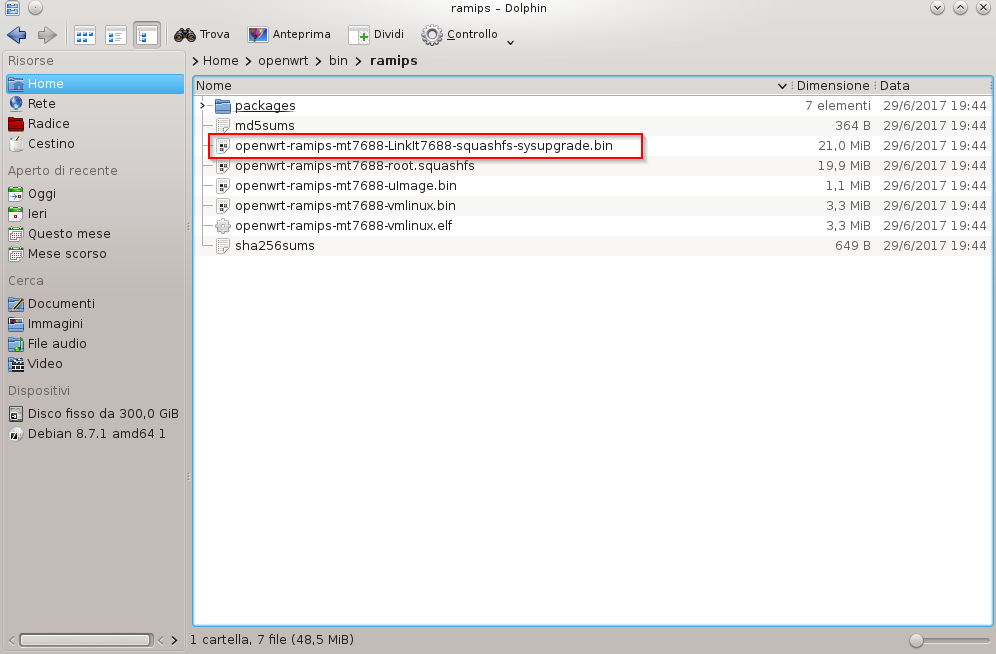
Rerun the building. At the end of the process the generated file is available in the  bin/ramips folder

linkit imageThe built firmware is available here

OpenWrt Linkit 7688 and 7688 Duo Image

WARNING: The image installation on the device is at your own risk. We accept no responsibility if the installation leads to  malfunction or block of the device.

If you upgrade the board using an usb flah drive, you need to rename the openwrt-ramips-mt7688-LinkIt7688-squashfs-sysupgrade.bin file in lks7688.img.

The image kernel for this building  is  3.18_45; If you want to use a recent kernel, you must use the opensource drivers available for the board; in the case of the Linkit 7688 Duo card, in our possession, we can rebuild the image using the Realtek rt76 drivers for the wireless network adapter and add the additional components for the Atmel MCU using LEDE, an OpenWrt fork

LEDE Project

In the next article you will build  a LEDE image for the Linkit 7688 Duo board. For the Linkit 7688 board at this time, the mraa libraries, used to interface the periphals, are not yet compatible with the latest version of LEDE and the functionality of the image is limited. There may be also bugs in the  wireless card opensource drivers, which hopefully are solved in the refinement of these drivers.

 LEDE building for Linkit 7688 Duo