
After configuring the IDF development environment in the previous article
let’s see now how to use Eclipse as IDE for code development. Instructions are available at the link
Download the C/C++ Eclipse for Linux
Unpack the file and move it to /opt/
|
1 2 3 |
tar -zxvf eclipse-cpp-2019-03-R-linux-gtk-x86_64.tar.gz sudo mkdir /opt sudo mv eclipe /opt/ |
Run ecplise
|
1 |
/opt/eclipse/ecplise |
Set the workspace for eclipse
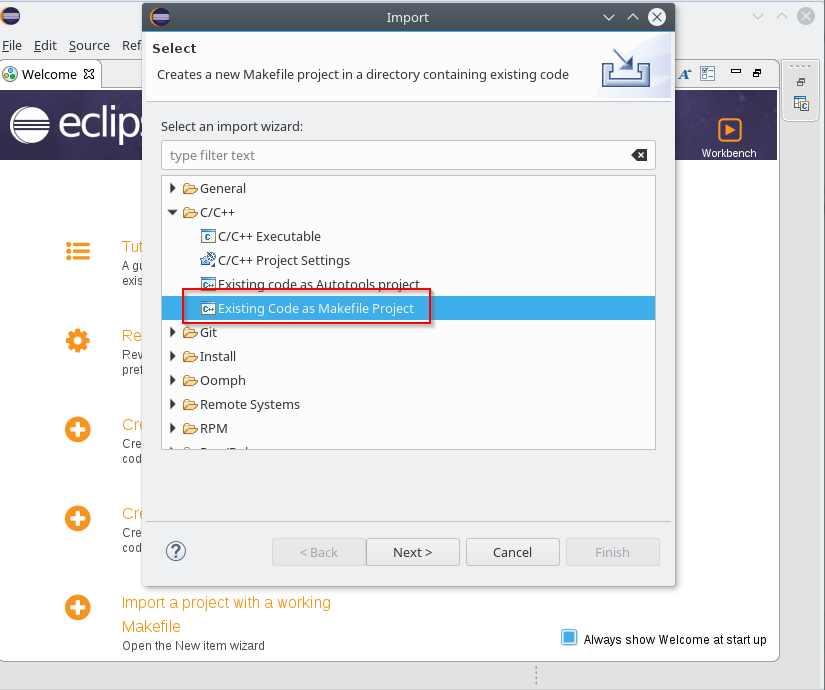
 Once the IDE is open, select File -> Import -> C / C ++ – -> Existing Code as Makefile Project
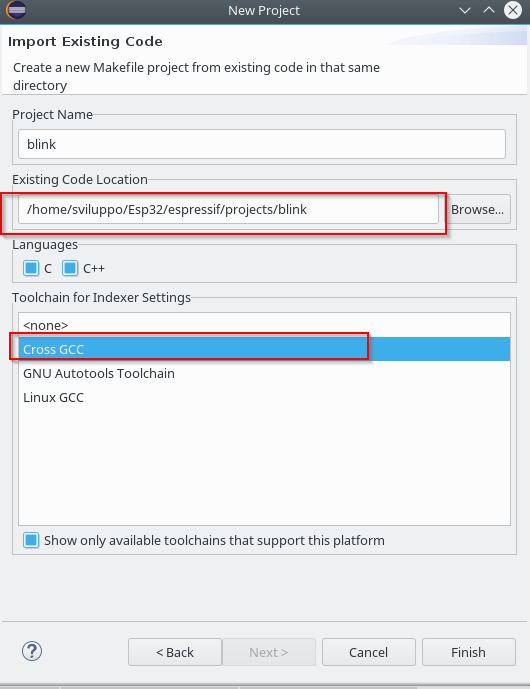
 Press Next; on the next screen select the folder containing the Makefile of a sample project in the “Existing Code Location” field and choose CrossGcc as “Toolchain for indexer settings” as shown below
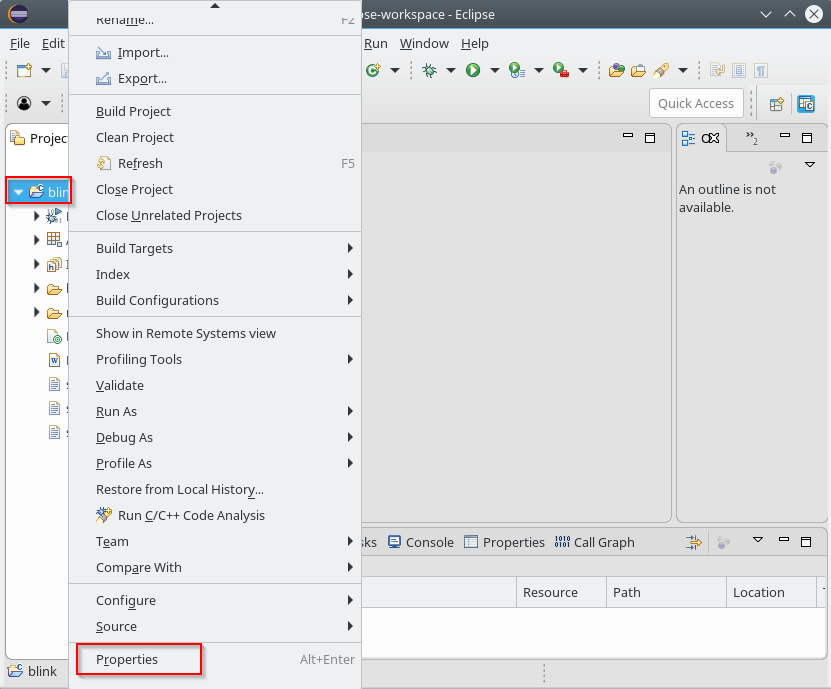
 Once the project is loaded, using the mouse right button on the project name, select the properties option
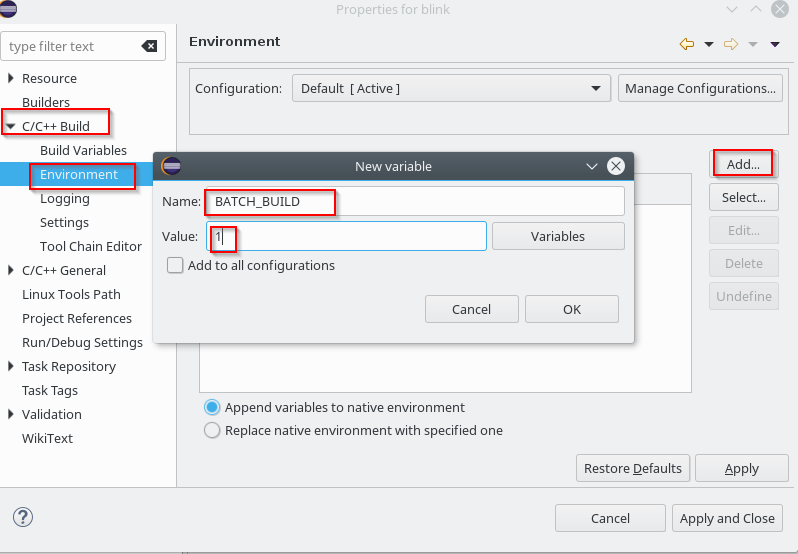
 Under C / C ++ Build -> Envinronment add the variable
|
1 |
BATCH_BUILD = 1 |
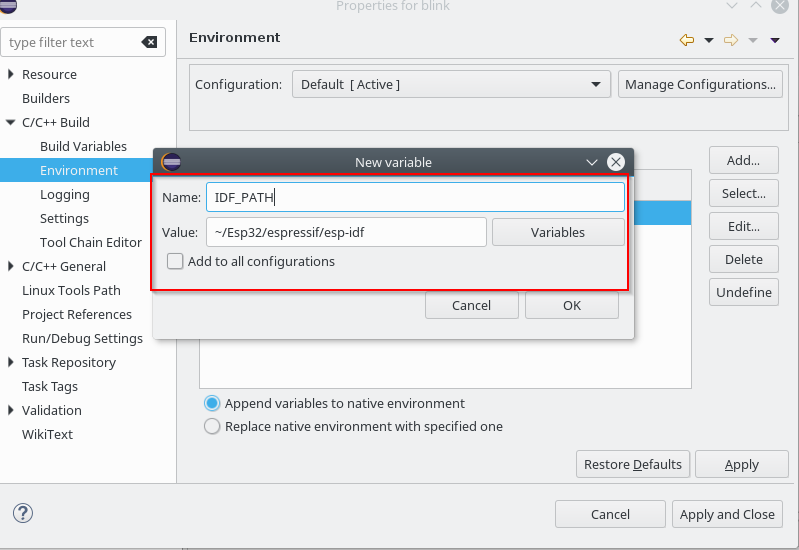
 Add the IDF_PATH variable pointing to the downloaded IDF SDK in the same section
|
1 |
IDF_PATH=~/Esp32/espressif/esp-idf |
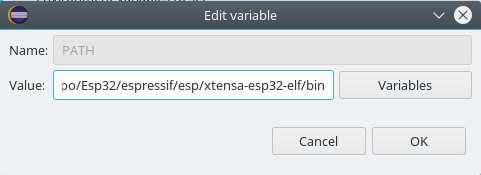
 Edit the PATH variable and add the path to the bin folder of the cross compiler /home/sviluppo/Esp32/espressif/esp/xtensa-esp32-elf/bin
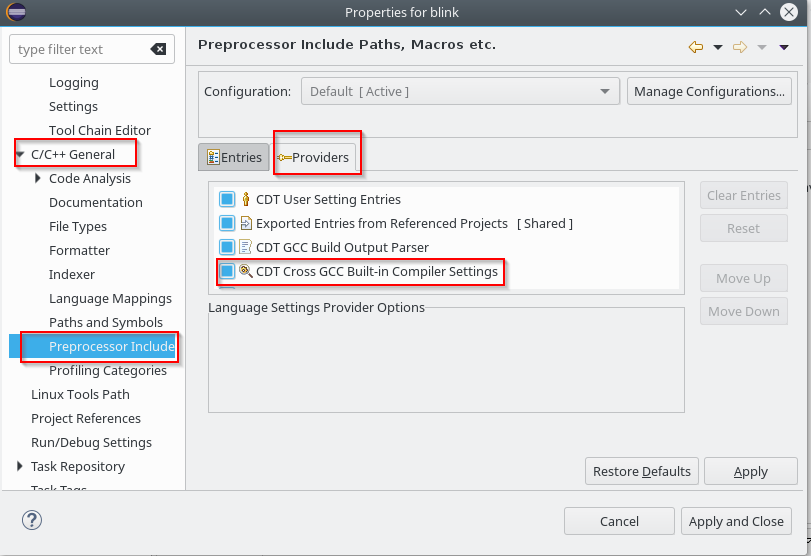
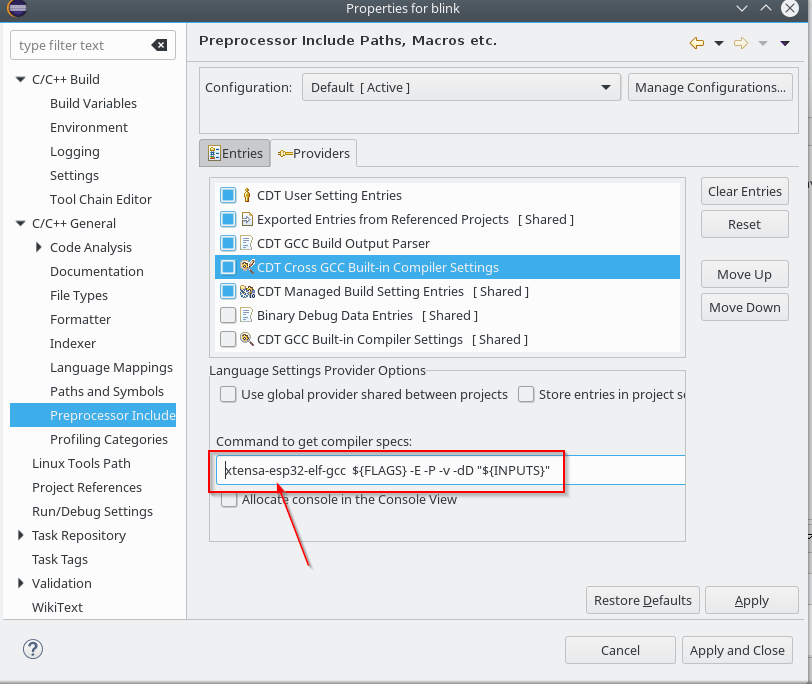
 Access “C / C ++ General” -> “Preprocessor Include Paths”; choose the Providers tab and click on “CDT Cross GCC Built-in Compiler Settings”
 Replace $ {COMMAND}
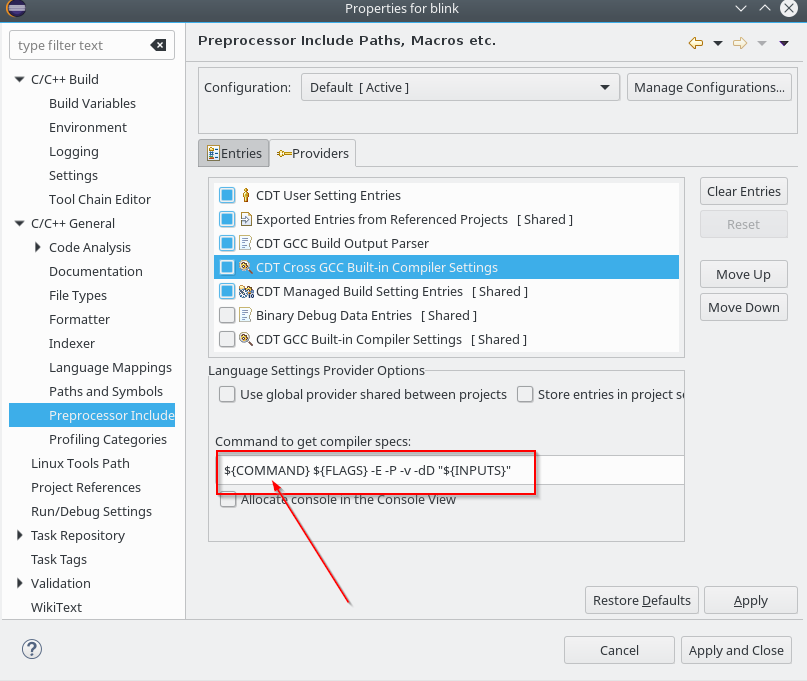 with xtensa-esp32-elf-gcc
 Choose now, always in the providers section, “CDT GCC Build Output Parser”
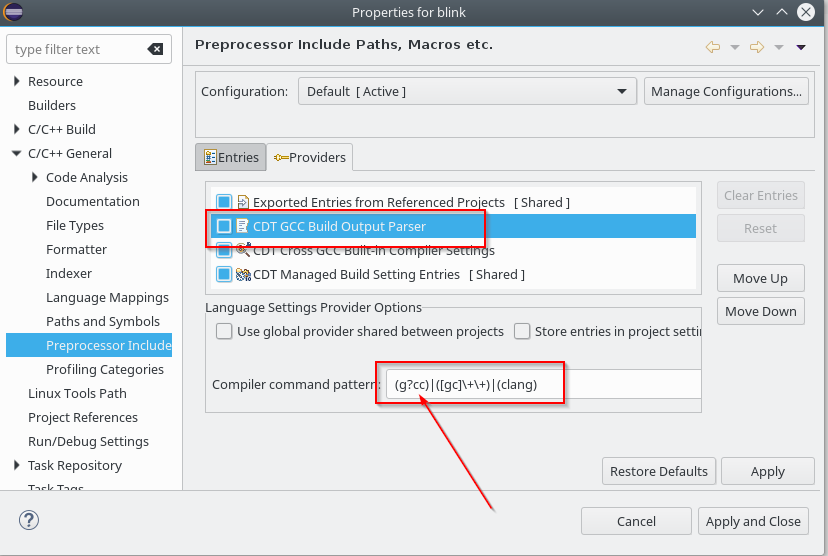 and insert at the beginning of the “Compiler command pattern” xtensa-esp32-elf-
 Save the configurations.
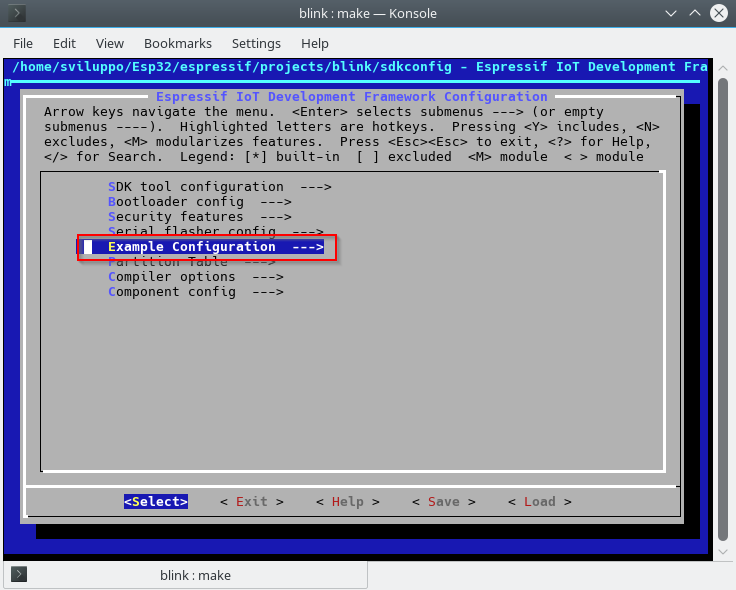
The project settings should always be made by make menuconfig in the unix shell. Access the shell and set the LED to be switched on/off the value 2 as GPIO; this is because in our case the card is a doit whose design is illustrated in this document
|
1 2 3 4 5 |
cd ~/Esp32/espressif export PATH=$PATH:$HOME/Esp32/espressif/esp/xtensa-esp32-elf/bin export IDF_PATH=~/Esp32/espressif/esp-idf cd projects/blink make menuconfig |
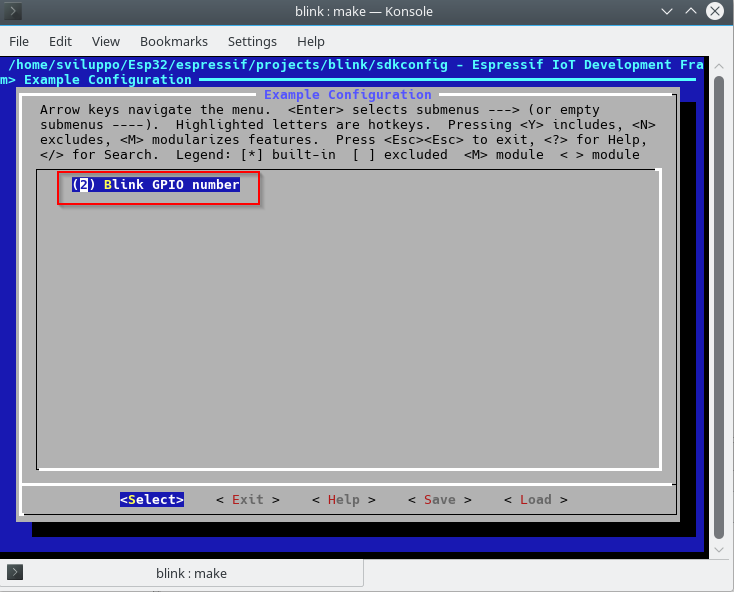
Access to Example configuration
 and set the gpio value to 2
 Save the configuration. Go back to Eclipse and proceed with cleaning with
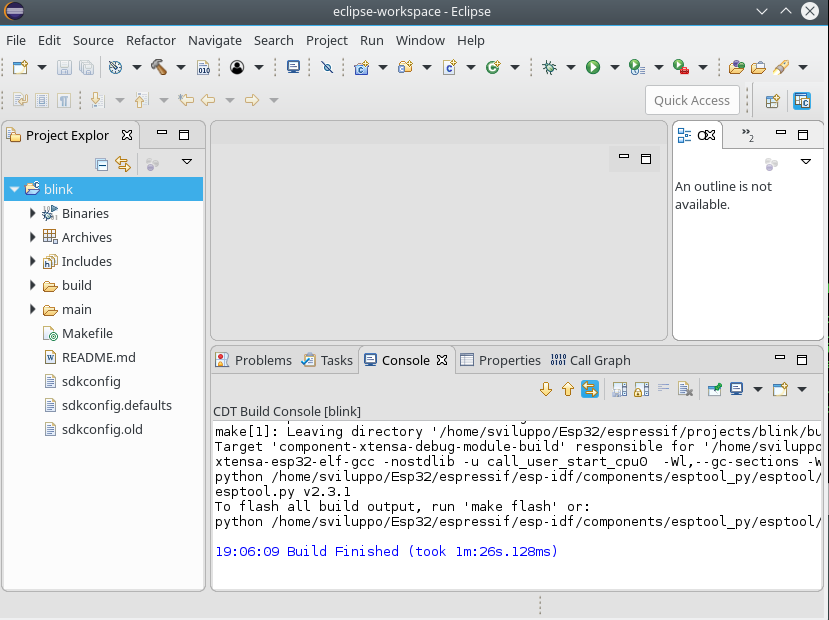
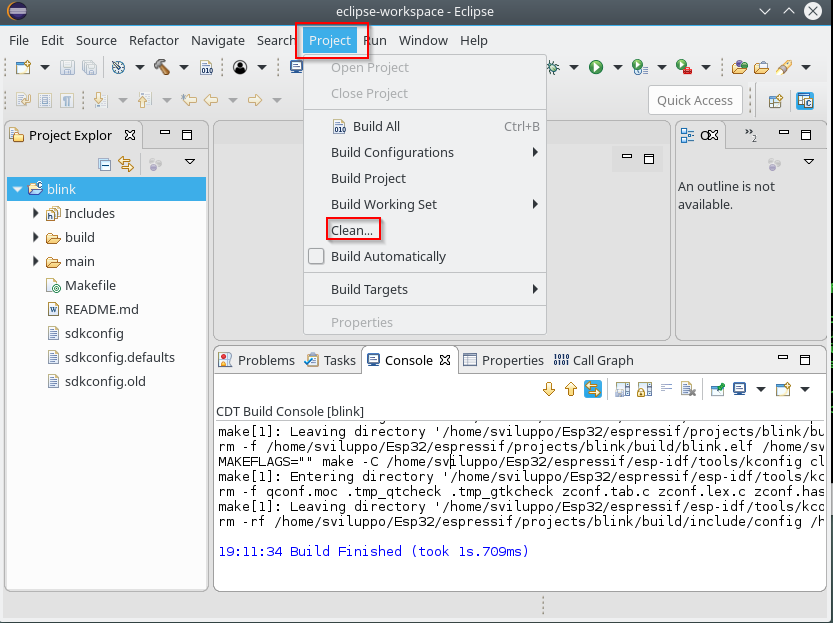 and subsequent compilation with Project -> Build
 To run firmware flash from eclipse;, select the project and with the right button choose Build Targets -> Create …
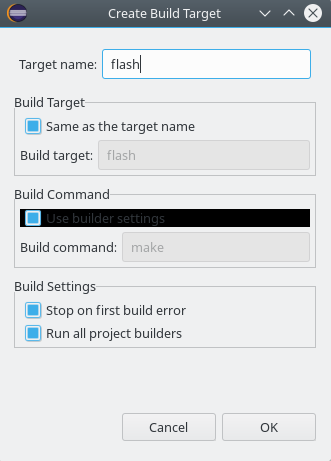
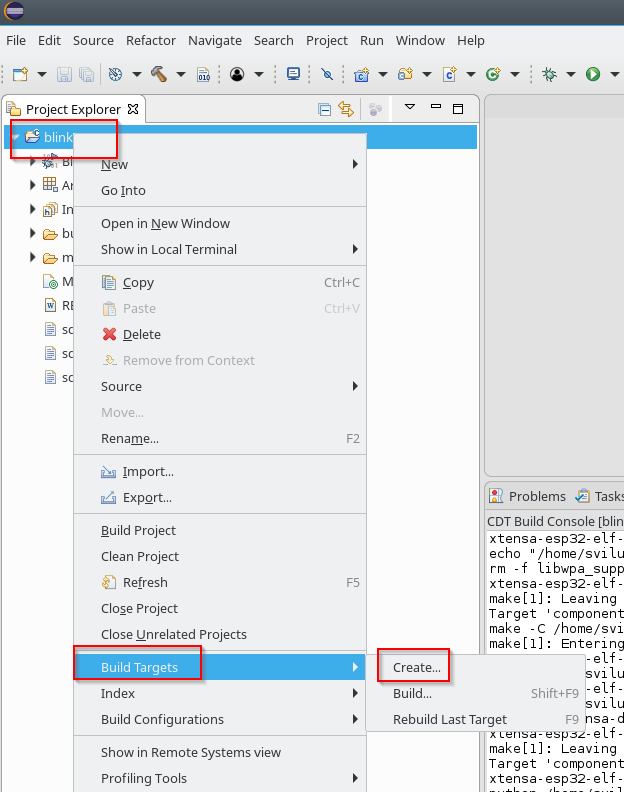 Enter flash as value in the target name field, leaving everything else as default
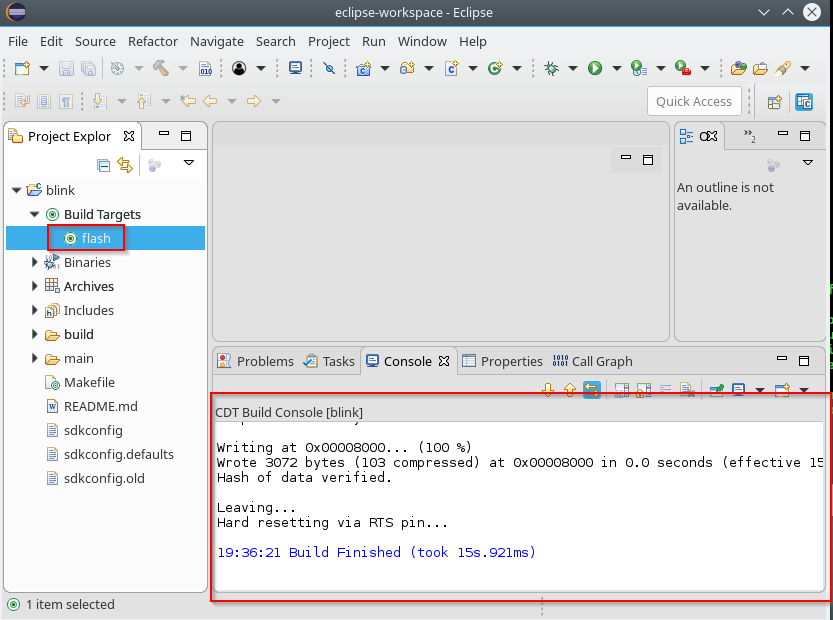
 At this point we proceed to upload the image by double-clicking on the new flash item within the project targets
 The settings to run the flash must be set with make menuconfig, as seen in the previous article