
After listing the main features of the Seeeduino XIAO board
in this article we prepare the Arduino development environment.
The first step is to download the Arduino Ide
Our Arduino IDE version is 1.8.5.
After downloading the IDE, start it and add the Seeeduino XIAO board repository by accessing File-> Preferences. In the tab “Settings” locate the “Additional Board Manager URLs ” field and add the link
https://files.seeedstudio.com/arduino/package_seeeduino_boards_index.json
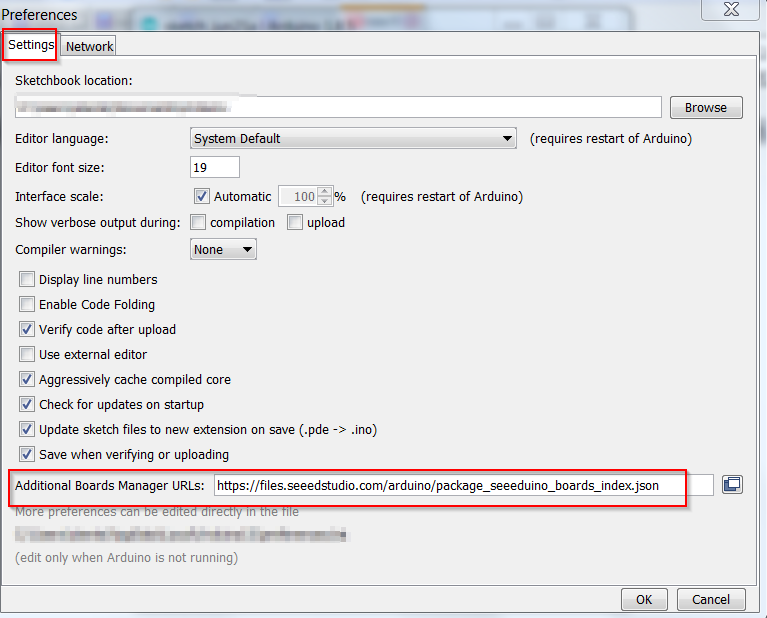 Press OK to update the settings.
Open now Tools->Boards->Board Manager and enter in the search box “Seeeduino XIAO”.
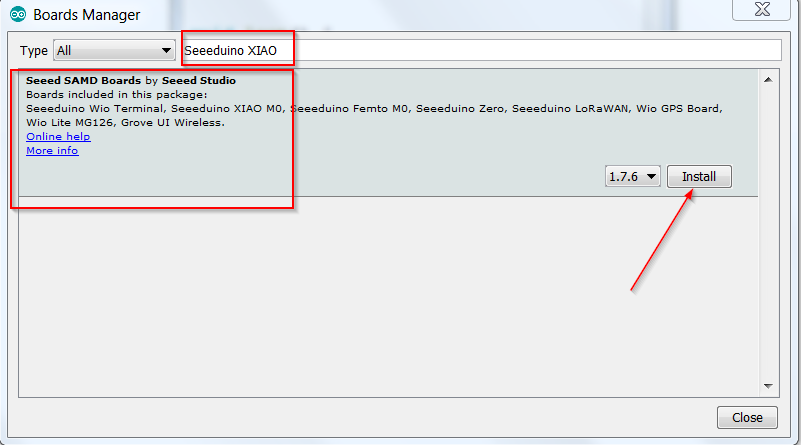
The “Seeed SAMD Boards” card is identified. It is installed with the “Install” button.
At this point on Linux the card is already visible on the USB port, while in Windows 7 we installed also the drivers available at the link
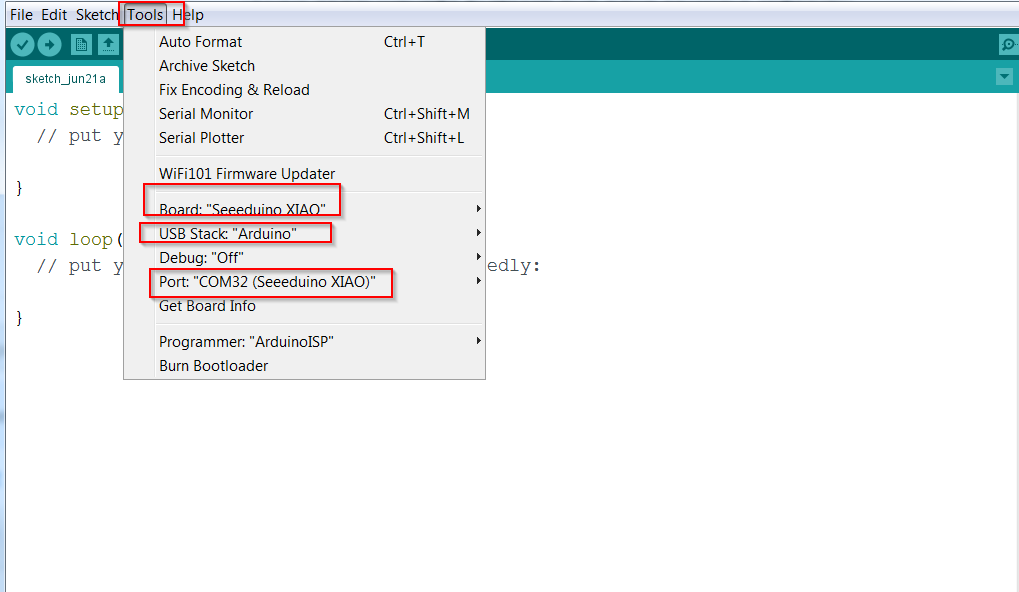
The following parameters are set for the Seeeduino XIAO board from the Tools menu
- Board:Seeeduino XIAO
- USB Stack: Arduino
- Port: USB port connected to the XIAO. In the port description is visible the reference (Seeeduino XIAO)
 To check that the whole environment is installed correctly, try the Arduino Blink test example, available in the menu File->Examples->01.Basics->Blink
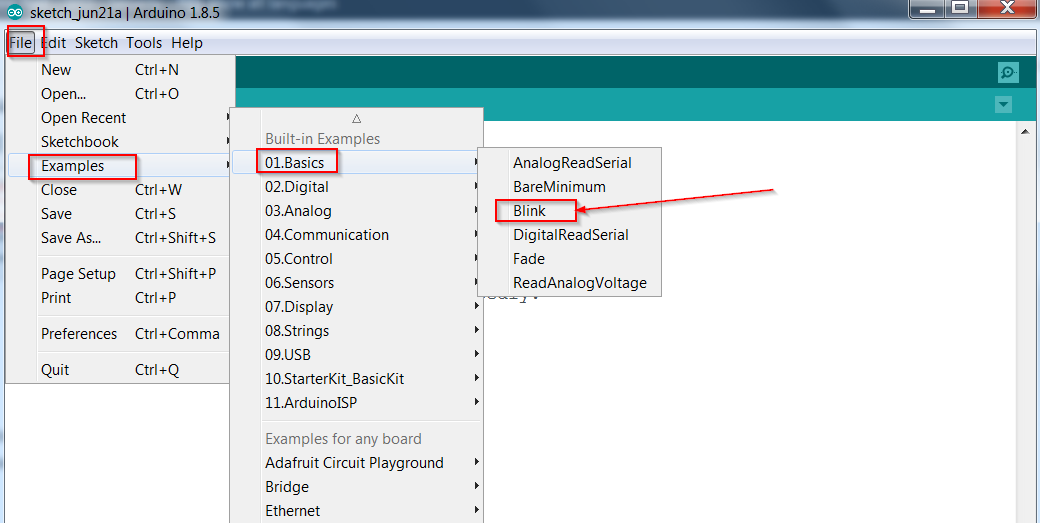
The example does nothing but turn off and on the yellow LED on the device.
In the next article we will make a small example with devices connected to the pins of the Seeeduino XIAO