Tag Archives: apache

Sensors Monitoring – Envinronment Setup

In setting up the infrastructure for monitoring sensors made up of ESP8266 devices in previously published articles

Mqtt with Beaglebone ed ESP8266 – Freeboard

Freeboard had been set up to display the data coming from the sensors.

In this new series of articles, we  set up Grafana

Grafana Dashboard

as  environment to view the data of the various sensors.

We implement the environment, in this case,  on an Orange Pi PC board, but other arm or pc system can be used.

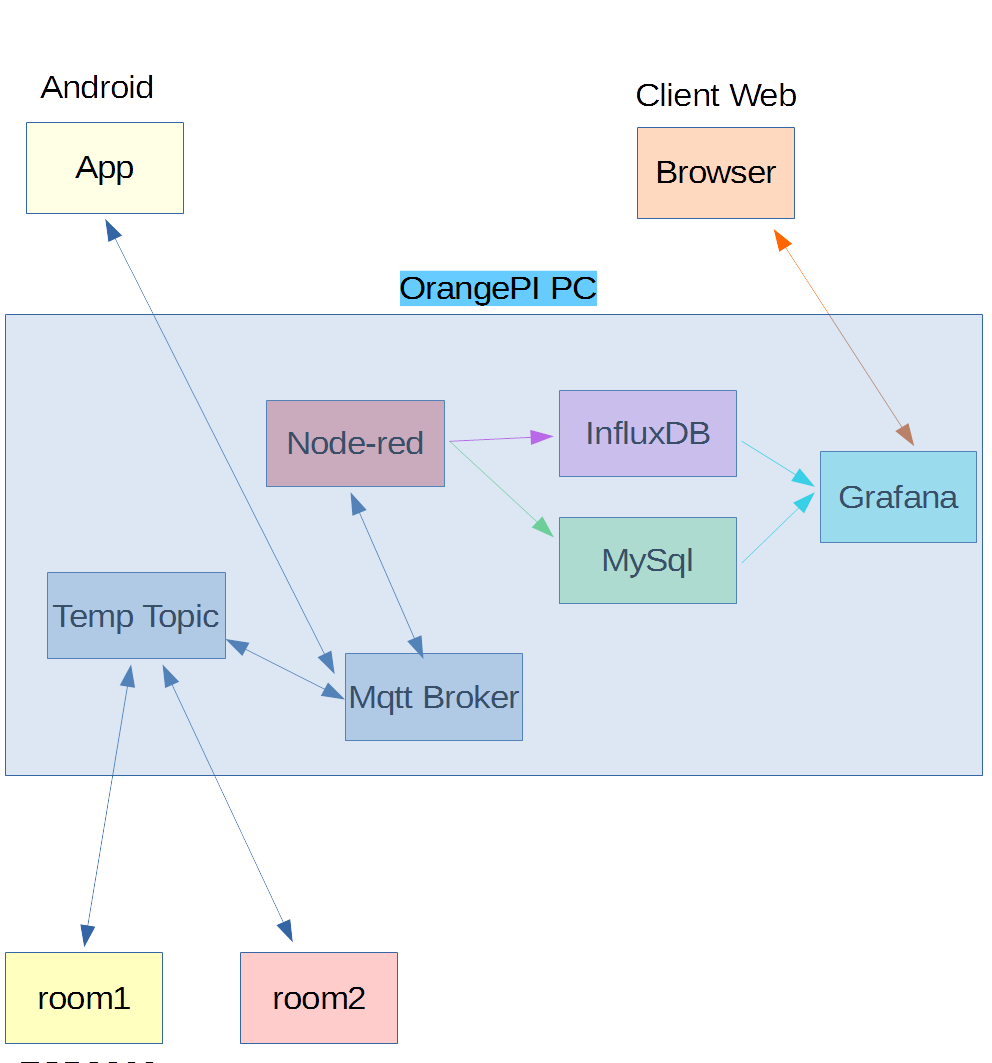
Below the architecture used in this series of articles

archGrafana

In these articles we’ll use the maximum authorizations for each environment, we will not use authorizations on mosquitto and no encrypted connections will be used. In a test environment this setting is fine, but in an operating environment it is necessary to set up the correct authorizations and possibly the encryptions in the connections in all environments.

We have installed our compiled version of Debian 9 Stretch for Orange PI PC. The image used is the following

Image Download

The monitor user was created during the Image setup, while the hostname was renamed in dashboardora. If not installed proceed to install the avahi daemon

In this way the services can be accessed by publishing the hostname, i.e. dashboardora.local.

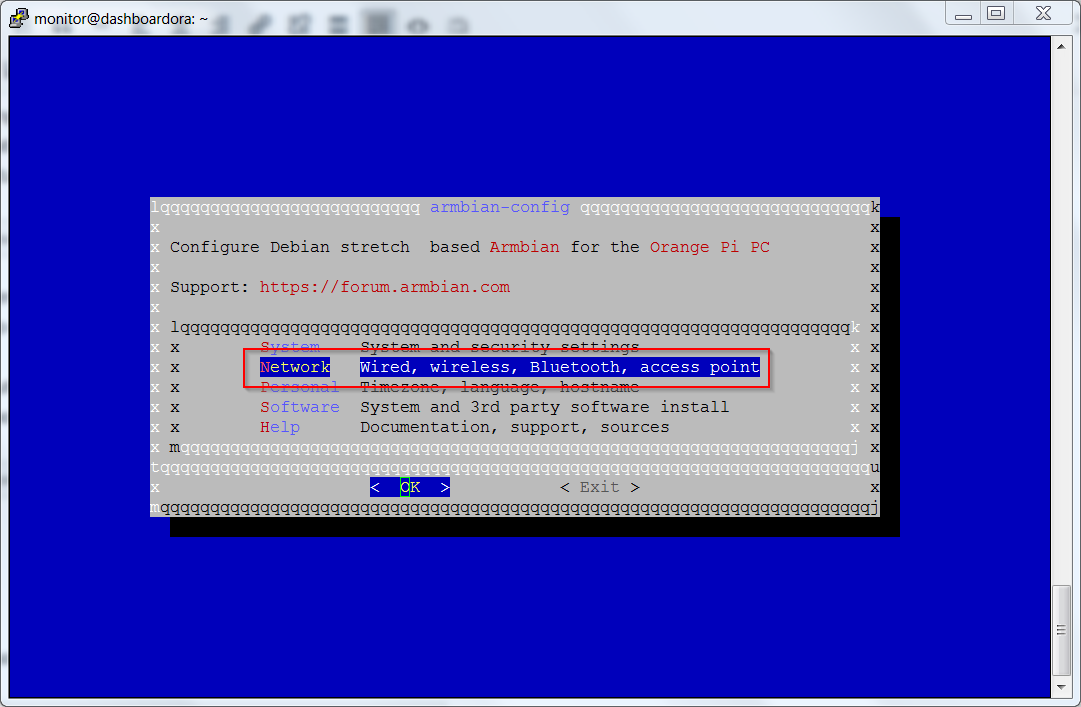
Using the armbian utilities  disable ip6 on the system; to carry out this setting launch armbian-config

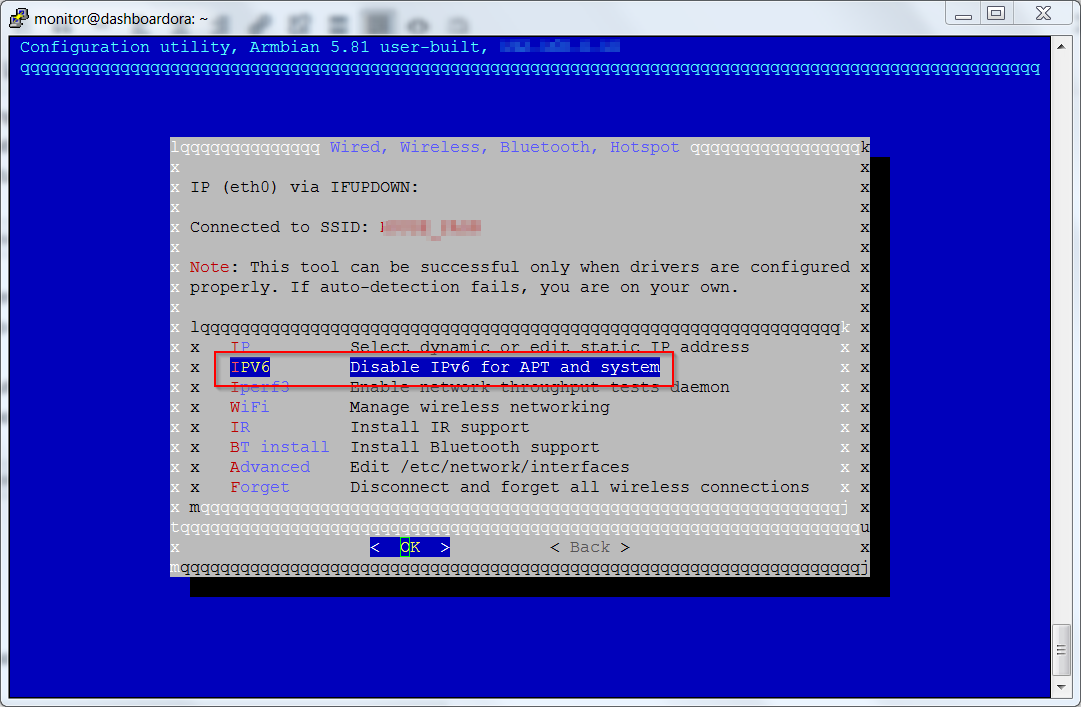
ipv6Disable1Proceed to diasble IPV6

ipv6Disable2

As a first step we install the  mqtt broker mosquitto

Install the http services and the databases Mysql and MySqlWorkbench

Apache2

and various prerequisites

Start apache

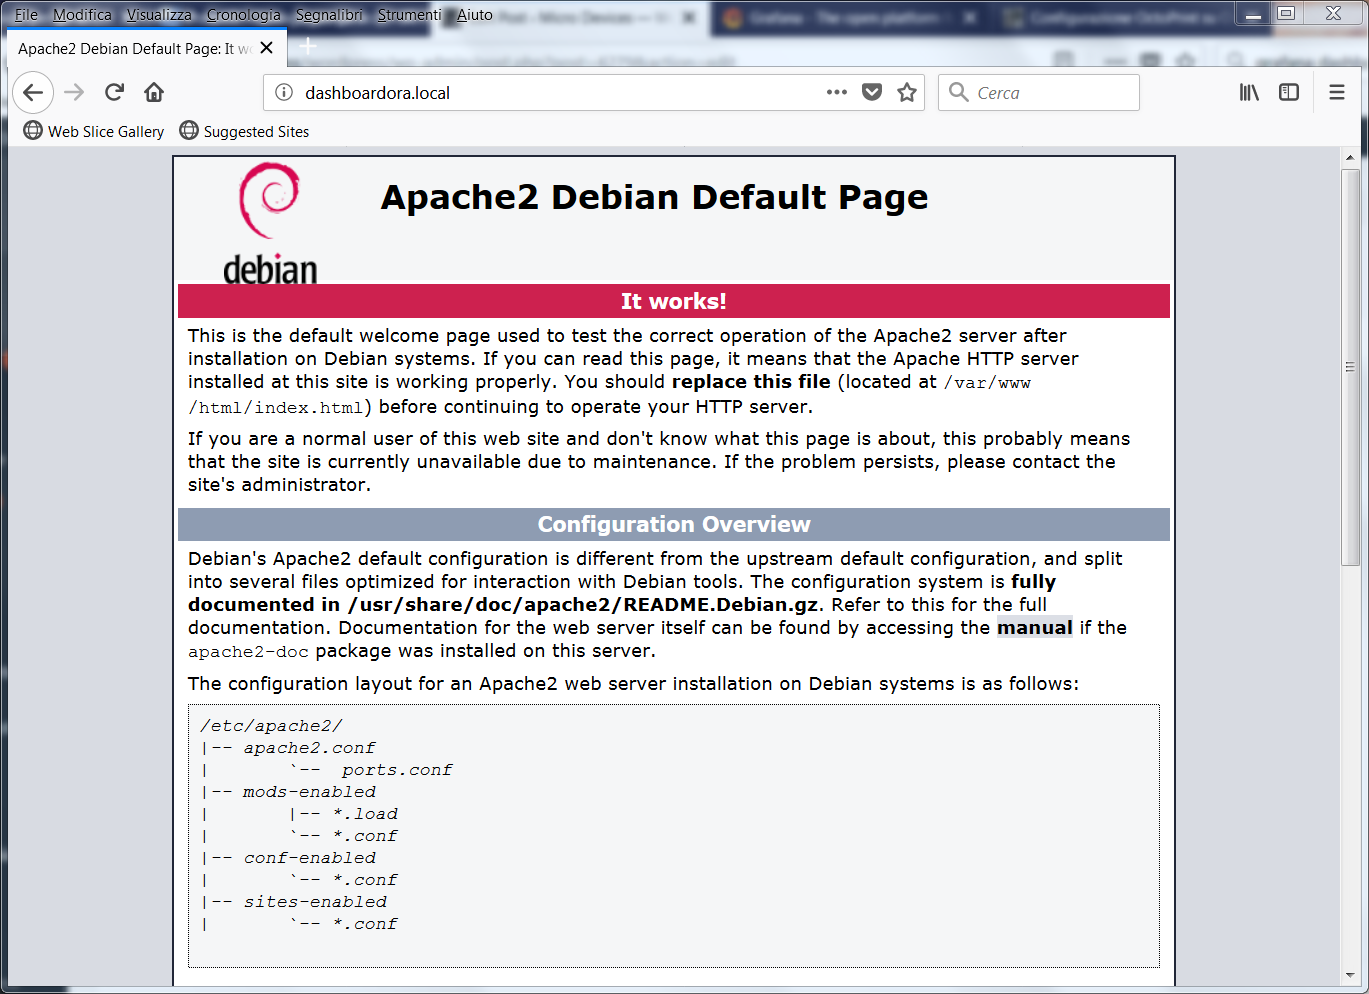
and check that the server responds to the web address, which in our case corresponds to http://dashboardora.local

apache

MySql

Debian 9  comes with MariaDB; you must set the password for the database administration user root with the following command

We set the root password and the ability to log in from other hosts as root
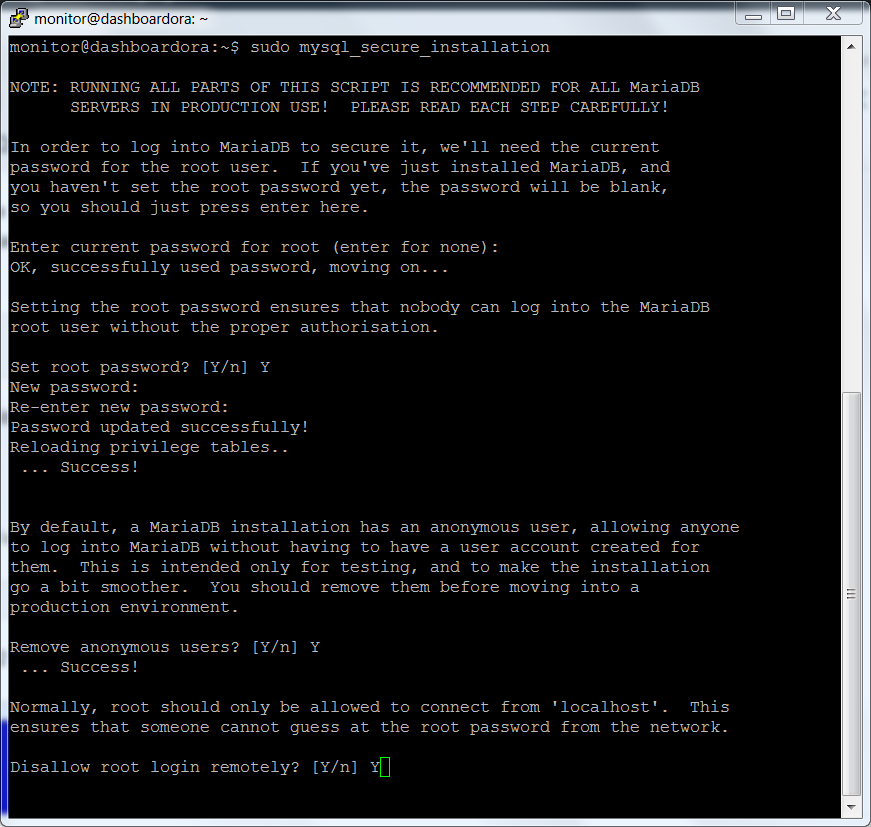
mariadb-secureThe other chosen options are listed below

mariadb-secure2

We install phpmyadmin for database management

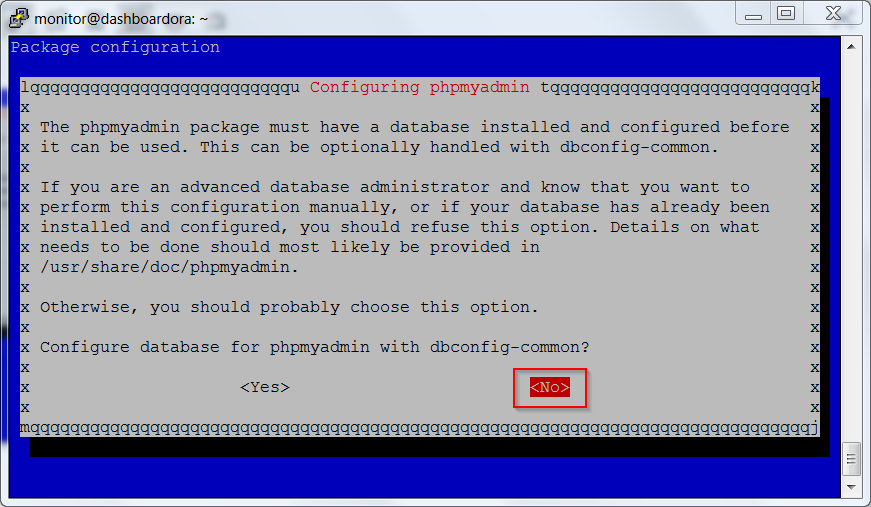
At the next screen choose apache2

phpmyadminFinally choose NO

phpmyadmin1

Run the commands listed below

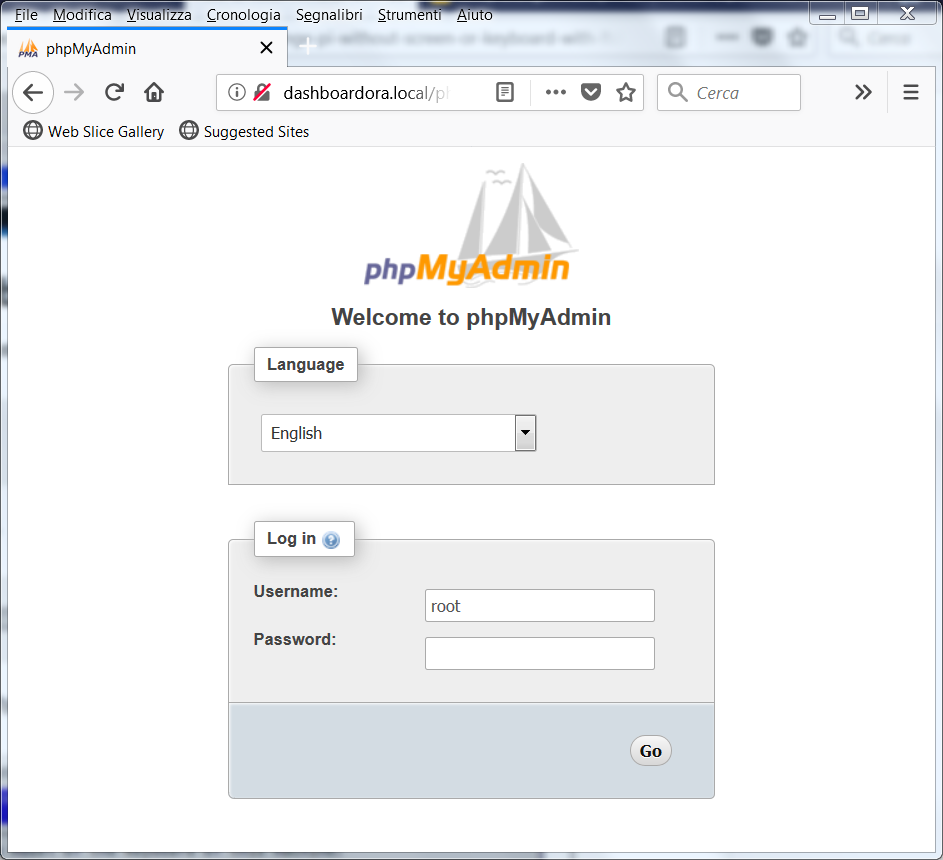
Check that the system works correctly by accessing via web browser by adding to the apache phpmyadmin address, in our case

http://dashboardora.local/phpmyadmin

phpmyadmin2

Log in with the database root credentials.

Mariadb must be enabled to accept connections from other hosts. To do this, go to the folder

and edit the 50-server.cnf file as root, changing the setting

in

To allow the root database user to be able to access from an external client, it is necessary to log on mariadb locally with his client and enable this option; therefore the following is performed


Mysql Workbench Installation on PC

Go to the following link

MySql Workbench

and download the version for your operating system; proceed with the installation.

For Linux the package is also available in the distribution repositories.

After configuring the connection, you access the MySql system control screen.
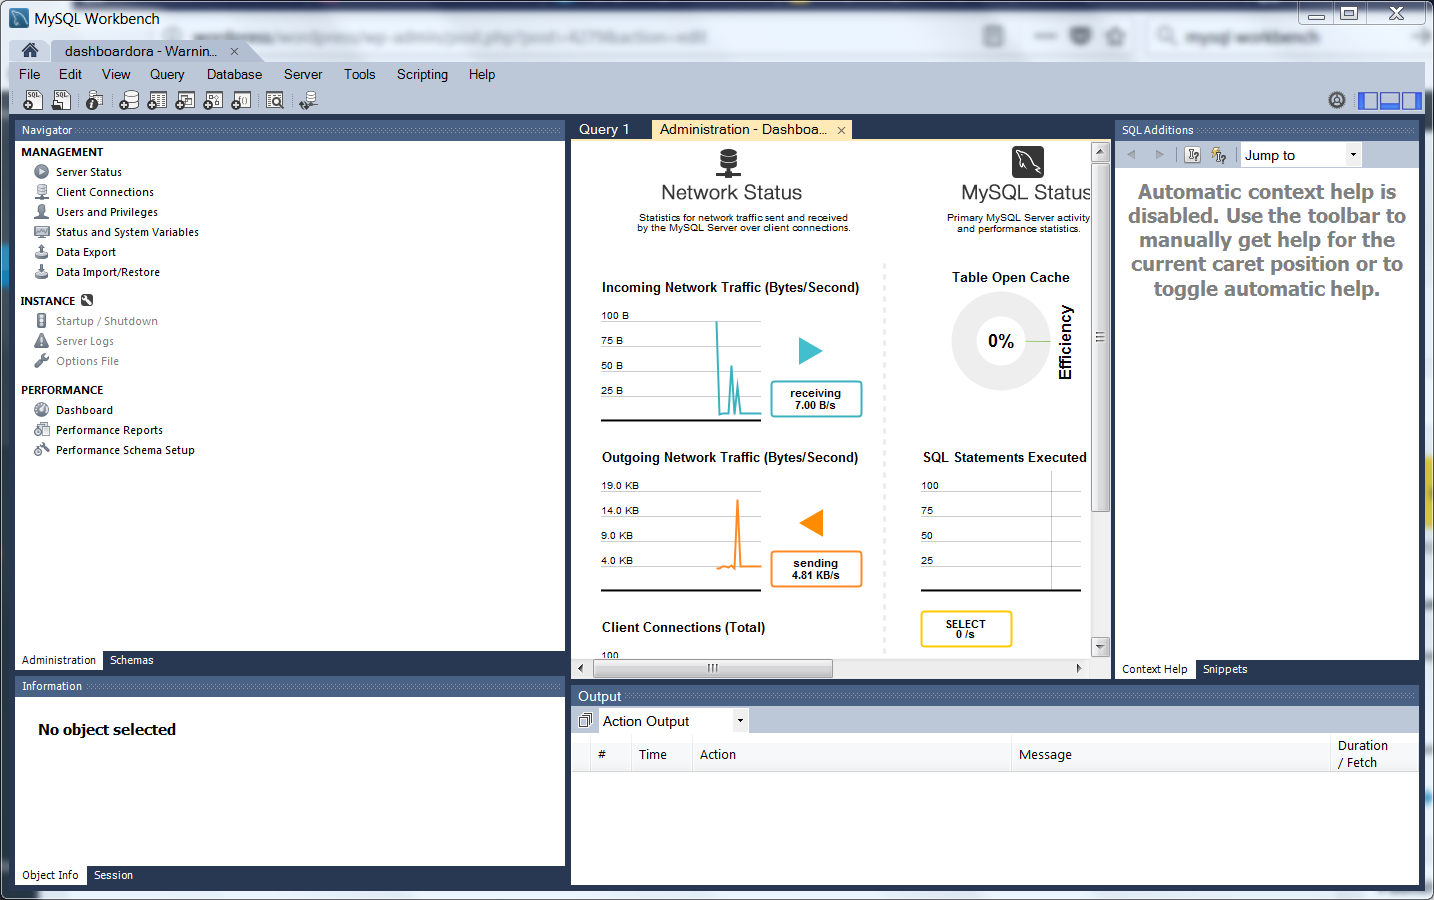
MySQLWorkbenchIn the next article we will continue the installation of the other components to be able to monitor the sensors

Sensors Monitoring – Envinronment Setup 2

MicroPython – Nodes examples with DHT11, Relay and MQTT

In a series of articles seen previously  on Mqtt, Beaglebone and ESP8266

Mqtt with Beaglebone and ESP8266 – Articles List

we have created the infrastructure for managing the ESP8266 nodes .

In this article we program the two ESP8266 nodes  using MicroPython instead of Nodemcu and Lua.

The infrastructure remains identical; on the Beaglebone there is Mqtt Mosquitto Server and Freeboard for the management of the mqtt topics, visualization and interaction.

The ESP8266 node examples with relay and DHT11 sensor use the umqtt MicroPython libraries, available on the site

umqtt simple

In the following examples, only the umqtt simple is used; in the code several delays have been inserted to allow the board to manage the messages and not run into errors; in the case the Mqtt server is not available the code restarts the board.

Below the code used for these examples.

Node with DHT11 sensor

  • boot.py: code executed at startup

  • umqtt/simple.py:  mqtt library

  • dht11.py: module for reading the temperature and humidity on the GPIO2

  • main.py: code executed after boot

  •  client_mqtt.py: Main module for node management

  • riavvia.py: service code to restart the module from uPyCraft


Node with relay

  • boot.py: code executed at startup

  • umqtt/simple.py: mqtt library

    • main.py: code executed after boot

    •  client_mqtt.py: Main module for node management

  • riavvia.py: service code to restart the module from uPyCraft

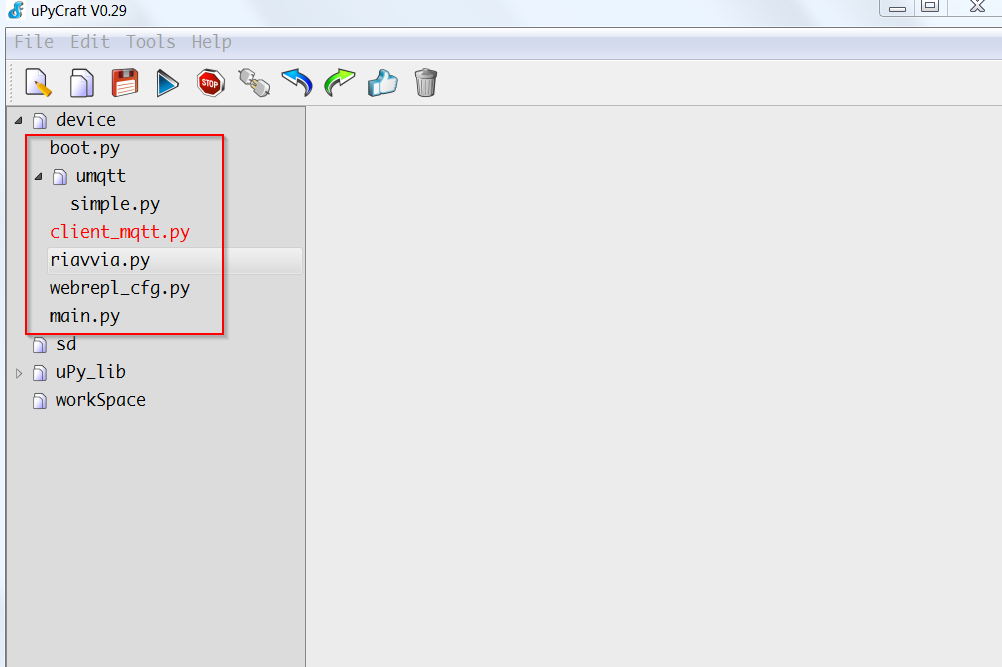
Below is the filesystem on ESP8266 for the relays sample

ESPFilesystemBy accessing Freeboard we have the same informations obtained with Nodemcu and LUA on ESP8266 nodes

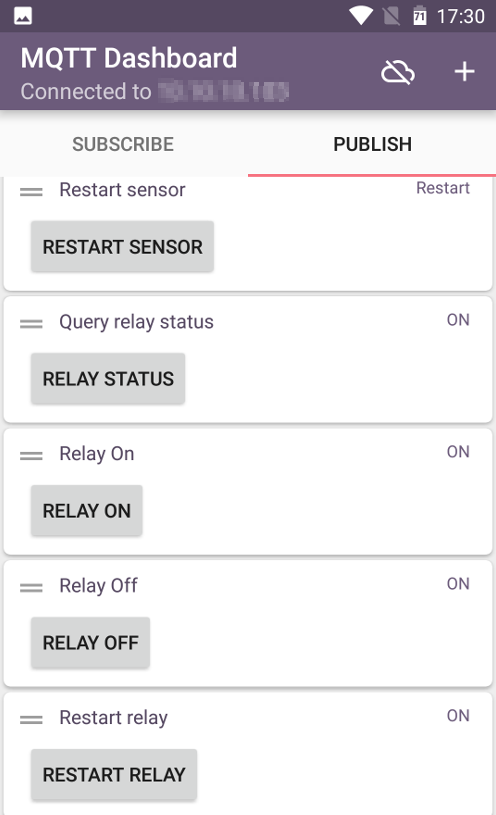
FreeboardMicroPythonBelow are the screens with MQTT Dashboard installed on an Android smartphone, with the possibility to check the status of the relay, read the sensor parameters, restart and sleep the two nodes

MqttPublish

MqttSubscribe

Here are the links to download the two examples

DHT11 sensor sample

Relay sample

In the next article we will compile the MicroPython firmware for ESP8266

MicroPython – MicroPython compiling for ESP8266


Mqtt with Beaglebone and ESP8266 – Freeboard

After the Mqtt web client installation

MQTT with Beaglebone and ESP8266 – WebServer and MQTT WebSocket

let’s install now the dashboard freeboard

Freeboard

In a ssh commad shell go into the /var/www/html  folder on Beaglebone as root and clone the freeboard github respository; change the owner of the freeboard folder in www-data:www-data

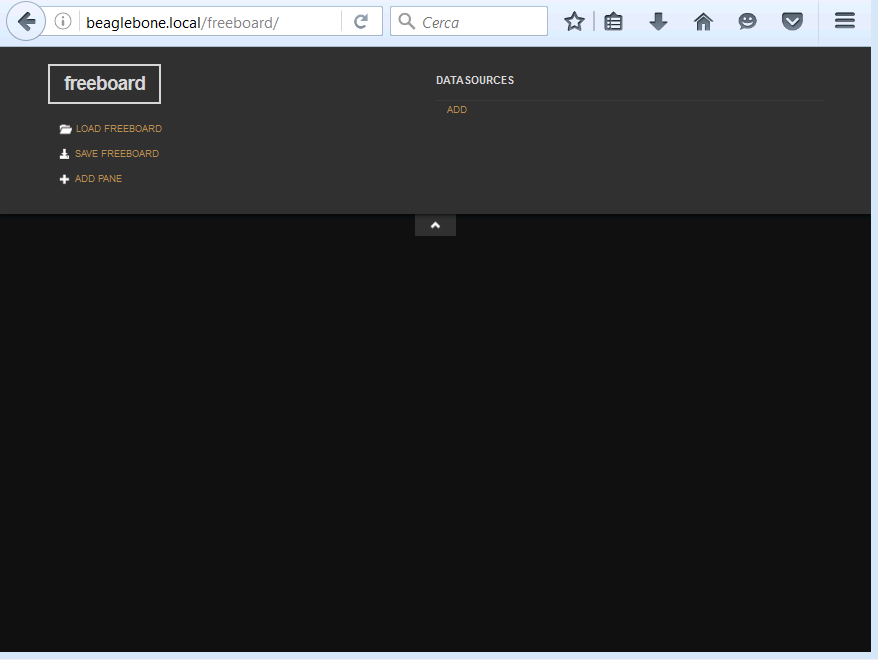
With a web browser go to the freeboard  folder on Beaglebone webserver to access the dashboard

freeboard

We have to add now Freeboard additional plugins. We add the following

  •  freeboard-mqtt

Clone the https://github.com/alsm/freeboard-mqtt github

Download the mqtt paho javascript library

Paho mqtt javascript library

Here is the direct link to the library

Last Version mqttws31.js

Create the mqtt folder under the Freeboard plugins folder and copy the mqttws31.js and paho.mqtt.plugin.js files

Edit the paho.mqtt.plugin.js file and insert the reference to the mqttws31.js library in the external_scripts section; in this case too we have to change the folder and contents owner

Change the owner

Edit the /var/www/html/freeboard/index.html file and insert the reference to the paho.mqtt.plugin.js plugin in the heads.js section

  • Add the dynamic-highcharts plugin

Clone in a folder the github

Copy the plugin_highcharts.js to the folder /var/www/html/plugins/thirdparty and change the owner

Edit again the file /var/www/html/freeboard/index.html and add the plugin as done above

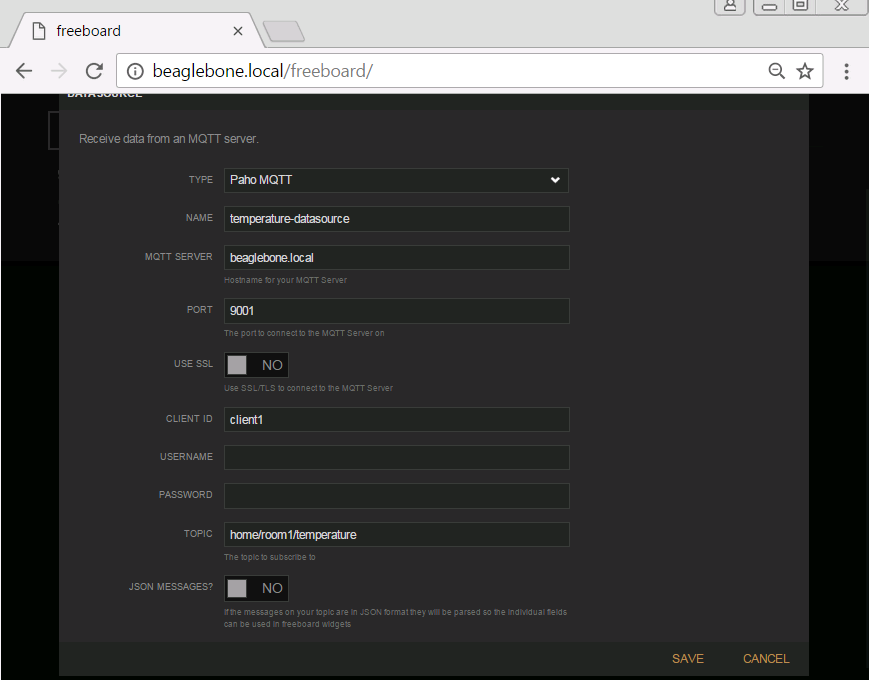
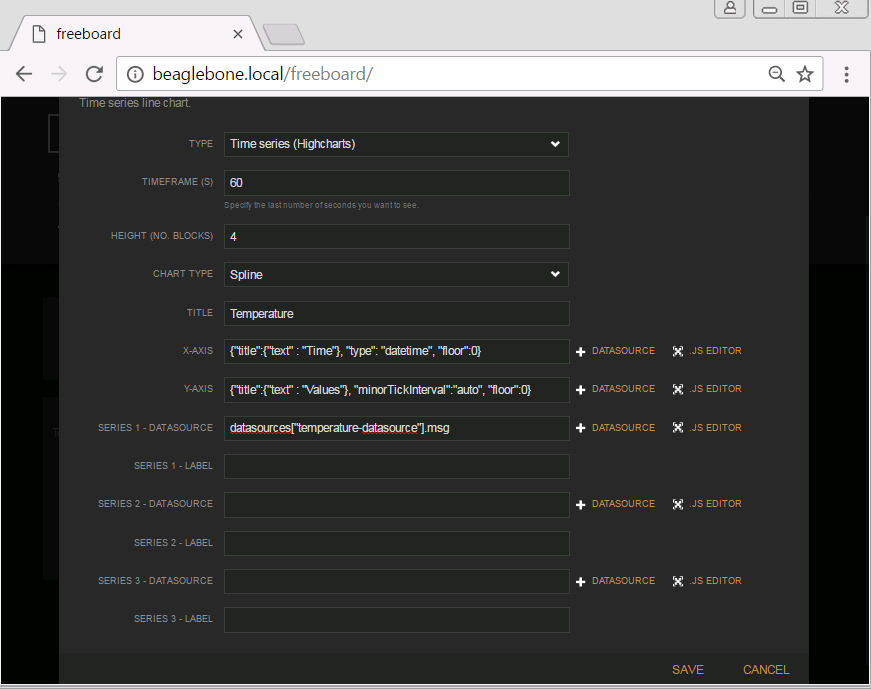
Access now the Freeboard dashboard and add the links to the temperature and humidity topics, the gauges and timeseries mesauring the values in real time and in a specific range of time . Here are some settings:

  • Datasource

freeboard datasource

  • Gauge

freeboard gauge

  • Timeseries

freeboard timeseriesChrome/Chromium browser allows to save the settings in a json file. This settings can be loaded locally or loaded from the web server, saving for example the dashboard.json file in /var/www/html/freeboard,  with the url

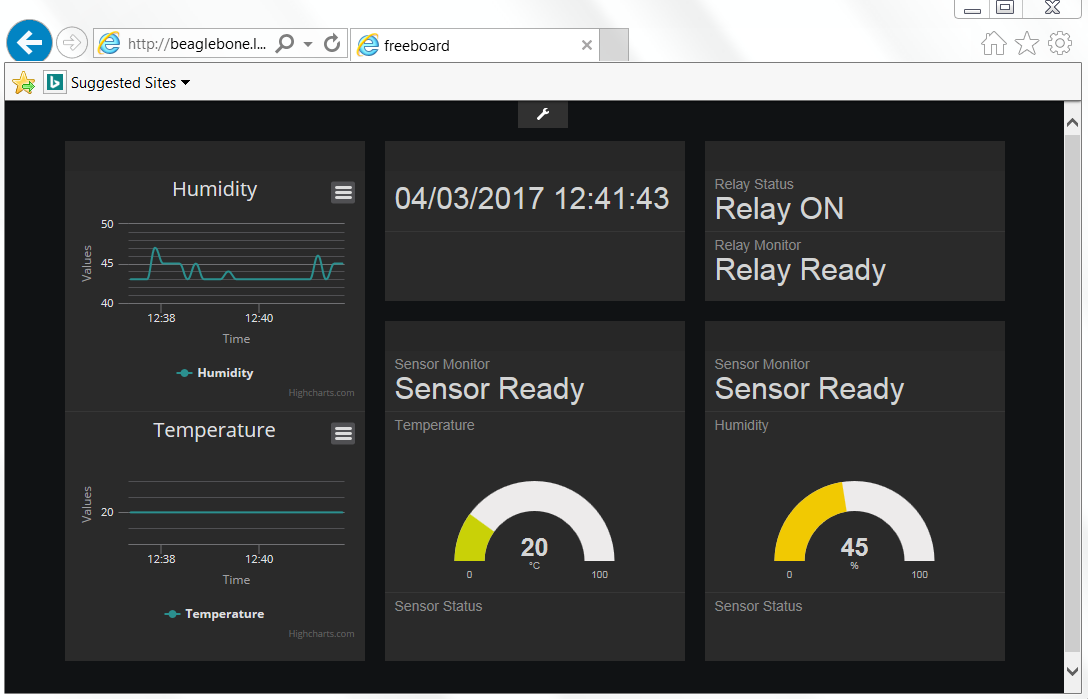
The image shows the Freeboad interface with various widgets showing the status and timeseries of the ESP8266 relay and sensors

freeboard dashboard

In these series of articles we configured the envinronment to access the Beaglebone using the beaglebone.local/beaglebone alias

Debian sd card setup for Beaglebone Black

but you can use anyway the Beaglebone IP tho access the services provided by the board.

In the next article we’ll treat the Mqtt Android client

Mqtt with Beaglebone and ESP8266 – Android Client


MQTT with BeagleBone and ESP8266 – WebServer and MQTT WebSocket

After the MQTT server and  ESP8266 nodes configurations

MQTT with BeagleBone and ESP8266 – Mosquitto installation on Beaglebone

MQTT with BeagleBone and ESP8266-MQTT ESP8266

MQTT with BeagleBone and ESP8266 – MQTT on ESP8266 with temperature sensor

MQTT with BeagleBone and ESP8266 – MQTT on ESP8266 with Relay

we analize now the webserver configuration on BeagleBone and  the Websocket configuration for the broker MQTT mosquitto always on Beaglebone.

First step is to access on the Beaglebone in ssh and disable the following services

Go into the folder /etc/apache2/sites-enabled and modfy 000-default.conf  changing the webserver port from 8080 to 80

In /etc/apache2/port.conf modify the listening port from  8080  to 80

Restart the Http server

Go into folder  /etc/mosquitto/conf.d and create a new file websockets.conf with the following contents inside

Save the file and restart Mosquitto

Disable the IPV6 protocol on  Beaglebone as described at the following link

Disable IPV6 in Debian

In the file /etc/sysctl.conf add

Restart the Beaglebone.

We proceed at this point to install on the http server a MQTT Websocket client and the Freeboard dashboard.

As for the MQTT Websocket client hive-MQTT we download the code from github

Hive mqtt

Log in as root in ssh on Beaglebone and go into /var/www/html folder;  clone the Mqtt client into mqtt-web folder and change the owner of this folder

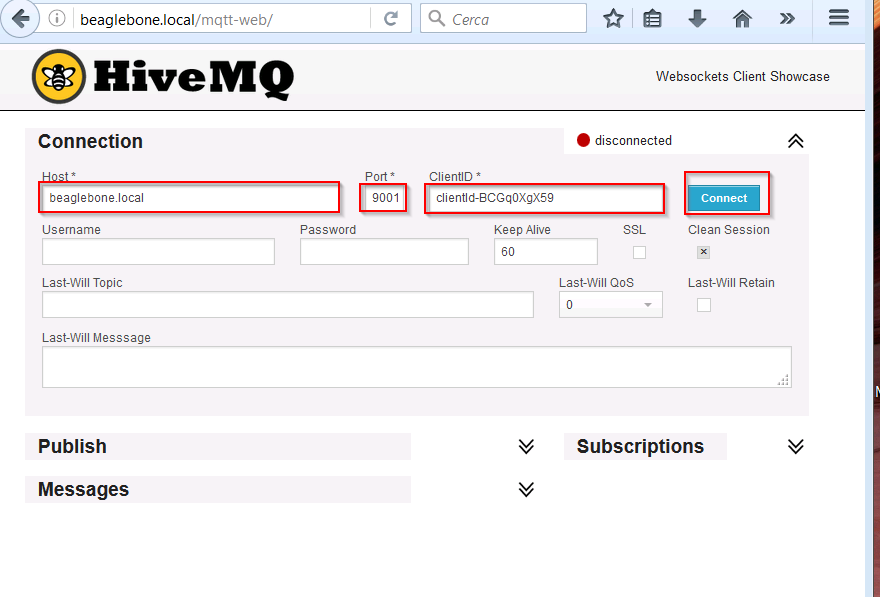
With a web browser navigate on our Http server to the mqtt-web link obtaining the Mqtt Web client; we can now set the parameters for the connection to the Mosquitto Mqtt Broker

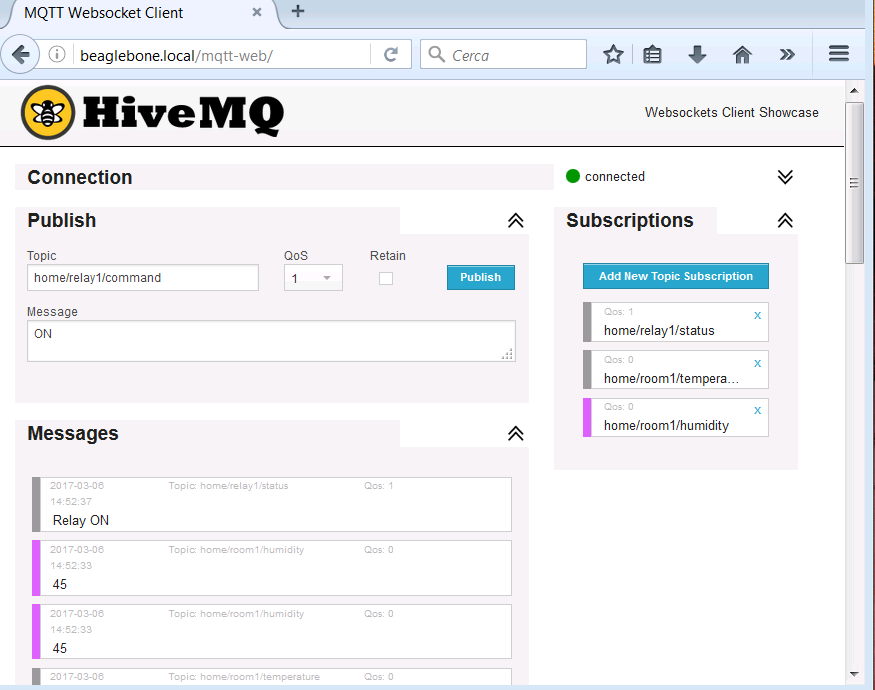
mqtt web client connectionPopulating the values for the subscription and publishing topics we can access to the messages of the topics and the ability to perform a command to the publishing topic

mqtt web clientIn the next article we’ll install the Freeboad dashboard on the Beaglebone

Mqtt with Beaglebone and ESP8266 – Freeboard