
This article describes how to set the Espressif development environment for the ESP32.
From the link to the resources for the soc
https://www.espressif.com/en/products/hardware/esp32/resources
we access the guide for compiling the firmware on the Windows, OSX and Linux platforms
http://esp-idf.readthedocs.io/en/latest/get-started/index.html
In this article we use Linux Debian 9 as operating system, configured as described previously here
MicroPython – Python ib embedded devices
We use the IDF github. On Debian 9, with the user used to connect to the system, we create the Esp32 folder under the user’s Home and the espressif folder inside it
|
1 2 3 4 5 |
cd mkdir Esp32 cd Esp32 mdkir espressif cd espressif |
Install the prerequisites
|
1 |
sudo apt-get install git wget make libncurses-dev flex bison gperf python python-serial |
Download the cross compiler
|
1 |
wget https://dl.espressif.com/dl/xtensa-esp32-elf-linux64-1.22.0-80-g6c4433a-5.2.0.tar.gz |
Create the esp folder and unpack the toolchain
|
1 2 3 |
mkdir esp cd esp tar -zxvf ../xtensa-esp32-elf-linux64-1.22.0-80-g6c4433a-5.2.0.tar.gz |
Add the bin folder of the cross compiler to the PATH
|
1 |
export PATH=$PATH:$HOME/Esp32/espressif/esp/xtensa-esp32-elf/bin |
Add the user used for the operations to the dialout group
|
1 |
sudo usermod -a -G dialout USER |
Clone the IDF repository from $HOME/Esp32/espressif
|
1 2 |
cd $HOME/Esp32/espressif git clone --recursive https://github.com/espressif/esp-idf.git |
Add the IDF_PATH environment variable
|
1 |
export IDF_PATH=~/Esp32/espressif/esp-idf |
Create the project folder under $HOME/Esp32/espressif and copy an example from di IDF examples
|
1 2 3 4 5 |
cd $HOME/Esp32/espressif mkdir projects cd projects cp -r $IDF_PATH/examples/get-started/hello_world . cd hello_world |
Run the configuration
|
1 |
make menuconfig |
Access Serial flasher config -> and set the connection parameters; in our case we leave the default
 Save the configuration and build the firmware
|
1 |
make |
To upload the firmware on the device run
|
1 |
make flash |
To upload only the application run
|
1 |
make app-flash |
while to build only the application run
|
1 |
make app |
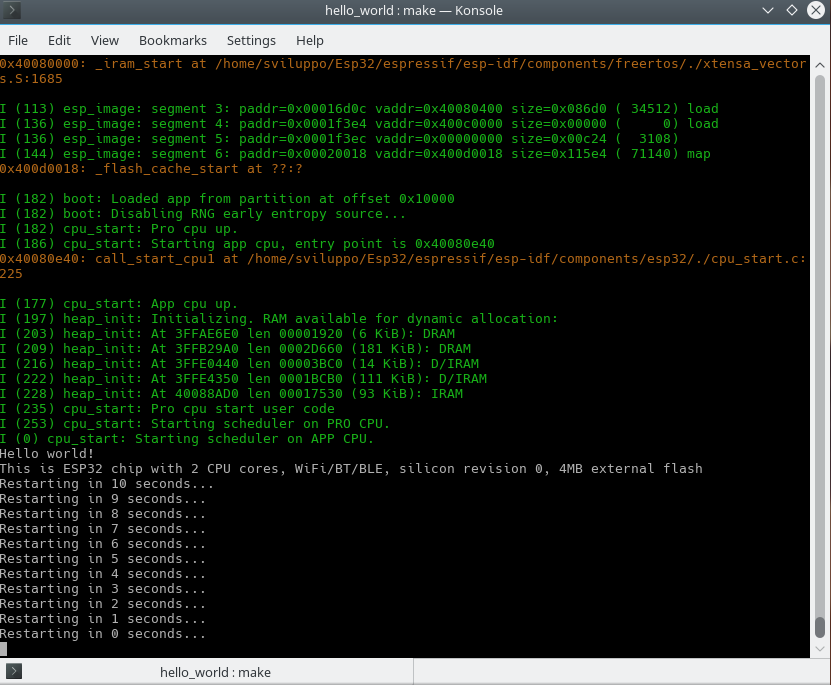
To run the program monitor run
|
1 |
make monitor |
 Here are the other examples available with sdk
https://github.com/espressif/esp-idf/tree/f586f5e/examples
The following link contains the references of the IDF API
http://esp-idf.readthedocs.io/en/latest/api-reference/index.html
You can also generate documentation from the github source. Go into ~/Esp32/espressif/esp-idf/docs/en
|
1 |
cd ~/Esp32/espressif/esp-idf/docs/en |
Install the prerequisites
|
1 |
sudo apt-get install python-pip python-sphinx doxygen |
|
1 |
sudo pip install sphinx_rtd_theme breathe sphinxcontrib.blockdiag sphinxcontrib.seqdiag sphinxcontrib.actdiag sphinxcontrib.nwdiag recommonmark |
Generate documentantion in html format
|
1 |
make html |

The documentation is available under _build / html.
In the next article we will configure Eclipse as IDE to build our applications