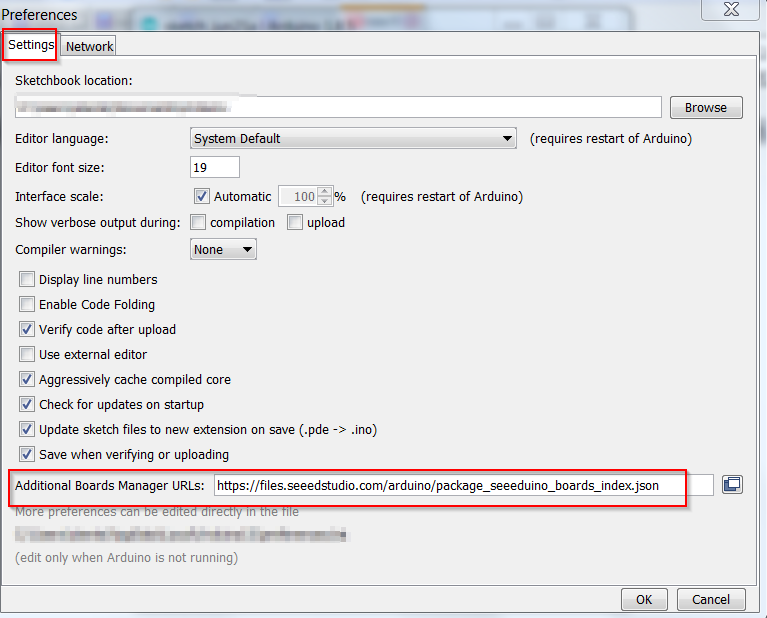
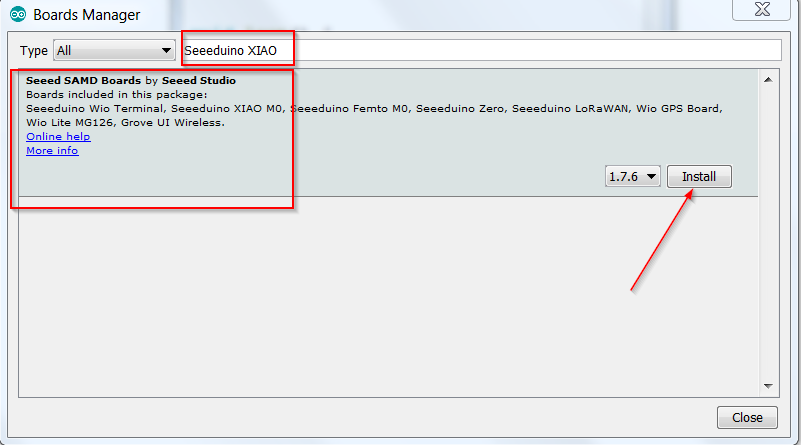
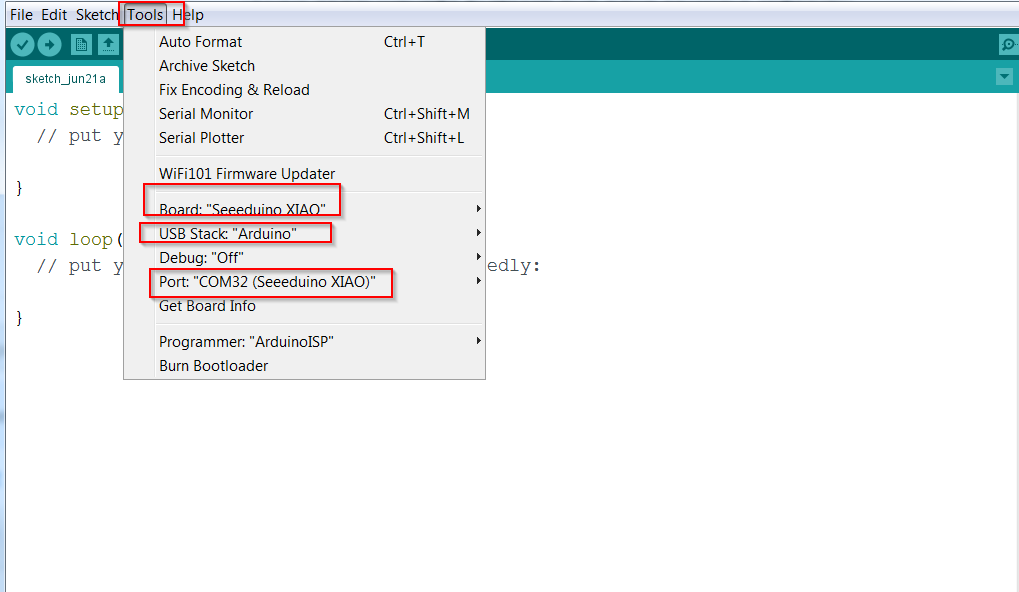
After the Arduino IDE environment configuration for the Seeeduino XIAO board in the previous article
Seeeduino XIAO – Arduino Envinronment
in this we will make a small example with this card.
In the project we’ll use the following components
- Ultrasonic sensor HC-SR04
- I2C Oled Display 0,96 pollici SSD1306
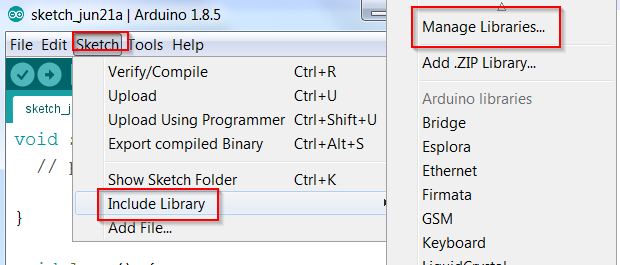
The first step is to install the libraries of the two components listed above on Arduino.
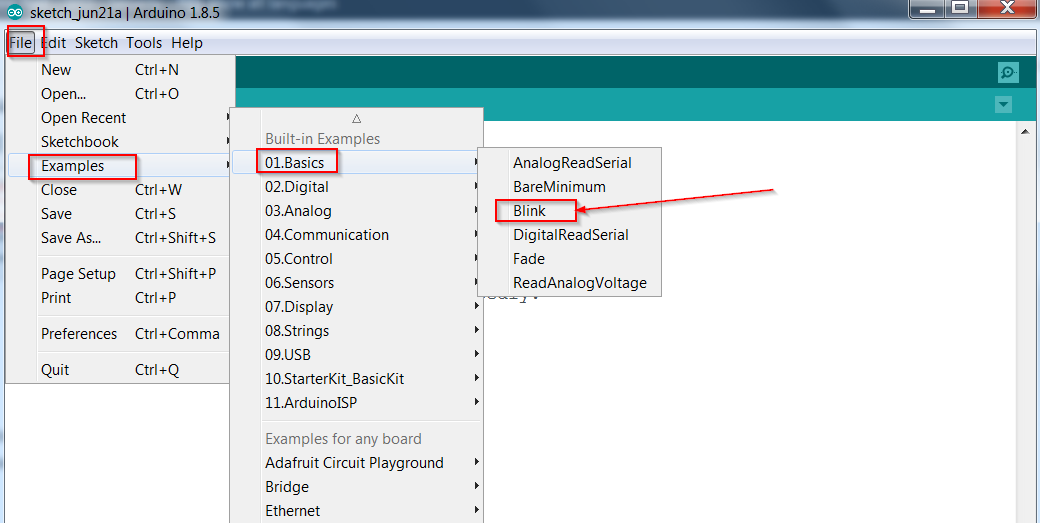
In the Arduino IDE, go to the menu Sketch->Include Library->Manage Libraries
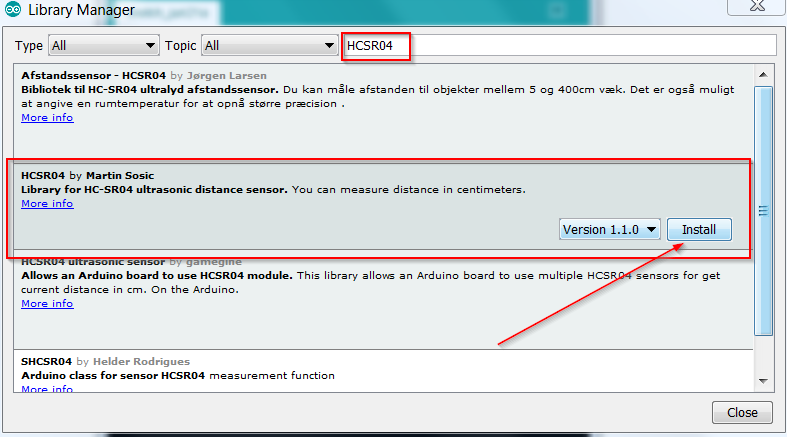
 For HCSR04 we choose HCSR04 by Martin Sosic
 For SSD1306 we choose ACROBOTIC SSD1306

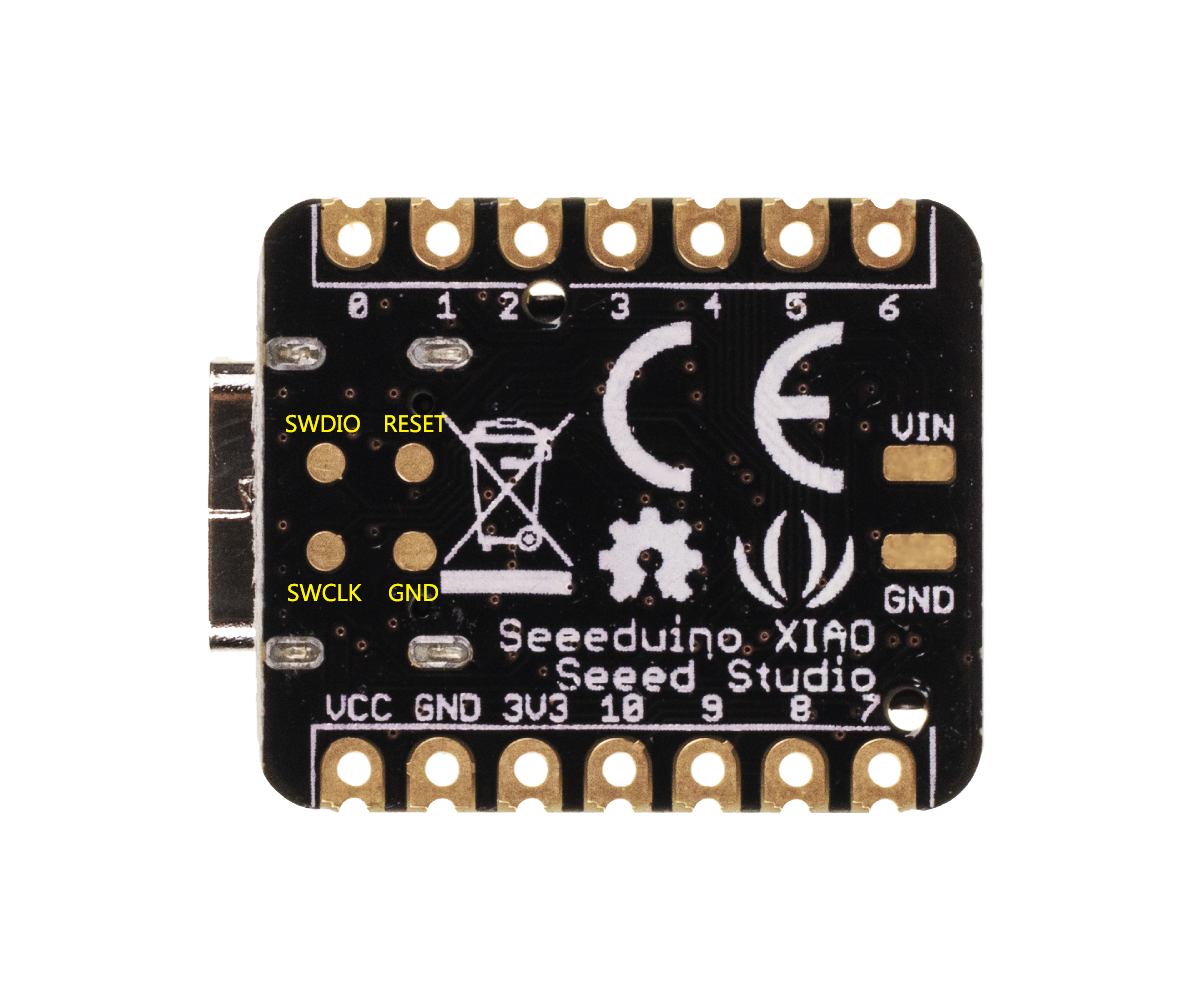
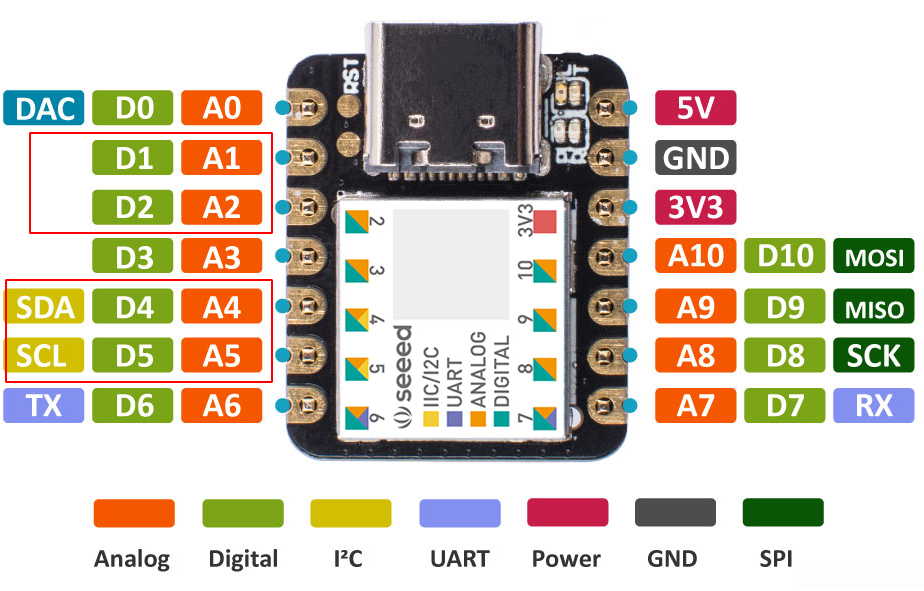
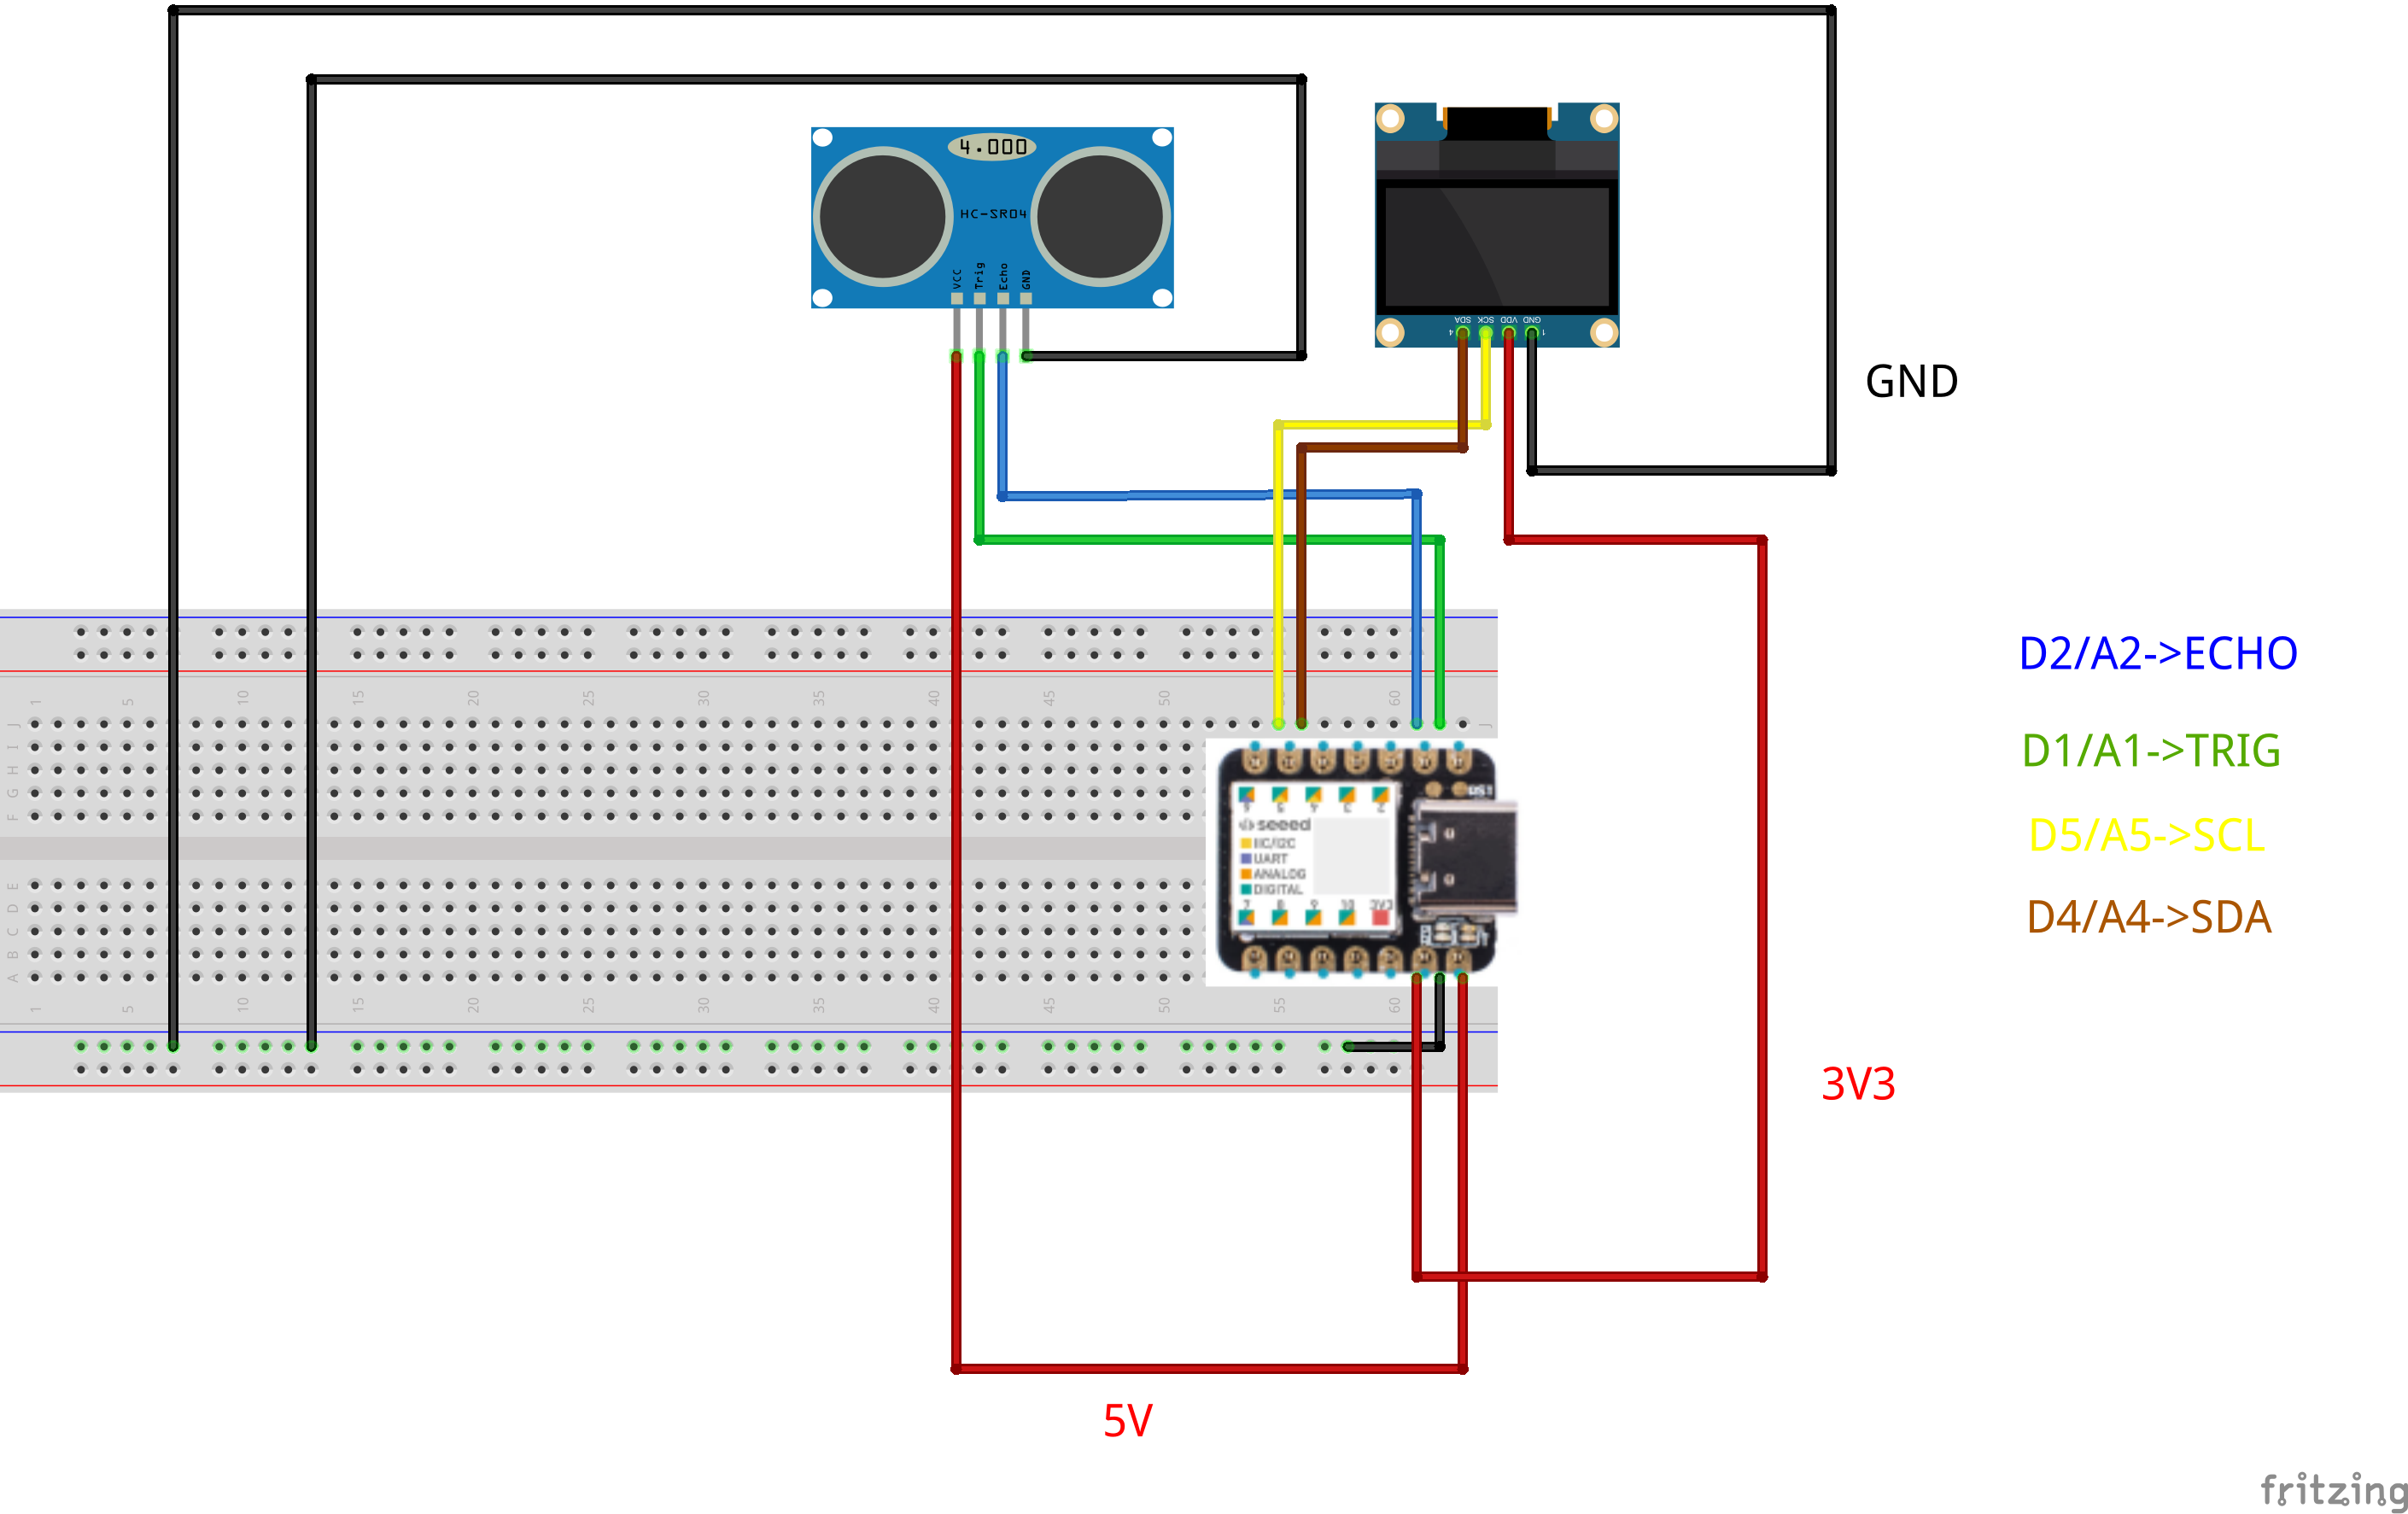
Now we have all the components for the project. We connect the components to the Seeeduino XIAO as listed in the following table
| XIAO PIN | SSD1306 PIN | HCSR04 PIN |
|---|---|---|
| 3V3 | VDD | |
| GND | GND | GND |
| 5V | VCC | |
| D2 | ECHO | |
| D1 | TRIG | |
| D5 | SCK | |
| D4 | SDA |
As can be seen from the table, we use the I2C and digital pins 1,2 of the XIAO
 Below is the connections diagram
 The example code is the following
|
1 2 3 4 5 6 7 8 9 10 11 12 13 14 15 16 17 18 19 20 21 22 23 24 25 26 27 28 29 30 31 32 33 34 35 36 37 38 39 40 41 42 43 44 45 46 47 48 49 50 51 52 53 54 55 56 57 58 59 60 61 62 63 64 65 66 67 68 69 70 71 72 73 74 75 76 77 78 79 80 81 82 83 84 85 86 87 88 89 90 91 92 93 94 95 96 97 98 99 100 101 102 103 104 105 106 107 108 109 110 111 112 113 114 |
//Include HCSR04 Library #include <HCSR04.h> //Include Wire Library #include <Wire.h> //Include Oled SSD1306 Library #include <ACROBOTIC_SSD1306.h> //Variables to store the objects distance, distanza, and the initial measure: distanza0 float distanza, distanza0; //Variable to store the string to show on the Oled Screen char misura[10]; //if the difference between distanza and distanza0 is greater than the threshold errore //the new distance and a warning is shown on the screen const float errore=20.0; // Initialize ultrasonic sensor //XIAO D1-> HCSR04 Trig //XIAO D2-> HCSR04 Echo UltraSonicDistanceSensor distanceSensor(1, 2); //Display messages on the oled void displayMessage() { // Set cursor position, line 4 0th character oled.setTextXY(4,0); //Show the measurement oled.putString(misura); // Set cursor position, line 6 0th character oled.setTextXY(6,0); //Show the Warning Message oled.putString("OBJ DETECTED"); } void setup() { //Initialize serial port to send messages Serial.begin(9600); //Initiate the Wire library and join the I2C bus as a master or slave Wire.begin(); // Initialze SSD1306 OLED display oled.init(); // Clear screen oled.clearDisplay(); // Set cursor position, start of line 0 oled.setTextXY(0,0); //Show an heading message oled.putString("OBJECTS"); // Set cursor position, start of line 1 oled.setTextXY(1,0); //Show an heading message oled.putString("DETECTION"); //At the start measure the distance in cm without objects intrusion distanza0=distanceSensor.measureDistanceCm(); //Clear misura content memset(misura,'\0',sizeof(misura)); //Send the data to be shown to the string variable misura sprintf(misura, "D in cm: %.2f", distanza0); // Set cursor position, line 4 0th character oled.setTextXY(4,0); //Show the measurement on the Oled oled.putString(misura); } void loop() { //Measure the distance in cm in the field of view of the ultrasonic sensor distanza=distanceSensor.measureDistanceCm(); //Send the measurement to the Arduino Serial Port Serial.println(distanza); //Clear misura content memset(misura,'\0',sizeof(misura)); //Send the data into the string variable misura sprintf(misura, "D in cm: %.2f", distanza); //Wait for 500 milliseconds delay(500); //if the new measurement differs from the initial one of a quantity greater than defined in errore variable, //the new measurement is displayed on the Oled Screen with the warning message if(abs(distanza-distanza0)>errore) { //Display the misura content on the Oled displayMessage(); } } |
If an object passes through the sensor’s field of view, the event is signaled on the OLED screen with the recorded measurement. Inside the code there are the descriptions of all the operations performed.
Here is the link to the source code file