Libreelec8 addon building for Orange PI PC

In the article about the Libreelec8 build for Orange PI PC

Libreelec8 in OrangePI PC

we created the environment and compiled the Libreelec8 image for our development board. We integrate what it has been said in the previous article showing how to build  the Libreelec 8 addons for our Orange PI PC board.

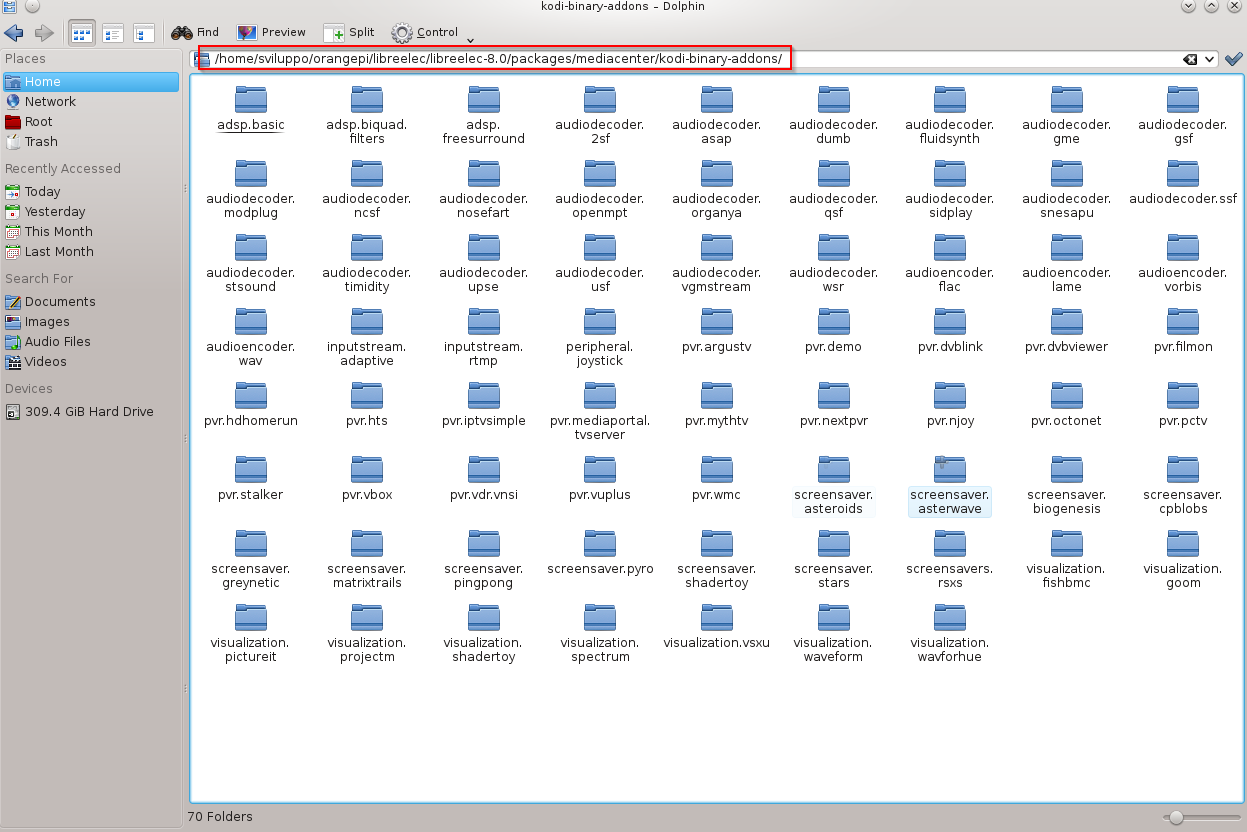
Now we proceed to build some addons. The packages that you can build are available in the kodi-binary-addons folder as shown below

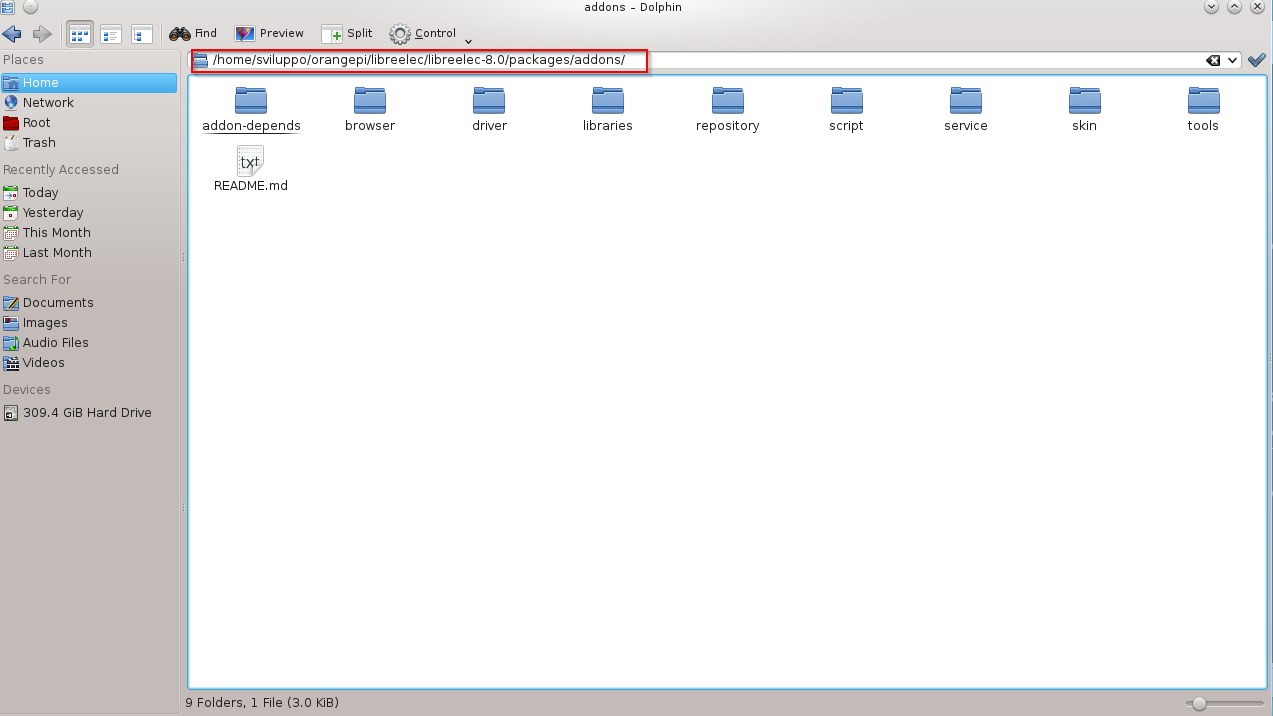
libreelec8 addonsand in the packages/addons folder
addons packages

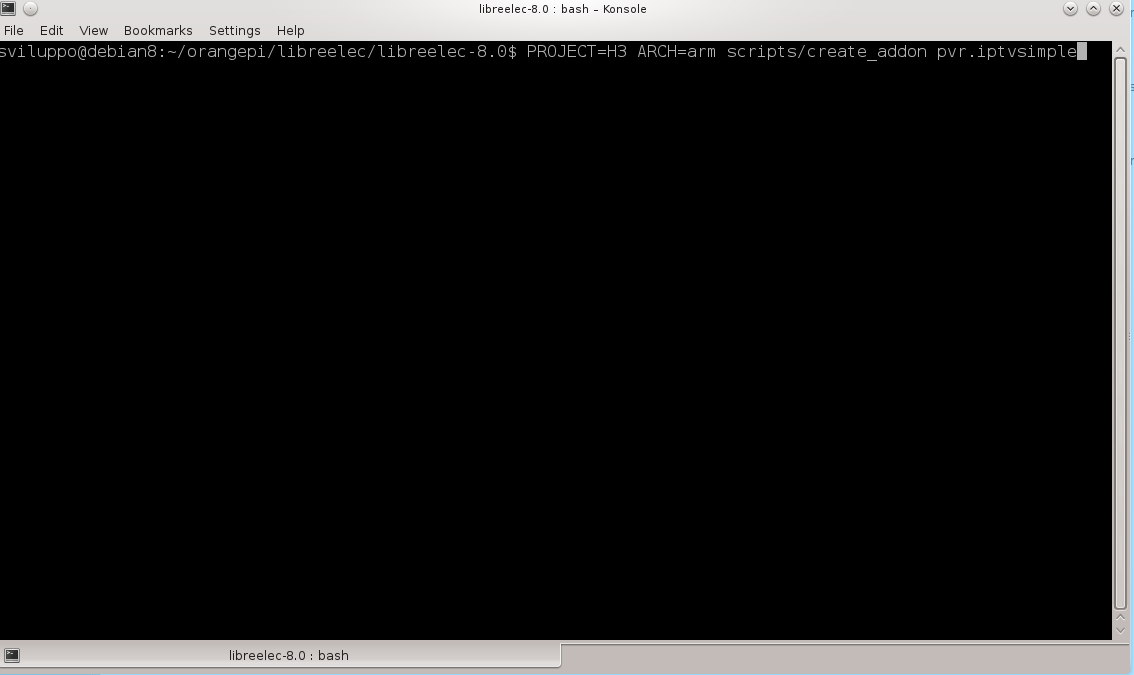
We build the  pvr.iptvsimple addon running the following command from the /home/sviluppo/orangepi/libreelec/libreelec-8.0 folder

addon command

We build the proftpd addon, among those avaliable in the packages/addons  folder
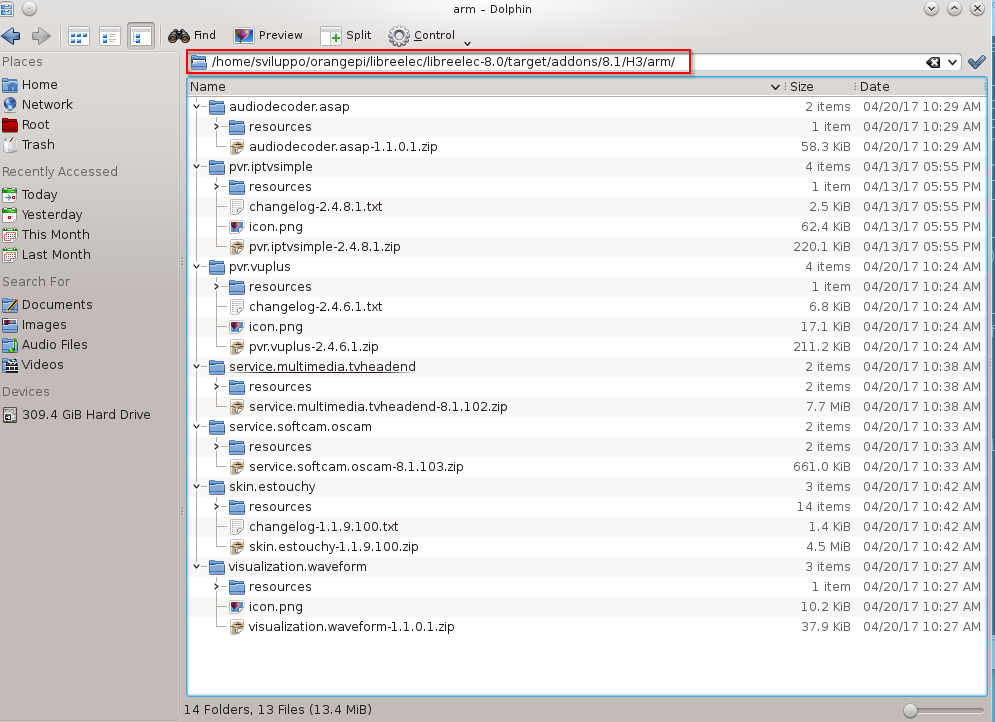
The compiled addons are available in the following folder

addons

Here are the links to download some compiled addons

PVR addons

Service Addons

Mqtt with Beaglebone and ESP8266 – Freeboard

After the Mqtt web client installation

MQTT with Beaglebone and ESP8266 – WebServer and MQTT WebSocket

let’s install now the dashboard freeboard

Freeboard

In a ssh commad shell go into the /var/www/html  folder on Beaglebone as root and clone the freeboard github respository; change the owner of the freeboard folder in www-data:www-data

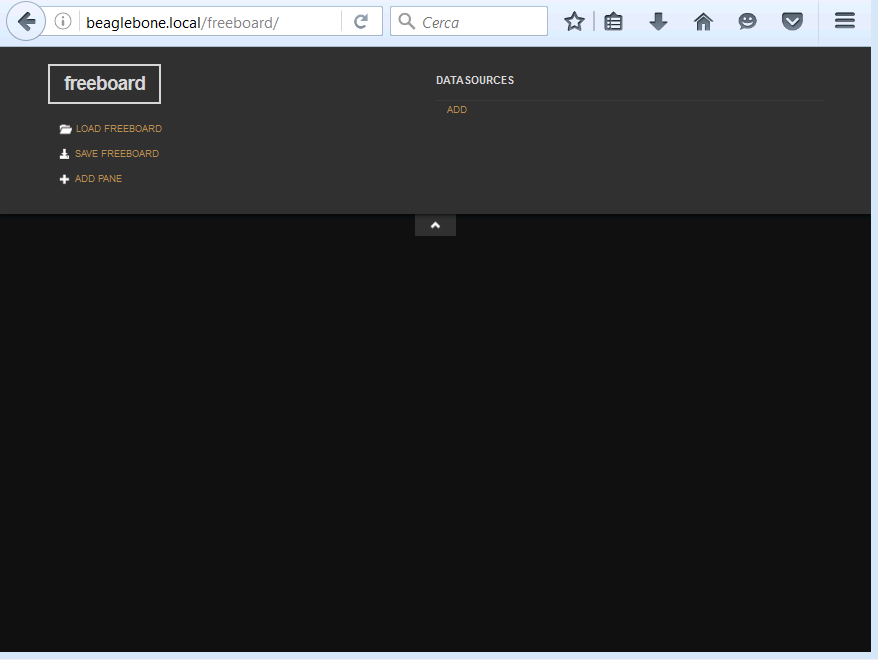
With a web browser go to the freeboard  folder on Beaglebone webserver to access the dashboard

freeboard

We have to add now Freeboard additional plugins. We add the following

  •  freeboard-mqtt

Clone the https://github.com/alsm/freeboard-mqtt github

Download the mqtt paho javascript library

Paho mqtt javascript library

Here is the direct link to the library

Last Version mqttws31.js

Create the mqtt folder under the Freeboard plugins folder and copy the mqttws31.js and paho.mqtt.plugin.js files

Edit the paho.mqtt.plugin.js file and insert the reference to the mqttws31.js library in the external_scripts section; in this case too we have to change the folder and contents owner

Change the owner

Edit the /var/www/html/freeboard/index.html file and insert the reference to the paho.mqtt.plugin.js plugin in the heads.js section

  • Add the dynamic-highcharts plugin

Clone in a folder the github

Copy the plugin_highcharts.js to the folder /var/www/html/plugins/thirdparty and change the owner

Edit again the file /var/www/html/freeboard/index.html and add the plugin as done above

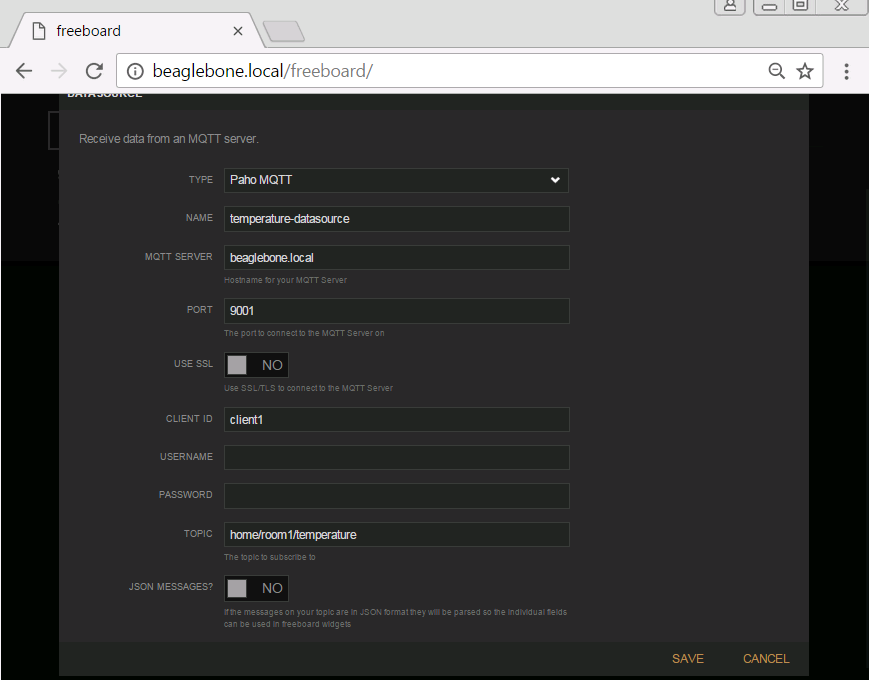
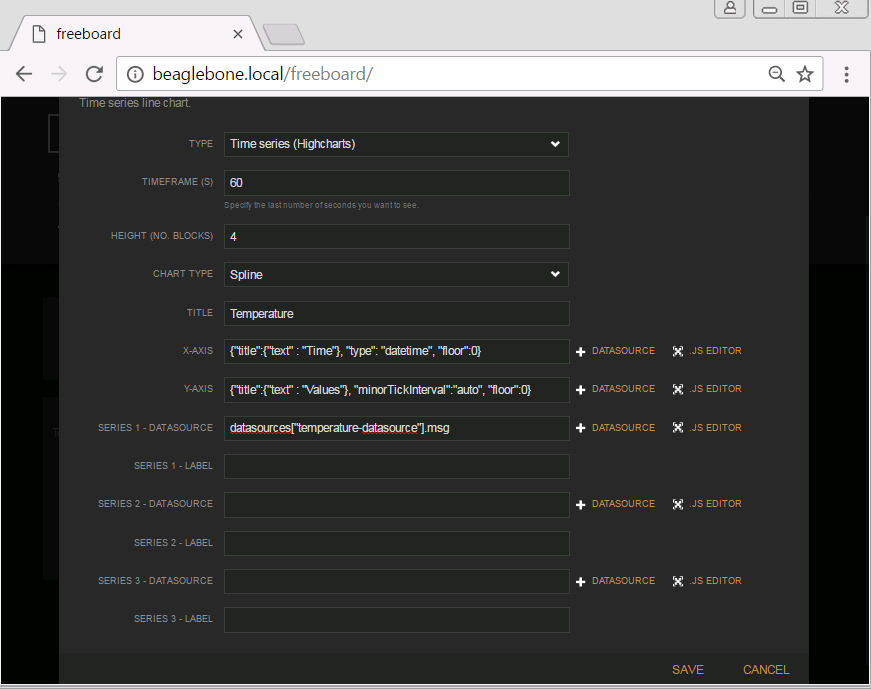
Access now the Freeboard dashboard and add the links to the temperature and humidity topics, the gauges and timeseries mesauring the values in real time and in a specific range of time . Here are some settings:

  • Datasource

freeboard datasource

  • Gauge

freeboard gauge

  • Timeseries

freeboard timeseriesChrome/Chromium browser allows to save the settings in a json file. This settings can be loaded locally or loaded from the web server, saving for example the dashboard.json file in /var/www/html/freeboard,  with the url

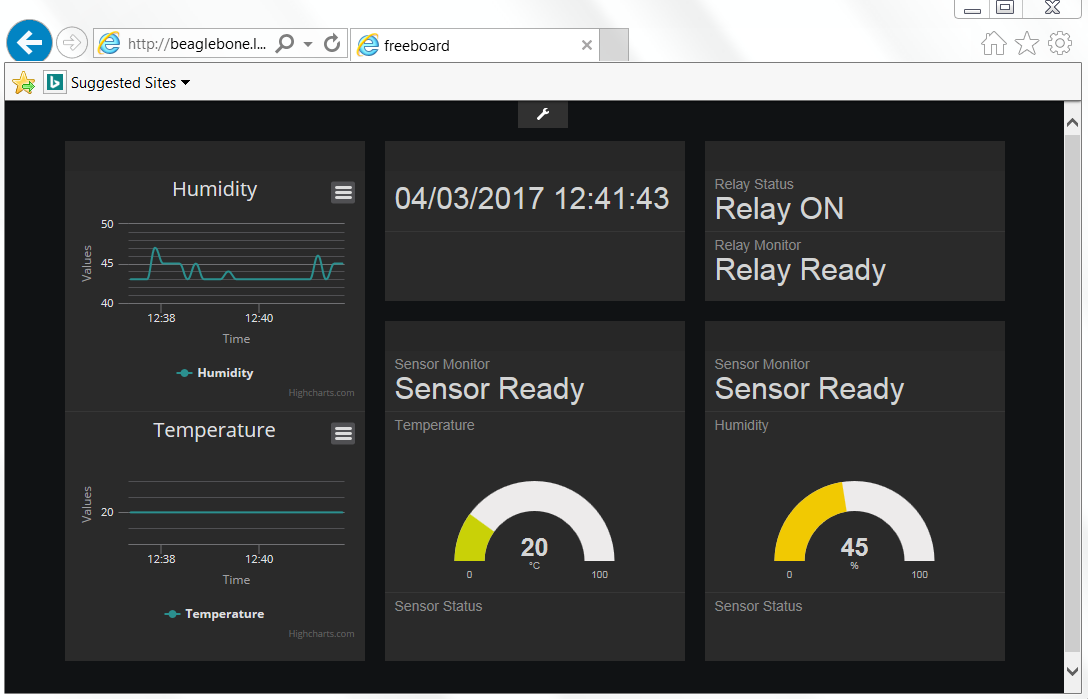
The image shows the Freeboad interface with various widgets showing the status and timeseries of the ESP8266 relay and sensors

freeboard dashboard

In these series of articles we configured the envinronment to access the Beaglebone using the beaglebone.local/beaglebone alias

Debian sd card setup for Beaglebone Black

but you can use anyway the Beaglebone IP tho access the services provided by the board.

In the next article we’ll treat the Mqtt Android client

Mqtt with Beaglebone and ESP8266 – Android Client


Libreelec8 in OrangePI PC

This article describes the steps that I ran to prepare a first version of Libreelec 8 in Orange PI PC cards and other H3 socs.

Starting from the Debian development envinronment, with its installed packages, already used for the compilation of OpenELEC 7

 Openelec compilation for Orange PI PC

we proceed to build an Libreelec 8 image.

We started as basis from the work done for Openelec 7 and Libreelec 7 available on the two github repositories

H3 Openelec 7 Github

H3 Libreelec 7 Github

Log in a unix command shell as user sviluppo; create a folder, libreelec , under orangepi folder and move into it

Clone the Libreelec8 github

The patches have been created for a specific version of the commit, so we align our github clone to that version

Download from the following link the patches, the H3 project and other stuff

H3 Libreelec 8

Unzip this file in /home/sviluppo/orangepi/libreelec

Run the following steps

1)Copy  to /home/sviluppo/orangepi/libreelec/libreelec-8.0/projects the folder

H3

2) Copy to /home/sviluppo/orangepi/libreelec/libreelec-8.0/packages/multimedia  the folders

cedarx
libmpeg2

3) Copy to /home/sviluppo/orangepi/libreelec/libreelec-8.0/packages/tools the folder

sunxi-tools

4) Copy to /home/sviluppo/orangepi/libreelec/libreelec-8.0/packages/sysutils  the folder

  sunxi-sys-utils

5) Copy to /home/sviluppo/orangepi/libreelec/libreelec-8.0/packages/graphics  the folder

sunxi-mali

6) Copy to /home/sviluppo/orangepi/libreelec/libreelec-8.0/packages/linux-drivers  the folder

mt7601u

7)  The following patches are available in /home/sviluppo/orangepi/libreelec/H3LE8/patches folder

linux.patch

image.patch

mkimage.patch

kodi.patch

libcec.patch

u-boot.patch

u-boot-release.patch

u-boot-update.patch

Patch the code from the /home/sviluppo/orangepi/libreelec folder running the following commands

Proceed to the image build for Orange PI PC from the folder /home/sviluppo/orangepi/libreelec/libreelec-8.0  running

At the end of the compilation in the /home/sviluppo/orangepi/libreelec/libreelec-8.0/target folder we find the files to install or update Libreelec 8

 At the link

Openelec 7 H3 FAQ

we find the boards we can build changing the SYSTEM parameter in the building command

SYSTEM=opi2
SYSTEM=opione
SYSTEM=opipc
SYSTEM=opiplus
SYSTEM=opilite
SYSTEM=opipcplus
SYSTEM=opiplus2e
SYSTEM=bpim2p
SYSTEM=bx2

This image is a first attempt to build Libreelec 8 for  H3  socs. The image was installed on Orange PI PC and the system worked well, but still bugs and malfunctions may occur.

Here is the built Libreelec 8 image for Orange PI PC

Orange PI PC Libreelec 8 Image

We tested this image on an Orange PI PC board.

Here are other images we did’t test on the devices

Orange Pi2 Libreelec 8 Image

Orange Pi Lite Libreelec 8 Image

Orange Pi One Libreelec 8 Image

Orange Pi PC Plus Libreelec 8 Image

Orange Pi Plus Libreelec 8 Image

Orange Pi Plus 2e Libreelec 8 Image

WARNING: The image installation on the device is at your own risk. We accept no responsibility if the installation leads to  malfunction or block of the device.

The following article shows how to build the addons

Libreelec 8 addon building for Orange PI PC

MQTT with BeagleBone and ESP8266 – WebServer and MQTT WebSocket

After the MQTT server and  ESP8266 nodes configurations

MQTT with BeagleBone and ESP8266 – Mosquitto installation on Beaglebone

MQTT with BeagleBone and ESP8266-MQTT ESP8266

MQTT with BeagleBone and ESP8266 – MQTT on ESP8266 with temperature sensor

MQTT with BeagleBone and ESP8266 – MQTT on ESP8266 with Relay

we analize now the webserver configuration on BeagleBone and  the Websocket configuration for the broker MQTT mosquitto always on Beaglebone.

First step is to access on the Beaglebone in ssh and disable the following services

Go into the folder /etc/apache2/sites-enabled and modfy 000-default.conf  changing the webserver port from 8080 to 80

In /etc/apache2/port.conf modify the listening port from  8080  to 80

Restart the Http server

Go into folder  /etc/mosquitto/conf.d and create a new file websockets.conf with the following contents inside

Save the file and restart Mosquitto

Disable the IPV6 protocol on  Beaglebone as described at the following link

Disable IPV6 in Debian

In the file /etc/sysctl.conf add

Restart the Beaglebone.

We proceed at this point to install on the http server a MQTT Websocket client and the Freeboard dashboard.

As for the MQTT Websocket client hive-MQTT we download the code from github

Hive mqtt

Log in as root in ssh on Beaglebone and go into /var/www/html folder;  clone the Mqtt client into mqtt-web folder and change the owner of this folder

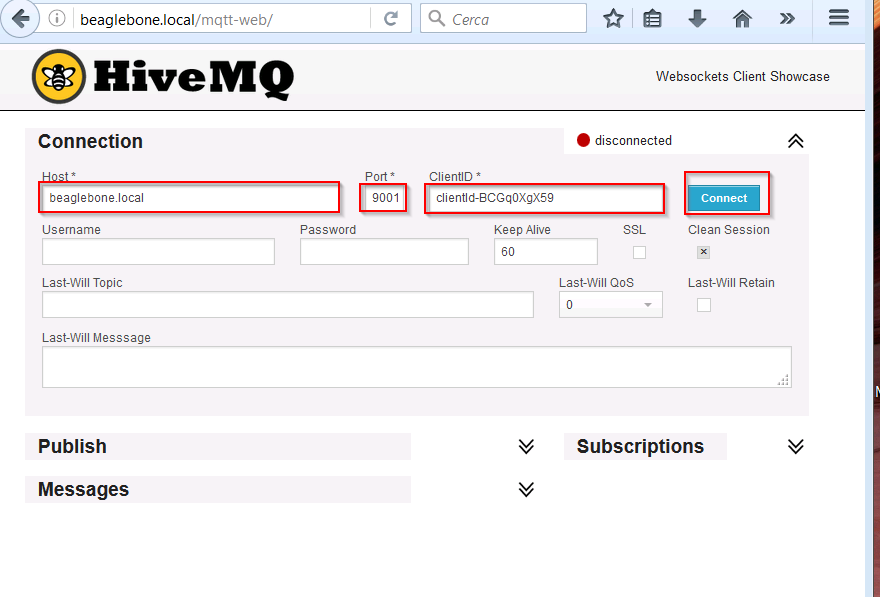
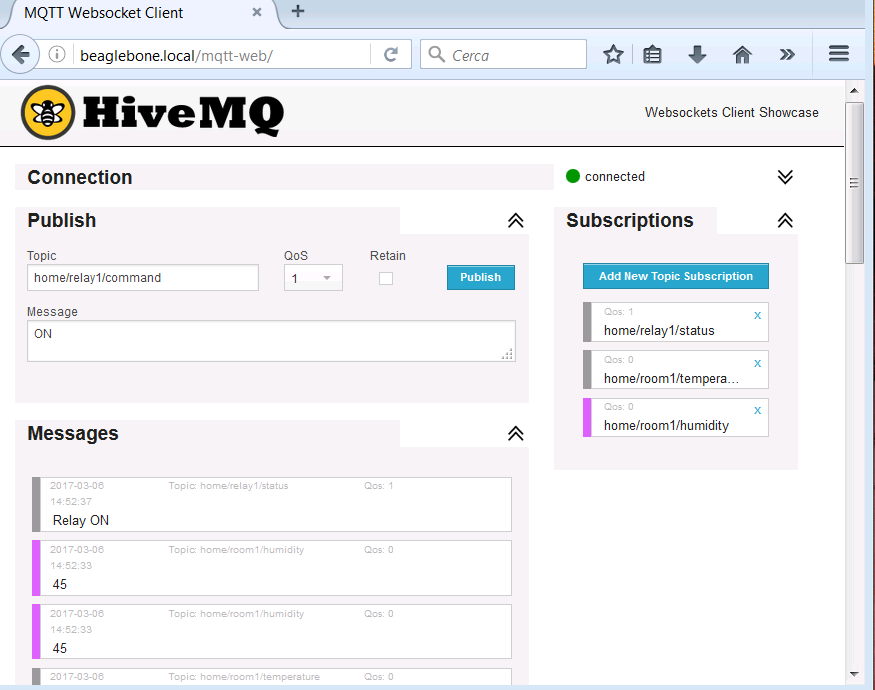
With a web browser navigate on our Http server to the mqtt-web link obtaining the Mqtt Web client; we can now set the parameters for the connection to the Mosquitto Mqtt Broker

mqtt web client connectionPopulating the values for the subscription and publishing topics we can access to the messages of the topics and the ability to perform a command to the publishing topic

mqtt web clientIn the next article we’ll install the Freeboad dashboard on the Beaglebone

Mqtt with Beaglebone and ESP8266 – Freeboard

MQTT with BeagleBone and ESP8266 – MQTT on ESP8266 with Relay

After the article about the connection with the temperature and humidity sensor

MQTT with BeagleBone and ESP8266 – MQTT on ESP8266 with temperature sensor

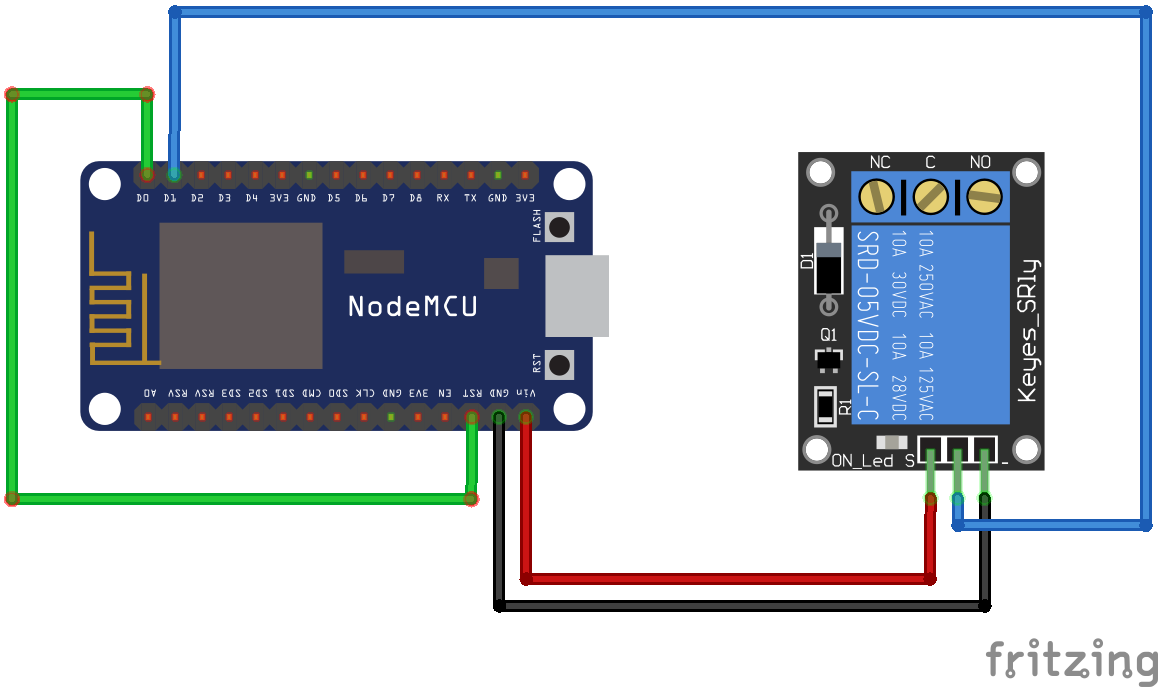
in this article we set the esp8266 to run a relay. Here is how we connect the relay to the ESP module

nodemcu relay

In this example too we will consider the option of putting the nodemcu in sleep. To have the node back form the sleep the system has to reboot and  it is necessary to connect the PIN D0 (GPIO16) to RST PIN as specified in the nodemcu documentation

Nodemcu sleep

Let us take a look at the lua code; It consists of init.lua and relay.lua files.

We analyze now the main points of each file

  • init.lua

In the file we set the the parameters to access the wifi network, the address and port of the MQTT broker  and the file to be run on the ESP after wifi connection to the access point is estabilished. If the ESP doesn’t acquire the network address the system is restarted.

  • relay.lua

The relay.lua file manages the relay, the subscription on MQTT broker with submission of the data. Global parameters have been set to manage the topic, the waiting time in tmr.alarm. There are in particular the following topics

  • /home/relay1/status : Status topic. The status is sent at the start and at  request from the command topic /home/relay1/command.
  • /home/relay1/monitor: Status of the esp sent periodically to this topic.
  • /home/relay1/command: Other clients can send commands to the esp:
    • Restart: Restarts the esp.
    • Sleep n: Put to sleep for n seconds the esp.
    • ON: Turn on the  relay.
    • OFF: Turn off the  relay.
    • Status: Request of tthe relay status (ON or OFF).

There are various service functions to manage all. The comments in the code describe each feature.

In the next article we will set up the webserver on Beaglebone and the websocket configuration for Mosquitto always on the Beaglebone

MQTT with BeagleBone and ESP8266 – WebServer and MQTT WebSocket