Tag Archives: firmware

Openelec addon building for Orange PI PC

In the article about the OpenELEC build for Orange PI PC

Openelec building for Orange PI PC

we created the environment and compiled the OpenELEC image for our development board. We integrate what it has been said in the previous article showing how to build  the Openelec addons for our Orange PI PC board.

As stated in the linked article we have to open a shell command window in the  OPENELEC-OPIPC folder

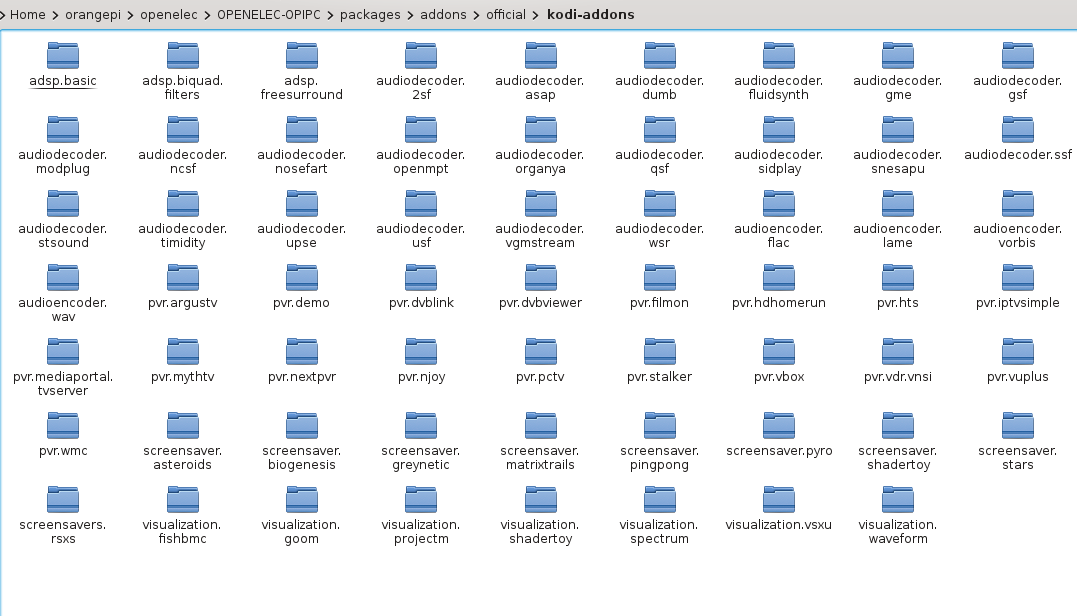
Using the  graphical interface in Debian we can verify the availabilty of the official addons structure. To add the unofficial ones we have to run from the  OpenELEC-OPIPC folder

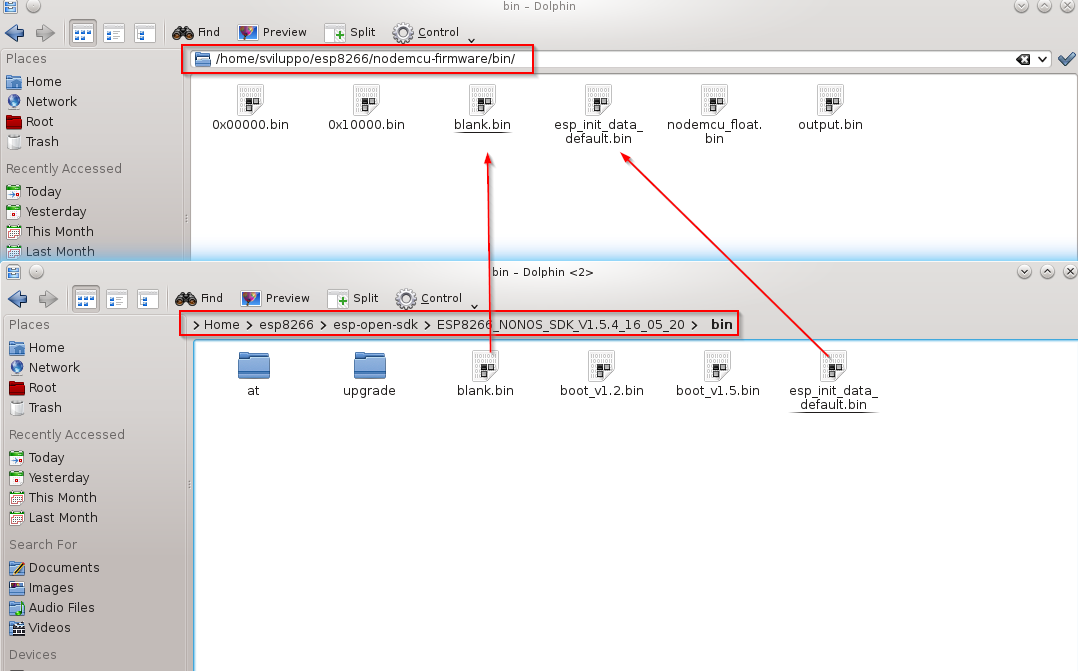
Now we proceed to build an official addon and an unofficial one. The packages that you can build ara available in the official folder as shown below

official Addonsand in the unofficial folder

unofficial Addons

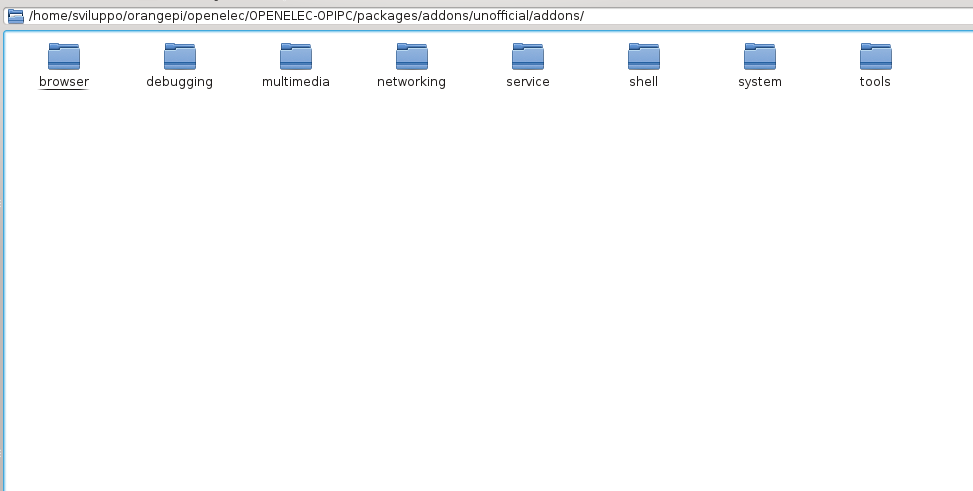
We build the  official pvr.iptvsimple addon with the command

For the unofficial we build the p7zip module

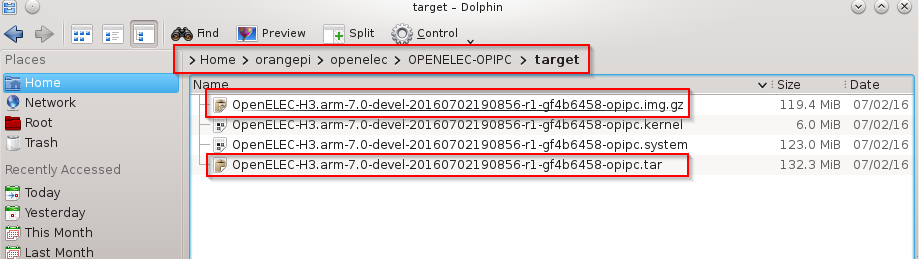
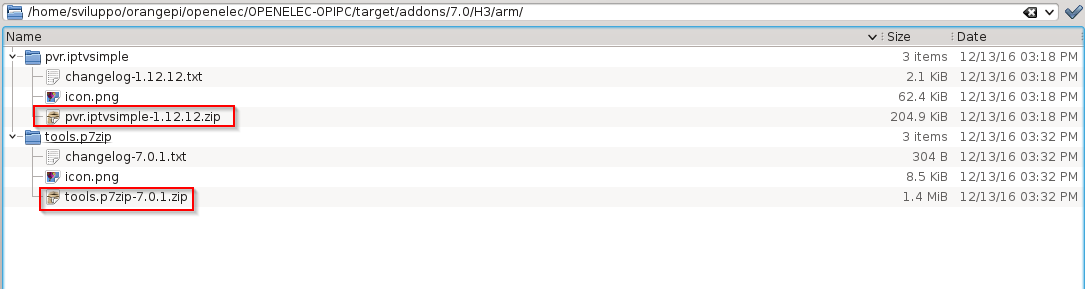
The compiled addons are availablein the following folder

addons

In the case of errors in the compliation check the logs and proceed consequently. For example in the case of trasmission the system was not able to download the source package using the link in the package.mk file

To overcome this unexpected error we added another link to the package, i.e.  we  changed the package.mk file from

to

In this way, the transmission addon has been compiled correctly, always with the command

Nodemcu Enduser_setup module lua sample(part2)

After the firmware build and its upload to the nodemcu dev kit, we connected a switch to pin D5, as shown in the previous article

Nodemcu Enduser_setup module lua sample(part1)

We finally can upload some sample code in which we use the enduser_setup module

Open ESPlorer and load the following sample code

  • webserver.lua

  • riasserawifi.lua

  • init.lua

 It is possible to download the above samples at the following link

 Sample code

Here is the documentation about the enduser_setup module

enduser_setup module documentation

The example consists of three files:

  1. init.lua:  It is executed at the startup of the esp8266.
  2. riazzerawifi.lua: It starts the portal to connect and save the configuration to your Access Point.
  3. webserver.lua:  It starts the webserver sample on the nodemcu.

As you can see from the code in init.lua, when the pin D5 is in the state HIGH, we start the portal using enduser_setup module. In the case in which the pin D5 is in the state LOW the  esp8266 acquires the IP from an Access Point defined previously after which the test webserver starts.

To save the access point confguration to which we want to connect we place the switch in order to have the HIGH input on pin D5 and reboot the card.

From a PC we can observe the presence of another access point, defined in the file riazzerawifi.lua

composed by Mynode string + ChipID module

nodemcu portal wifiWe can connect to this access point and  via browser we  access to the portal at the ip address 192.168.4.1

Login portal wifi nodemcuSelect or enter the SSID of an access point providing the correct   password. After the connection reposition the switch to have  the LOW state  for pin D5 and reboot the nodemcu dev kit.

Now the system will automatically connect to the SSID defined previously and starts the example of the web server.

Please refer to the Lua documentation nodemcu for further study and usable modules

LUA Nodemcu Documentation

Nodemcu Enduser_setup module lua sample(part1)

In the previous article we showed a sample LUA code for ESP8266

Lua sample code for esp8266

Let us now see an example in which we’ll use the enduser_setup Lua module.

As a first step we compile the nodemcu firmware by including the enduser_setup module. We have to apply the same steps discussed in the build process article

Nodemcu firmware build

editing the app/include/user_modules.h file and uncommenting the line

After the building and firmware upload to the device, we use a switch connected to nodemcu dev kit as shown in the picture

reset access point nodemcu

The pin D5 can be connected to a low or high input voltage. Based on the input voltage we can change the behavior of the system.

Note: The Pin D5 in this specific example has been used as Input Pin; in the case of use as Output Pin, you must insert a resistor to limit the output current, as specified in the link

GPIO Pin Allocations

In the next article we’lll upload a LUA sample code with enduser_setup module enabled and we’ll utilize it to manage the wifi connections

Nodemcu Enduser_setup module lua sample(part2)

Nodemcu compilation on Linux

We’ll cover the steps to follow to create your own Nodemcu image with cross compiling on Linux.

We always start from the Debian envinronment described in the previous article

Debian Envinronment

 According the following link

Cross Compilation

as first step we prepare the cross compiling envinronment.

Log on Debian with our development user (sviluppo in our case) and create an esp8266 folder in  a terminal window

We install the prerequisites

We download the open-esp-sdk repository

to proceed to its compilation

At the end of the compilation we have the following messages

So we have to include in the PATH variable the following

We can clone at this point the Nodemcu firmware github. Always from the previous terminal window run

Once placed in the esp8266 folder execute

At the end go into the nodemcu-firmware folder

Before proceeding to the creation of our first firmware we have to make  changes in the app / include / user_config.h file configuration:

  • We enable the directive for our devkit 0.9 (our devkit)

#define DEVKIT_VERSION_0_9 1     // define this only if you use NodeMCU devkit v0.9

  • We change the USB communication speed (speed for our devkit)

//#define BIT_RATE_DEFAULT BIT_RATE_115200
#define BIT_RATE_DEFAULT BIT_RATE_9600

  • We change the flash size to 4M (flash of our nodemcu devkit)

#define FLASH_4M
// #define FLASH_8M
// #define FLASH_16M
//#define FLASH_AUTOSIZE

We save the file and proceed to the creation of the firmware with the command

At the end under the bin folder

we’ll find two files: 0x00000.bin and 0x100000.bin. We generate a single file nodemcu_float.bin with the command

At this point we have to enable the sviluppo user to use the usb port with the command

Debian has no need for additional USB drivers. In the presence of virtual machine enable the USB device.

Access to the SDK downloaded and compiled previously; in the bin folder copy the files

  • blank.bin
  • esp_init_data_default.bin

into the folder we generated the 0x00000.bin and 0x100000.bin files

binDefaultAt this point we are able to flash the firmware on the device using the esptool. In the next article we’ll descrive how to load the firmware

Nodemcu firmware upload with esptool

Building OpenWrt firmware

After the brief description of OpenWrt system in the previous article

OpenWrt

we describe now how to build the firmware for our router.

We use as tartget device the TP-Link TL-MR3420 router version 1.

This model is in the list of the supported OpenWrt devices; here is the specific documentation for this device

TP-Link TL-MR3420

From the documentation we know that the SOC is an Atheros AR7241. This information will be used in the configruation phase of the buildin envinronment.  As a preliminary operation also download the original firmware of this router from the link

Original Firmware

In the page TP-Link TL-MR3420 we find the links to two differents versions of the OpenWrt firmware:

  • Firmware used to install OpenWrt: openwrt-15.05.1-ar71xx-generic-tl-mr3420-v1-squashfs-factory.bin.
  • Firmware used to update OpenWrt: openwrt-15.05.1-ar71xx-generic-tl-mr3420-v1-squashfs-sysupgrade.bin

If we have the original firmware in our device we must utilize the first one, while in the case of updates we use the second one..

We now execute the operation described in the link

OpenWrt Building

in the Debian envinronment installed in previous article

Debian Envinronment

In a shell command window we install the prerequisites as non root user (sviluppo in our case)

We create a folder OpenWrt under the home user folder (sviluppo in our case) and clone the repository. In this build we choose the stable branch 15.05

At the end of the git task, execute

We are now ready to build the firmware of the TP-Link TL-MR3420 V1.

Execute the command

and we choose as target Target System AR7xxx/AR9xxx as described in the following screenshotsOpenWrtmenuconfigWith the following choices we change the options

  • y: we buil it.
  • m: we build it as module.
  • n: we skip it.

At the following link

OpenWrt Building

we find all the documentation about the building.

In the Target System with enter we can choose our Target PlatformOpenWrtmenuconfigAtherosWe have to install the base packages to admin the system, so we access LuCI OptionOpenWrtmenuconfigLucithen CollectionsOpenWrtmenuconfigLuciCollectionsand at the end the luci package; with this option the system installs an http server tooOpenWrtmenuconfigLuciCollectionsBaseWe choose as modules some cryptographics packages in the kernel modules sectionsOpenWrtmenuconfigKernelModulesthen Cryptographic Api modulesOpenWrtmenuconfigKernelModulesCryptoApiand at the end the following modules merged into the firmware fileOpenWrtmenuconfigKernelModulesCryptoApioptionsYou should save the configuration in a file in order to use it again later. Finally save the configuration in the .config file.

We can now exit the menuconfig and execute the following command in the shell command window

This task checks for the prerequisites.

To build the firmware we execute

in verbose mode.

At the end of the task we can find the firmware in the atheros platform under the bin folder. In our case our images are highlighted in the following screenshotOpenWrtFirmwareWe can now flash the firmware.

WARNING: Before installing the firmware verify the recovery process of your router in the event of a problem, i.e how to start in recovery mode, flash via tftp, use JTAG, etc. The image installation on the device is at your own risk. We accept no responsibility if the installation leads to  malfunction or block of the device.

The OpenWrt web site describes all the vaious options to build the firmware and packages. In the next article

Building OpenWrt package

we’ll describe how to build and install from a shell window command the vsftpd package.

Building Armbian image for Orange PI PC

We treat now the bulding of the image Armbian for Orange PI PC. From the developer’s github

Armbian Github

we find the steps to do the task.

From the Armbian site

Building Armbian

the supported building envinronment is Ubuntu. In our test we use Ubuntu 16.04.1 LTS x86-64

Ubuntu

and our Debian 8.5 envinroment used for the other tasks described on this site. With Ubuntu the compile.sh script installs all the required packages to build the image.  On the Armbian web site we can find also various compilation options..

Using Debian 8.5 as host, we have to exectute some prerequisites tasks described below. In the case of issues execute the building on Ubuntu..

First we install the cross compilation envinronment in Debian

https://wiki.debian.org/CrossToolchains

We have to create the file  crosstools.list in /etc/apt/sources.list.d

Edit this file and add the line

Save the file and add the repository key using curl. We install the curl package

and add the key

Now we are ready to install the packages and architecture as listed below

At this point the procedure is the same on Ubuntu or Debian. We create a folder called armbian under orangepi folder in the home folder of the linux system; in our case the user is sviluppo

We clone the repository with the following command in a shell command window in the armbian folder

To build the image execute

When requested enter the root password and for our image select the options described below.

  • Full OS image

fullosimage

  • Orangepipc board

orangepipc

  • default kernel

defaultkernel

  • Debian stable image

debianstable

  • Image with desktop envinronment

debiande

We find the image under the folder output/images ready to be transferred on a micro sd card as described in previous article

immagine

OpenATV Enigma2 image compilation

In this article we describe how to generate an OpenATV image, based on the Enigma 2 framework

Openatv

 Atfer the compilation envinronment installation, described in this previous article

Debian envinroment setup

we can proceed as described below.

Execute the logon into Debian envinronment with the development user (sviluppo in our example). In the home directory create the enigma2 folder

 Install the following packages

Modify the shell as bash executing

and choosing the NO option.

Create under openatv an enigma2 folder

At this step let’s create a folder sources; this folder will contain all the sources for the various set-top boxes we would like to compile

Using the git command we clone locally the oe-alliance repository

After this task enter into build-envinronment folder and execute

Now we modifiy the source dowload folder editing the site.conf file and changing the parameter as described below from

to

We are ready now to proceed to the image compilation.

From the build-envinronment to generate, for example, the image for Airdigital Zgemma H2H set-top box execute

For the Xtrend ET10000 set-top box

At the end of the process we’ll find the image ready to be uploaded on the set-top box in the deploy folder for each machine type; in the case of the Zgemma H2H the folder is

immaginezgemma

The zip file contains for the Zgemma H2H the file to be unzipped on the usb pen and uploaded on the device.

WARNING: The image installation on the device is at your own risk. We accept no responsibility if the installation leads to  malfunction or block of the device.

Openelec compilation for Orange PI PC

In this article we describe how to proceed to compile the Openelec image for the Orange PI PC card.

From the Orange PI PC forum, in the Openelec section the developers describe the steps to compile the image

Openelec Orange PI PC FAQ

In previous blogs we described how to install debian and how to modify the script.bin file to adapt the hdmi output to our television

Debian installation

Output resolution change

The compilation takes a long time; it is advisable to use multicore processors to speed up the compilation process.

Create a folder, openelec, under orangepi folder and move into it

Install the following packages

With git download the github sources in the local  OPENELEC-OPIPC folder

After the above operation access to OPENELEC-OPIPC folder

Execute the following command

The process check prerequisities and installs additional packages

Insert the root password when required; after the prerequisites installation the compilation begins.

At the end of the compilation in the target folder we find the files to install or update Openelec

  1. The file having the .img.gz extension is to upack and tranfer to a micro sd card as described in previous posts.target
  2. The file with .tar extension is to be copied in the update folder on the Openelec system; this file updates the system when rebooting the Orange PI PC cardupdate