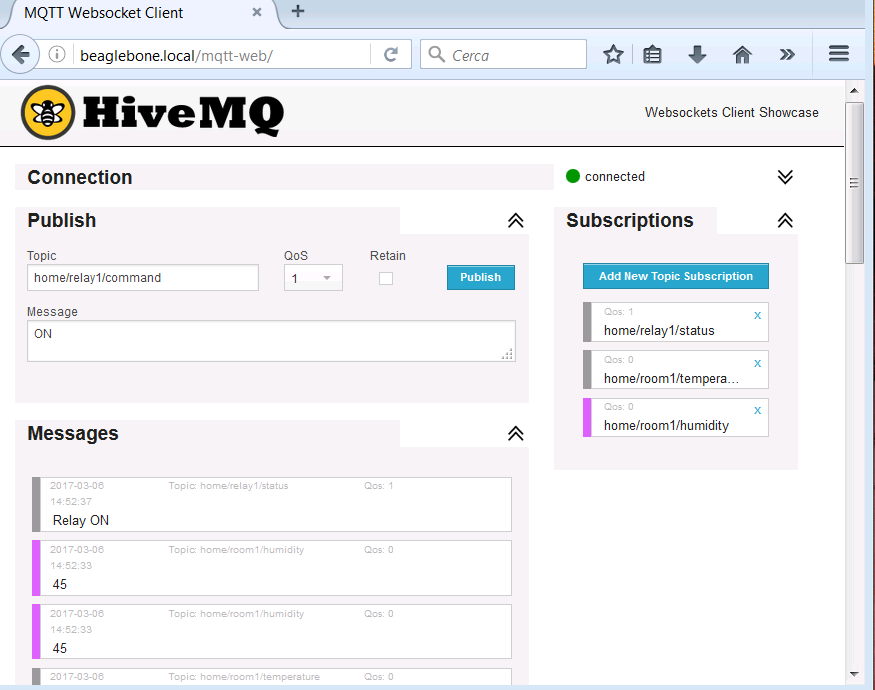
After the Mqtt web client installation
MQTT with Beaglebone and ESP8266 – WebServer and MQTT WebSocket
let’s install now the dashboard freeboard
Freeboard
In a ssh commad shell go into the /var/www/html folder on Beaglebone as root and clone the freeboard github respository; change the owner of the freeboard folder in www-data:www-data
|
|
#cd /var/www/html #git clone https://github.com/Freeboard/freeboard.git freeboard #chown www-data:www-data -R freeboard |
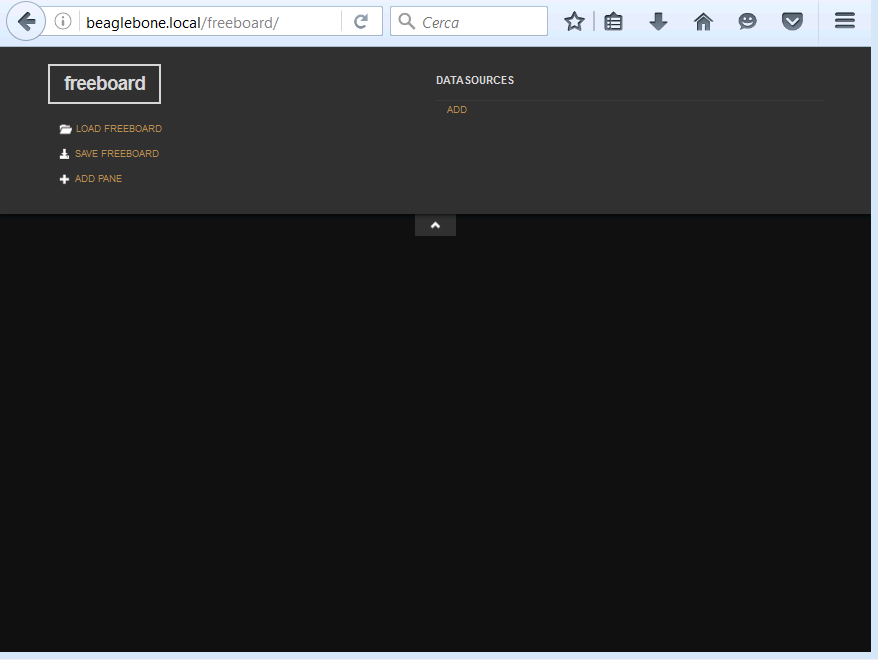
With a web browser go to the freeboard folder on Beaglebone webserver to access the dashboard
We have to add now Freeboard additional plugins. We add the following
Clone the https://github.com/alsm/freeboard-mqtt github
|
|
#cd #git clone https://github.com/alsm/freeboard-mqtt |
Download the mqtt paho javascript library
Paho mqtt javascript library
|
|
#cd #git clone https://github.com/eclipse/paho.mqtt.javascript.git |
Here is the direct link to the library
Last Version mqttws31.js
Create the mqtt folder under the Freeboard plugins folder and copy the mqttws31.js and paho.mqtt.plugin.js files
|
|
#cd /var/www/html/freeboard/plugins/mqtt # ls mqttws31.js paho.mqtt.plugin.js |
Edit the paho.mqtt.plugin.js file and insert the reference to the mqttws31.js library in the external_scripts section; in this case too we have to change the folder and contents owner
|
|
// # A Freeboard Plugin that uses the Eclipse Paho javascript client to read MQTT messages (function() { // ### Datasource Definition // // ------------------- freeboard.loadDatasourcePlugin({ "type_name" : "paho_mqtt", "display_name": "Paho MQTT", "description" : "Receive data from an MQTT server.", "external_scripts" : [ "plugins/mqtt/mqttws31.js" ], "settings" : [ |
Change the owner
|
|
#cd /var/www/html/freeboard/plugins #chown www-data:www-data -R mqtt |
Edit the /var/www/html/freeboard/index.html file and insert the reference to the paho.mqtt.plugin.js plugin in the heads.js section
|
|
<!DOCTYPE html> <html> <head> <meta charset="UTF-8"> <title>freeboard</title> <meta name="mobile-web-app-capable" content="yes"> <meta name="apple-mobile-web-app-capable" content="yes" /> <meta name="apple-mobile-web-app-status-bar-style" content="black" /> <meta name="viewport" content = "width = device-width, initial-scale = 1, user-scalable = no" /> <link href="css/freeboard.min.css" rel="stylesheet" /> <script src="js/freeboard.thirdparty.min.js"></script> <script type="text/javascript"> head.js("js/freeboard_plugins.min.js", "plugins/mqtt/paho.mqtt.plugin.js", // *** Load more plugins here *** function(){ |
- Add the dynamic-highcharts plugin
Clone in a folder the github
|
|
git clone https://github.com/onlinux/freeboard-dynamic-highcharts-plugin |
Copy the plugin_highcharts.js to the folder /var/www/html/plugins/thirdparty and change the owner
|
|
#cd /var/www/html/freeboard/plugins/thirdparty #chown www-data:www-data plugin_highcharts.js |
Edit again the file /var/www/html/freeboard/index.html and add the plugin as done above
1 2 3 4 5 6 7 8 9 10 11 12 13 14 15 16 17 |
<!DOCTYPE html> <html> <head> <meta charset="UTF-8"> <title>freeboard</title> <meta name="mobile-web-app-capable" content="yes"> <meta name="apple-mobile-web-app-capable" content="yes" /> <meta name="apple-mobile-web-app-status-bar-style" content="black" /> <meta name="viewport" content = "width = device-width, initial-scale = 1, user-scalable = no" /> <link href="css/freeboard.min.css" rel="stylesheet" /> <script src="js/freeboard.thirdparty.min.js"></script> <script type="text/javascript"> head.js("js/freeboard_plugins.min.js", "plugins/thirdparty/plugin_highcharts.js", "plugins/mqtt/paho.mqtt.plugin.js", // *** Load more plugins here *** function(){ |
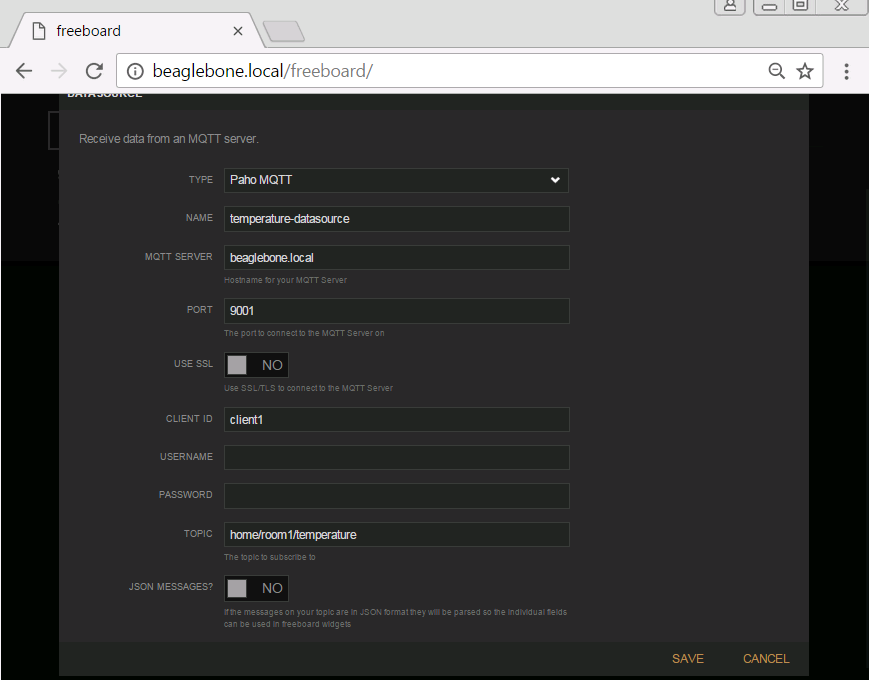
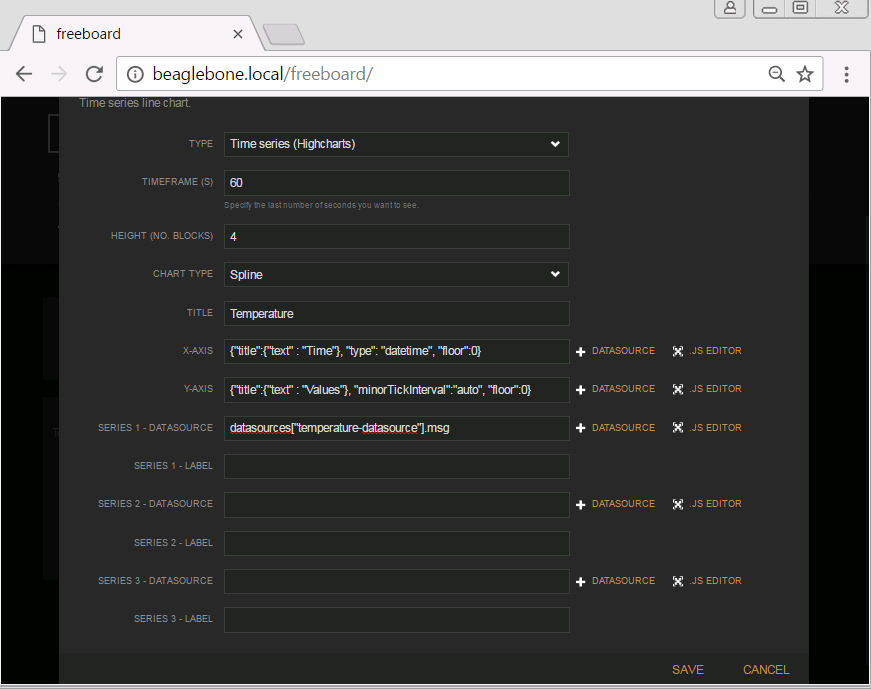
Access now the Freeboard dashboard and add the links to the temperature and humidity topics, the gauges and timeseries mesauring the values in real time and in a specific range of time . Here are some settings:

 Chrome/Chromium browser allows to save the settings in a json file. This settings can be loaded locally or loaded from the web server, saving for example the dashboard.json file in /var/www/html/freeboard, with the url
|
|
http://beaglebone.local/freeboard/index.html?load=dashboard.json |
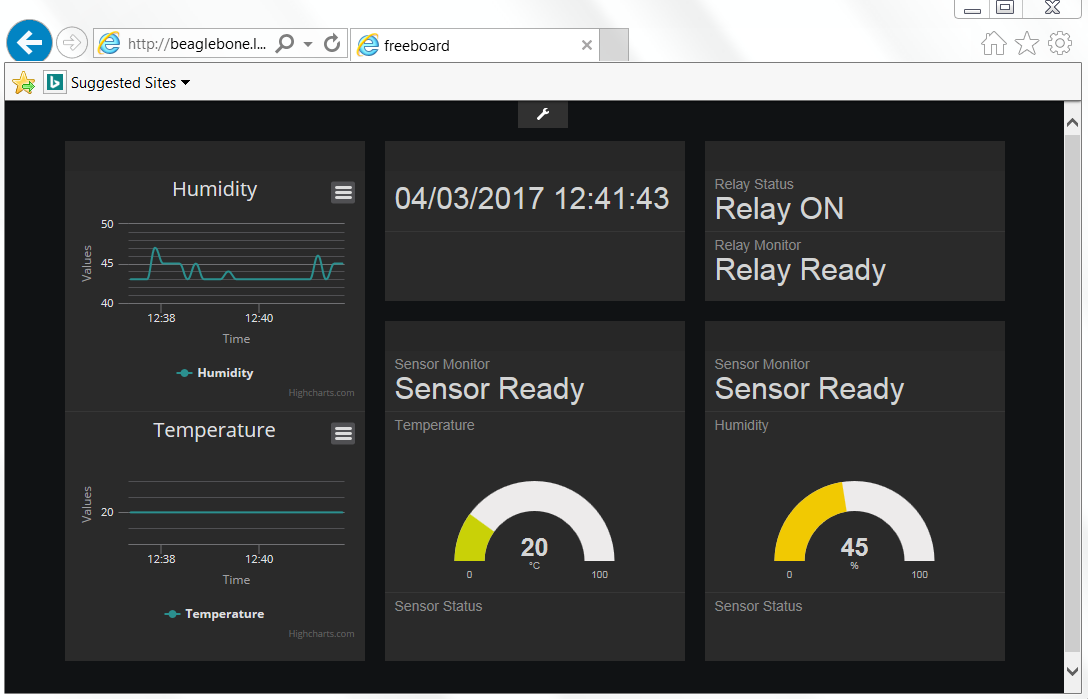
The image shows the Freeboad interface with various widgets showing the status and timeseries of the ESP8266 relay and sensors
In these series of articles we configured the envinronment to access the Beaglebone using the beaglebone.local/beaglebone alias
Debian sd card setup for Beaglebone Black
but you can use anyway the Beaglebone IP tho access the services provided by the board.
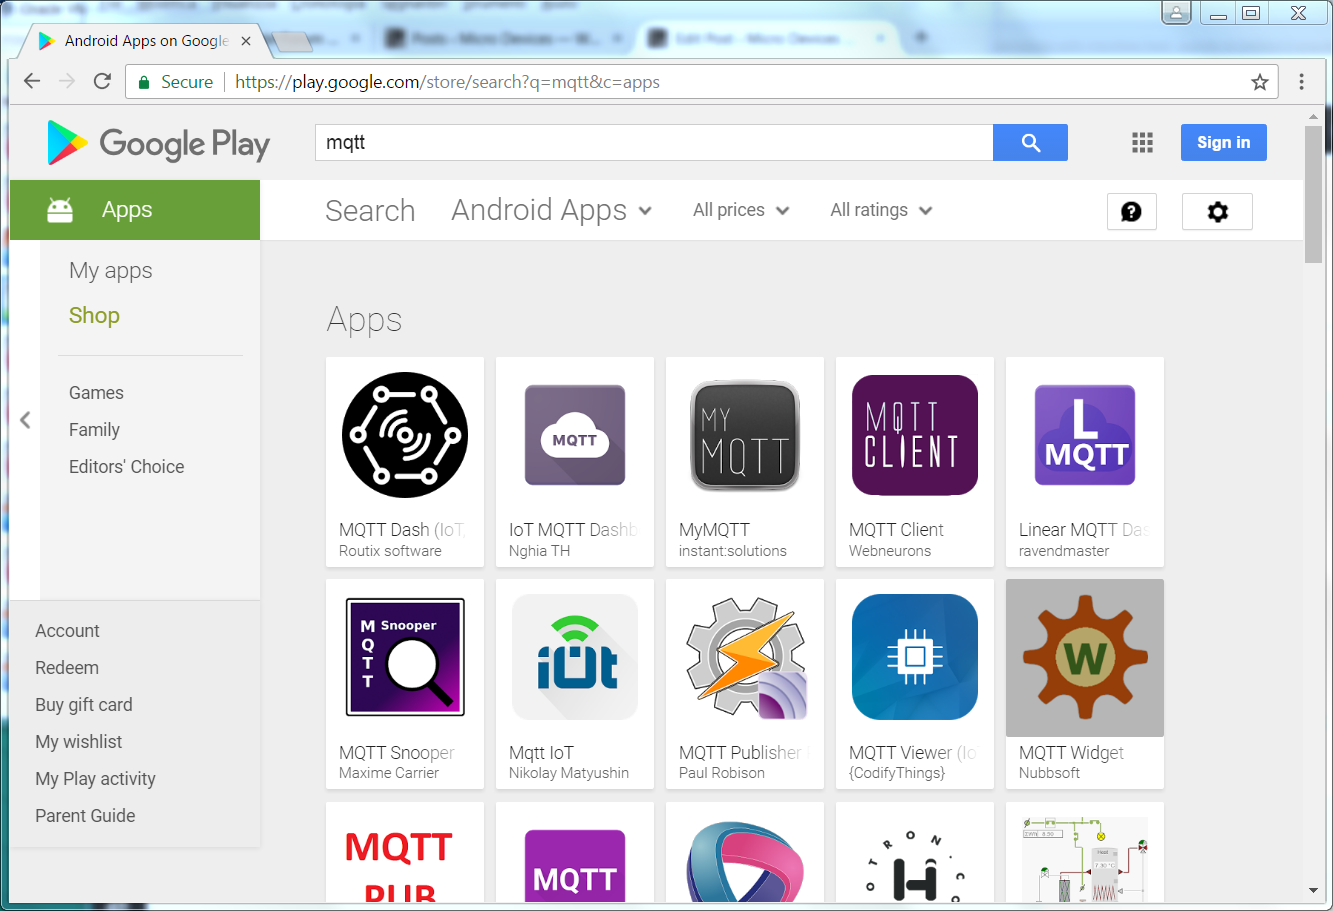
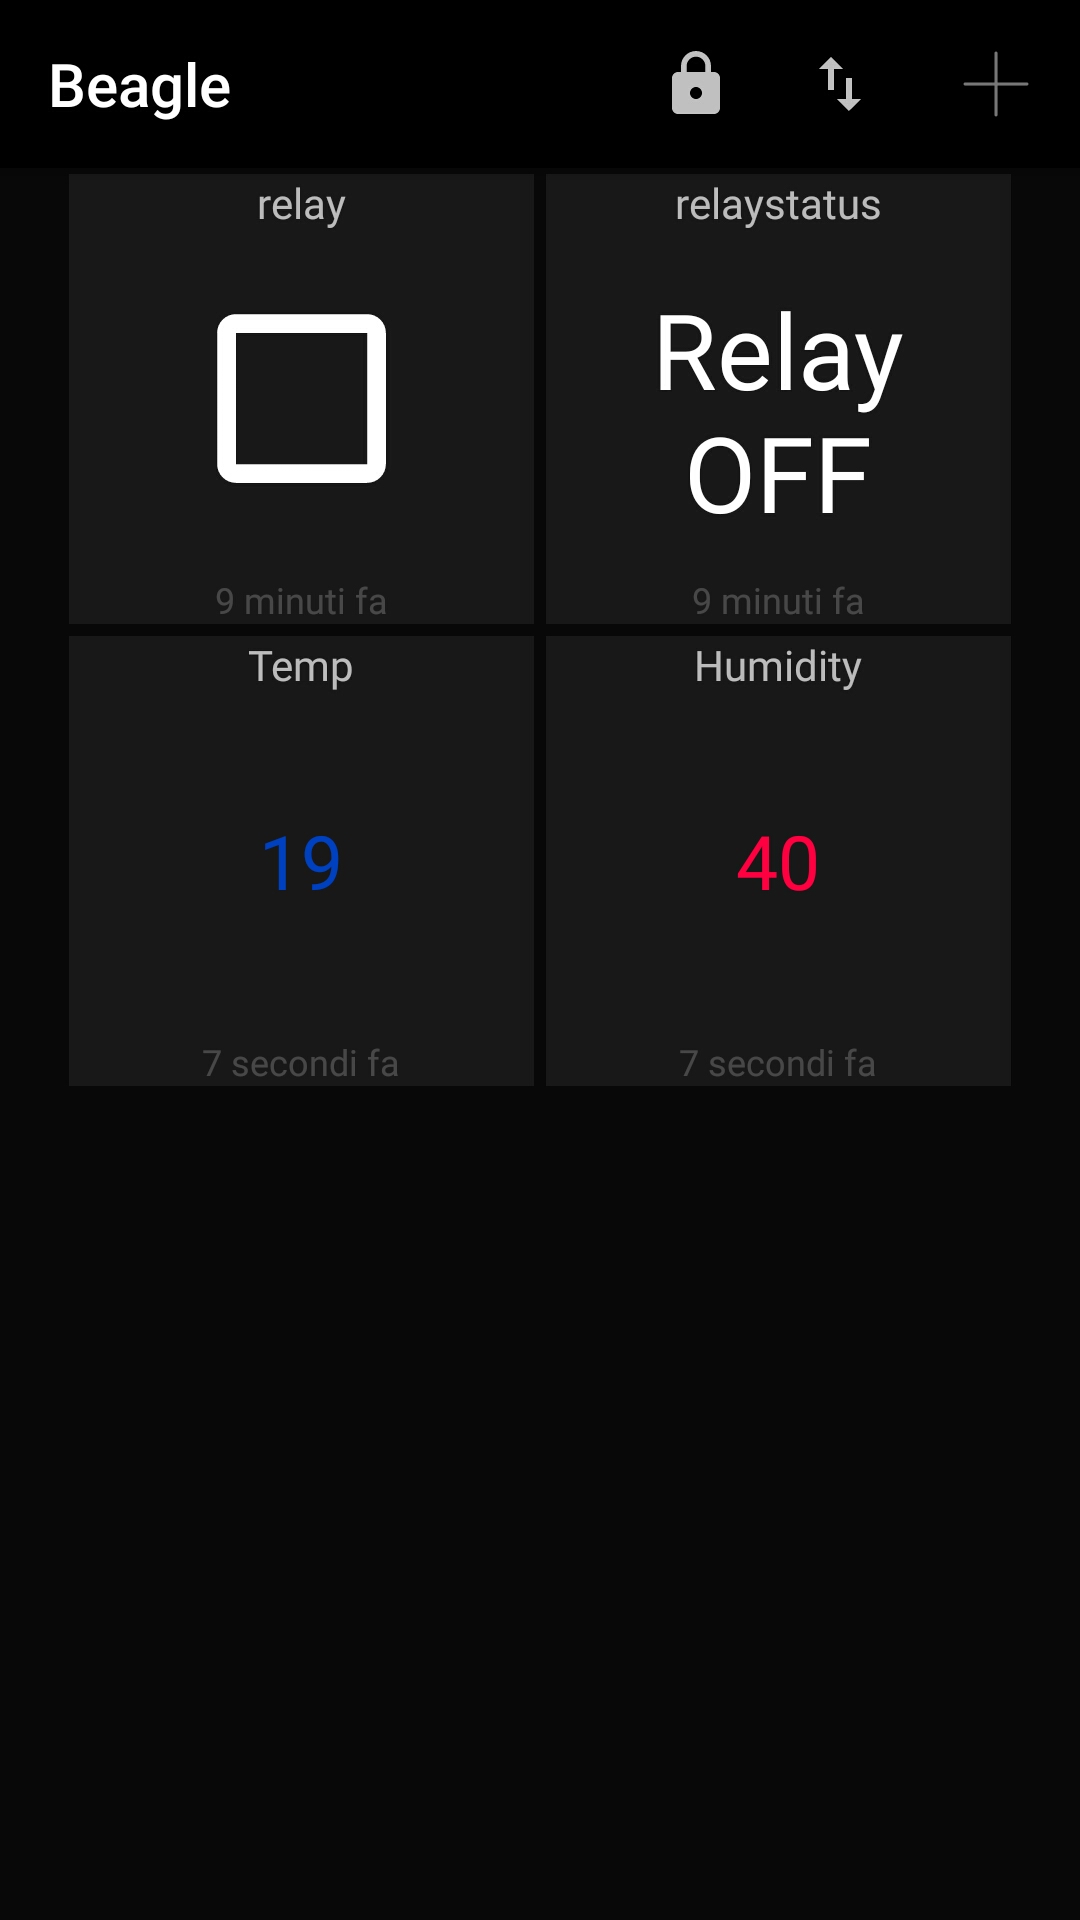
In the next article we’ll treat the Mqtt Android client
Mqtt with Beaglebone and ESP8266 – Android Client

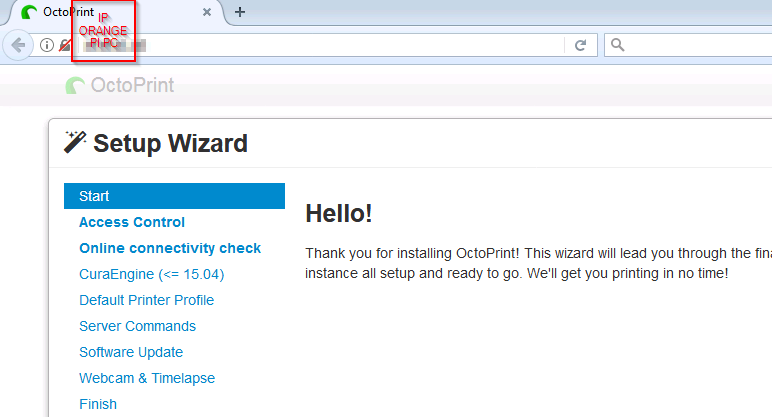 It is possible to map the Octoprint service on port 5000 only to the loopback interface by editing the file ~/.octoprint/config.yaml